Air Fryer Chicken Wings
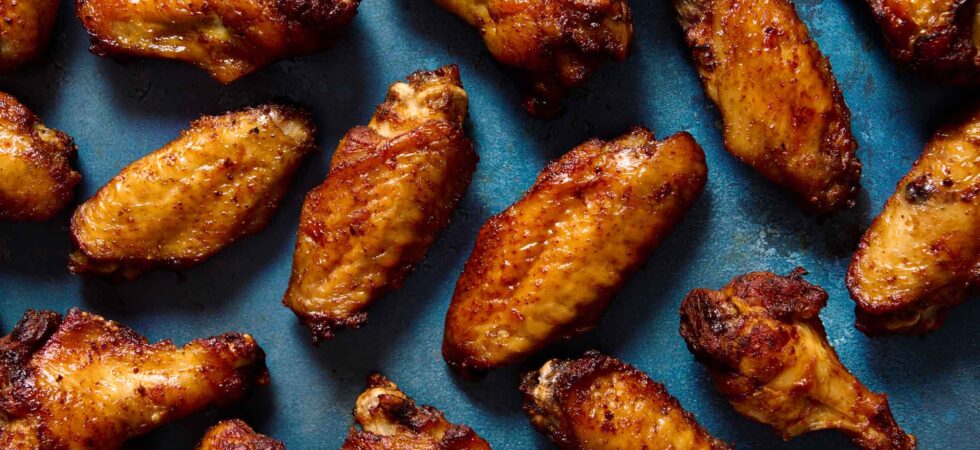
Welcome to my Ted Talk on Extra Crispy, Air Fryer Chicken Wings. I swear they stay juicer and get just as crispy as deep fryer wings. You just have to understand how to prepare them.
This chicken wing recipe is meant to be your new standard for dry (no sauce) wings. The seasoning is simple but flavorful, so you can add other spices or sauces without trouble. There are three distinct, but simple, steps. 1. Dry brine the chicken wings 2. Season the wings with a dry rub 3. Cook the wings in an air fryer. The FAQs have short cuts and substitutions, as well as other cooking alternatives, so take a look there if you want more recipe tips, tricks, and options. I even touch on some simple sauces!
So, get ready for tailgating, pool parties, and cookouts. These air fryer chicken wings are going to make the cut every time!
Get the Recipe: Air Fryer Chicken Wings
Ingredients
Dry-Brined Chicken Wings
- 2 lbs chicken wings, fresh or defrosted
- 2 teaspoons Diamond Crystal kosher salt
Dry Rub Seasoning
- 1 teaspoon Diamond Crystal kosher salt
- ½ tablespoon chili powder
- 1 teaspoon paprika
- 1 teaspoon ground cumin
- 1 teaspoon garlic powder
- ½ tablespoon onion powder
Equipment
- paper towels
- 1-2 large bowls
- 1 9×13 cooling rack
- kitchen scale optional
- 2 tongs
- 1 airfryer
Instructions
Dry-Brine Wings
- First, make sure the wings have fully defrosted before beginning the recipe. Then, pat down the defrosted chicken wings with paper towel and add them to a large bowl. Sprinkle in the kosher salt and give them a toss. Once coated, lay the chicken wings out (not touching) on top of a cooling rack inset into a baking tray. Place the tray in a refrigerator, for 6-12 hours.
Season Wings
- When ready to cook the wings, take them out of the refrigerator. If you see any residual moisture pat the wings dry again. Then, add the chicken wings into a medium bowl and set them aside. Next, mix the dry rub spices in a small bowl and pour them over the top of the wings. Mix everything, with your hands, until the wings are well coated by the rub. Now, it’s time to cook.
Air Fry Wings
- Using tongs, arrange the wings, in a single layer, inside your air fryer. You want to place them all meatiest and thickest skin-side down for the first half of the cooking process. Turn your air fryer to 390°F (199°C) and cook the wings for 6 minutes. With a clean set of tongs, flip the wings over and cook for another 7-8 minutes. Use a probe thermometer to make sure the wings have hit 165°F (74°C) internally. If they are fully cooked, use the second pair of tongs to remove the wings. Wait 5-10 minutes for them to cool down enough to eat and enjoy!
- If your air-fryer is too small to cook all the wings at once (mine is) use the first set of tongs to add in the second batch of wings, again skin side down. Cook for 5 minutes and then flip using the second pair of tongs. Cook for another 5-7 minutes. Again, make sure to check the internal temperature with a thermometer. Any subsequent rounds will be 10-12minutes until done, because the air fryer is already hot.
Notes
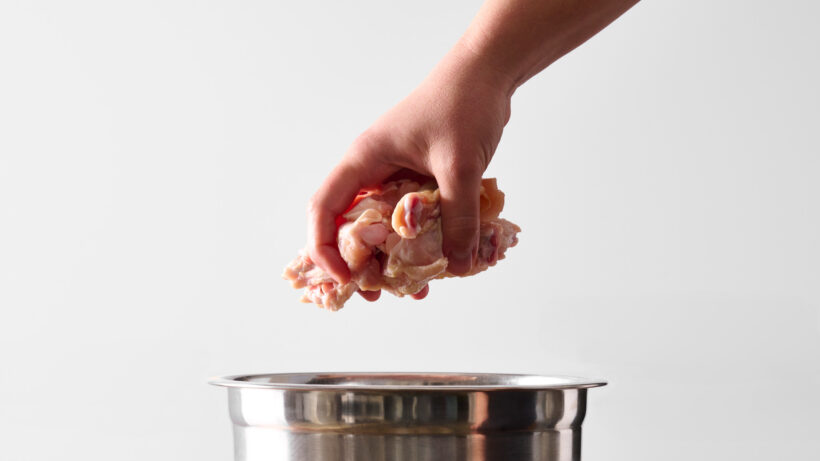
- It’s best to use fresh chicken wings. If they are frozen, defrost the wings before beginning the recipe by leaving them in the refrigerator overnight or soaking the packaged chicken wings in water until they are ready.
- Make sure not to overcrowd the wings or there won’t be enough circulation to get their skin crispy. Only use one layer with bits of space between them, for air to move.
- Using two sets of tongs ensures no cross-contamination between the cooked chicken wings and the raw chicken wings. You can use a fork or some other kitchen tool, if you only have one pair, but tongs are the easiest to use.
Nutrition
Fequently Asked Questions
At 390°F (199°C) air fryer chicken wings cook for a between 10-15 minutes.
From a cold start, place the wings meatiest and thickest skin-side down for the first half of the cooking process. Air fry for 6-7 minutes on the first side. Then, use tongs to flip the wings over and cook for another 7-8 minutes.
If you need to cook a second batch of wings, cook the first side of the wings for 5 minutes and then flip them using a clean set of tongs. Cook for another 5-7 minutes. Any subsequent rounds will be 10-12 minutes until done, because the air fryer is already hot.
Of Note: Use a probe/quick read thermometer to make sure the wings have hit 165°F (74°C) internally. If they are fully cooked, use the tongs to remove the wings. Wait 5-10 minutes for them to cool down enough to eat and enjoy!
Don’t have an air fryer? That’s okay too! Air fryers are really just mini convection (forced-fan) ovens. If you want to make these in your oven, on convection (fan), make the following adjustments to the above recipe:
1. Add 1tsp (3.7g) of baking powder per 1lb (454g) of wings to the dry brine.
2. Don’t cover the wings while they dry brine.
3. Dry brine the wings longer. Between 12-24 hours to really let them dry out.
4. Preheat your oven to 450°F (232°C) with convection (fan) turned on.
5. Bake on the same cooling rack-baking sheet setup that you brined with.
6. Bake the wings meat and skin-side down for 20 minutes and then flip to skin-side up for another 15-25 minutes. Use a thermometer to determine when the wings are done.
Dry-brining is salting proteins ahead of cooking to both flavor and tenderize them.
What’s the science? Essentially, the salt pulls moisture from the surface of your meat through diffusion. It then dissolves into a very concentrated wet brine using the food’s own moisture and diffuses back into the meat. This creates equilibrium on either side of the surface of the meat.
Okay, so that’s the flavor boost part. Here’s where the tenderizing comes in. As the salt solution gets pulled back into the meat, it will start to denature and breakdown proteins it comes in contact with. This ensures that the contracting filaments in proteins relax and that the cells absorb more moisture. This is what keeps them tender during cooking.
Sure. The brine is to help flavor the wing meat and keep the meat’s texture tender after cooking. But, it does not mean you can’t cook great wings just patting them dry and immediately seasoning and cooking them. If you do not dry-brine the wings you’ll need to add one more 1 tsp of Diamond Crystal kosher salt to the seasoning (about 2 tsp or 4.8g total).
Of Note: Dry–brining ensures that even if the wings are over cooked a bit, by accident they will remain tender. I’m not saying you can’t over cook them, just that you have a little more flex in the joints before you are eating sawdust.
Increasing the pH of the surface of the wings will promote more browning (the maillard reaction), which crisps up the skin quite a bit more.
To do this, add 1 teaspoon (3.7g) of aluminum-free, double acting baking powder per 1lb (454g) of meat to the dry rub. This techinique is best done if you plan to skip drying out the skin of the chicken wings or if you bake the wings in an oven.
Why?
In an oven, there isn’t as much intense and direct heat as there would be in an air fryer, even with convection (fan) on. Less concentrated heat equals less moisture evaporation. And, without taking the time to dry out the chicken wings (a minimum of 6 hours for an air fryer or 12 hours for an oven), the skin holds too much moisture to really dry out and stay crisp in the time the wings take to cook.
Of Note: Too much baking powder can leave a metallic taste behind or give the chicken skin a sandy texture. (The sandy texture will also happen if you dry the wings out AND add in the baking powder. Doubling up does not make everything extra crispy. It’s a “too much of a good thing” situation.) So, make sure to stick to the ratio. The trade-off between adding baking powder for more crispiness and ruining the flavor is not one I would opt to take. I also suggest purchasing an aluminum free baking powder, like Rumford double-acting baking powder.
I prefer baking powder over baking soda. Why? Well…
The added acidic ingredients in aluminum-free, double-acting baking powders help to better balance out any metallic taste you might get from the baking soda alone.
The monocalcium phosphate in aluminum-free baking powders also acts as a buffering agent and helps maintain a stable pH level. This helps prevent undesirable changes in color and texture as well.
Speaking of texture, double acting baking powder reacts and bubbles when introduced to heat, which creates a craggier, bubblier texture on the surface of the chicken wings’ skin. Baking soda, alone, only reacts when mixed with an acid. So, it can increase the skin’s browning but it won’t enhance the texture of the wing nearly as much.
You can, but I wouldn’t recommend it for the best results. Ice crystals melting while the wings cook makes a lot of water, and the steam created is going to stop the chicken skin from crisping. Not to mention, freezing expands any water in the cellular structure food. The quick change between frozen and cooked will release more water than defrosted to cooked. So, the texture isn’t going to be the same as fresh or even defrosted wings. Lastly, the seasoning rub isn’t going to stick well to the chicken, so you’ll need to partially cook the chicken wings, then add the dry-rub, and then cook the wings the rest of the way for the best results.
If you still really want to cook chicken wings from frozen, an air fryer at 390°F (199°C) wings should take between 15-23 minutes, depending on how hot the air fryer is when the wings are added. In a 450°F (232°C) oven with convection (forced fan) the chicken wings should take between 50-65 minutes.
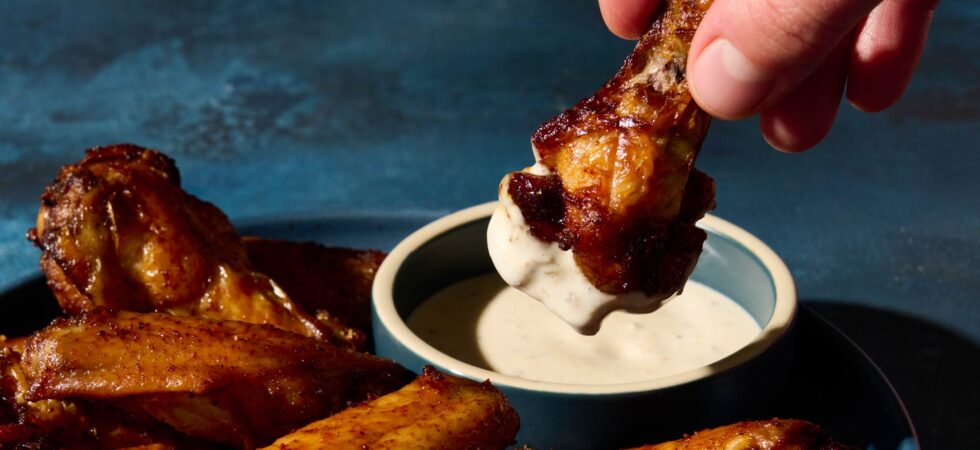
The easiest is going to be 2 tablespoons (28g) of butter and 4 tablespoons (60ml or 2oz) of your favorite hot sauce. Melt the butter in the microwave or on your stove stop and then whisk in the hot sauce. It will emulsify together and then you can toss the wings in the sauce.
I also really like to combine a sweet barbecue sauce with gojuchang and red miso paste for a super simple Korean-style barbecue sauce. I use roughly 4 tablespoons (60ml or 73.5g) BBQ sauce, 1 tablespoon (15ml by vol or 16.8g) gojuchang, and 1/2 tablespoon (7.5ml by volume or 8.4g) red miso paste.
Other sauces that are a little more involved, but just as delicious for dipping or tossing, include Green Goddess Dressing, Tzatiziki, or Tahini-Ginger dressing.
There may be affiliate links in this post. A Little Spoon, LLC is a participant in affiliate advertising programs designed to help content creators earn fees by linking to affiliated sites.
These were phenomenal! I added some lemon pepper to the mix as well, and these were my favorite wings I’ve had to date. Easy addition to the rotation!
Thank you so much for the comment! I’m glad you liked the recipe. 🙂