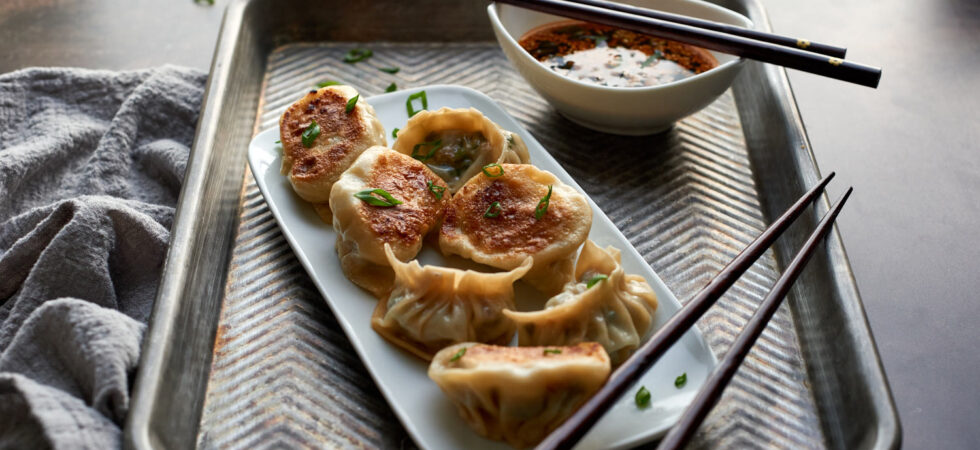
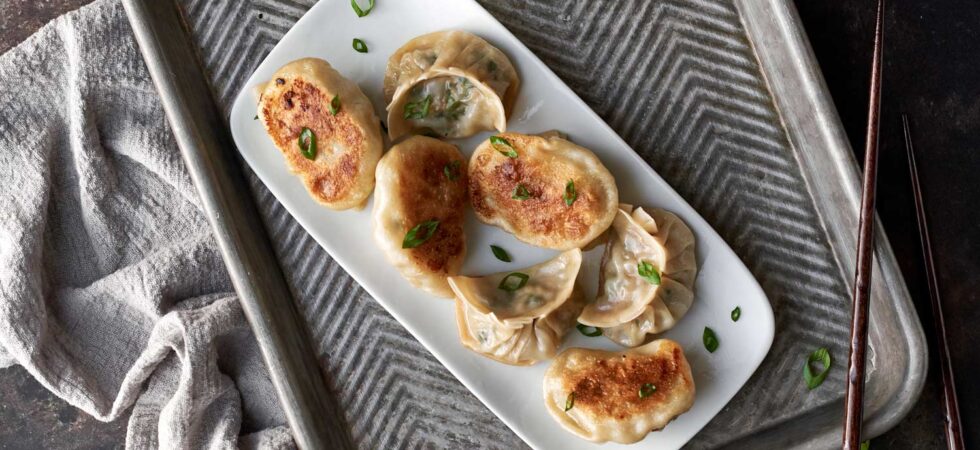
Pork Gyoza: Japanese Dumplings

When I first learn to make something, I do what I’m sure all of you do. I look up a recipe that seems promising and make it exactly as written. From there, we may differ. Moving forward, I tweak ingredients and technique as well as incorporate other recipes, research, experience, etc. The goal is to distill down to the core essence of a recipe and then coax out as much flavor as possible. The filling in these pork gyoza (Japanese dumplings) are one of the few exceptions to my ministrations.
In this case, I came across this RecipeTin Eats pork gyoza filling recipe several years ago and never changed a single ingredient. In my opinion, this pork filling is simple, flavorful, and well-balanced in all of the right ways. If you like it, I suggest checking out Nagi’s blog. The wrappers and dipping sauce were developed over more than several versions, because science.
I hope those of you who come to this blog for recipes know by now that, while I like to play around with flavor boosting ingredients I don’t like adding unnecessary elements to recipes. This blog is about recognizing good food and flavor no matter how simple or complex. Good is good.

Get the Recipe: Pork Gyoza
Ingredients
Filling
- 1½ cups napa cabbage, finely minced , (about 1/2 a head)
- 1 teaspoon kosher salt , (divided in half)
- 1 lb ground pork
- 1 cup garlic chives
- 1-2 cloves roasted garlic
- 1 teaspoon ginger, freshly grated
- 1 teaspoon sesame oil
- 1 tablespoon cornstarch, (plus extra for rolling)
- 2 teaspoons soy sauce
Wrappers
- 2 cups all purpose flour, (plus extra for rolling)
- ½ cup boiling water
- 1 teaspoon kosher salt
- ¼ cup room temperature water
Dipping Sauce
- ½ tablespoon sesame oil
- ¼ teaspoon red chili flakes or chili oil
- ½ tablespoon scallions, one stalk
- ½ teaspoon white sesame seeds
- ¼ cup soy sauce
- 1 tablespoon shaoxing wine
- 1 clove garlic, roasted or sliced
- ¼ teaspoon ginger, sliced
Equipment
- chef knife
- cutting board
- small pot
- mixing bowls
- plastic wrap
- colander or salad spinner
- meat grinder optional
- measuring Cups
- Measuring spoons
- microplane or fine grater
- pasta roller or rolling pin
- 3.5in (9cm) circle cookie or biscuit cutter
- small non-stick pan with lid
- chopsticks or tongs optional
Instructions
- If you decide to grind your own pork shoulder (butt) for the recipe you can do that up to 1 day in advance. First, cut and partially freeze the pork in 1-1 1/2in (2.5-3.8cm) slabs for about 1-2 hours. From there, cube the pork into 1/2in (1.3cm) squares. Place a bowl under your grinder and run the partially frozen cubes through it, using the finest grind plate you have. Cover the bowl when done and store it in the refrigerator until you are ready to mix the filling.
- If you want to make your wrappers from scratch, begin the dough about 1 hour before you make the gyoza. This recipe is for a hot-water dough. (see notes for other options and characteristics) Measure out the flour and salt and and add just the flour to a medium bowl or stand mixer bowl. Next, measure out 1/4 cup tap temperature water and set aside. Then, add water to a small pot. Bring that water to a boil on your stove top. As soon as the water boils, remove the pot and pour 1/2 cup of the water into a measuring cup. Add in the salt and use a small whisk or fork to dissolve the salt.
- Now, turn on the mixer or use that same fork (or chopstick) and slowly pour the salt water into the flour mixing as you go. Once all of the hot water is in, mix until the dough gets shaggy (about 30-60 seconds) and then stream in the separate cool water. You may not use all of it. You want the dough to be tacky and malleable, but none of it should stick to your fingers. Mix until a dough ball forms and all of the flour has incorporated (another 1-2 minutes in the mixer and 2-5 minutes by hand).
- Stop mixing and let the dough rest for 15 minutes. Then, mix again for 1-2 minutes until the dough is smooth and has just a little bit of spring back when you push your thumb into it. At this point, the dough is ready to rest in the refrigerator until it’s time to roll out your wrappers. Hot water doughs need less rest time, so you can begin the filling immediately.
- For the filling, slice the napa cabbage into 1/4in (.6cm) wide slices. If you get past the top of the cabbage before you hit the amount you need, start pulling off the leaves and stack them so you can cut around the center vein that connects to the core of the cabbage. Rinse the strips and run them through a salad spinner to make sure they are clean and relatively dry. Take the strips and chop them down further into finely-minced pieces.
- From there, put your cabbage into a bowl, colander with small holes, or large fine-mesh strainer and mix with 1/2 teaspoon (2.4g) kosher salt. Set aside in your sink to let the cabbage rest and drain for 15-20 minutes.
- While that is happening, take the bowl of ground pork out of the refrigerator and set it aside. Grate the ginger into a separate small bowl and add in the soy sauce, sesame oil, roasted garlic, cornstarch, and salt. Then, finely chop your garlic chives and dump them on top of the pork. Don’t mix yet. Almost there, I promise.
- Now, squeeze out as much moisture from the cabbage as you can. You can use a cheesecloth or your hands, depending on what you prefer/have on hand. You should have about 3/4 cup (95g) of cabbage after squeezing. Dump that into the pork bowl as well as the seasoning slurry.
- Now, you can mix by hand to make sure everything is well incorporated. (If you hate touching your food, you can use a spatula. It will just take a bit longer.) Cover the filling and set it in the fridge while you make the wrappers. (if you have store bought wrappers, skip this next step and start shaping your dumplings)
- For the wrappers, first, setup your work space. I prefer to use the pasta attachment for my stand mixer (see FAQs for rolling out wrappers by hand) to roll out the dough. Keep some flour and cornstarch on hand to dust both the dough and your surface when working. You will also need a kitchen scale, 3.5in (9cm) round cutter, #50 cookie scoop, and a silpat covered baking sheet.
- It’s important not to expose your wrapper dough to the air too much or it will dry out. To avoid this, cut off a 50-55g piece of dough (about 1/8th the total dough ball) to roll out one-at-a-time and leave the rest wrapped. Flatten the piece to about 1/2 in (1.3cm) and then send it through the pasta roller on setting #1. Each pass through, turn the dial one higher, until you have it to #6. Feel free to send the dough through more than once on a single setting to ensure even thickness. The dough should stretch to between 20-22.5in (50-57cm). From here, cut out 5 wrappers with your cutter and retrieve the filling from the refrigerator.
- Now, use a #50 cookie scoop to portion out 1tbsp (20-22g) of filling onto a wrapper. Shape the filling a bit, so it’s oblong and not a circle.
- Leave the dumpling resting on the table and fold the front and back sides up to meet in the middle. Pinch the very center and then pleat the left and right sides. To form a pleat, you will essentially use three fingers: an inside index finger that forms a pocket and pushes under to begin a pleat and an outside index finger to help pull the pleat over the first index finger and pinch. Once a fold is made, seal it by removing the inside index finger and pinching it to the other side of the wrapper using your outside index finger and thumb. Keeping the dumpling stationary ensures you only make pleats on one side to create the signature crescent shape.
- Place each gyoza onto the silpat for later. Once 5 are made, repeat the rolling, cutting, and shaping process until all the filling is gone. It is likely you will have leftover dough.
- At this point you can place the tray in your freezer. Once frozen, simply transfer the dumplings to a plastic bag and freeze for 2 months. you can cook them directly from frozen.
- If you want to cook the pork gyoza, either fresh or frozen, place a small (8-10in / 20-25cm) non-stick pan (that has an accompanying lid) on your stovetop and turn the burner to medium-high. Add in about a tablespoon of a neutral oil, like vegetable or canola. Once the oil heats up, add between 8-10 gyoza to the pan. It’s best to arrange them in a pinwheel shape to fit more. Let the gyoza bottoms cook until they are crispy and brown on the bottom. About 3-5 minutes depending on the heat.
- At this point, pour roughly 2-3 tablespoons of water into the pan and immediately cover it. Turn the heat down to medium-low and let the gyoza cook until they are 160°F or 71°C internally. This takes another 3-7 minutes depending on if they are fresh or frozen. Once they have steamed through, take the lid off and turn the heat up once more. Let the bottoms of the gyoza re-crisp and then turn them onto a plate when done to enjoy.
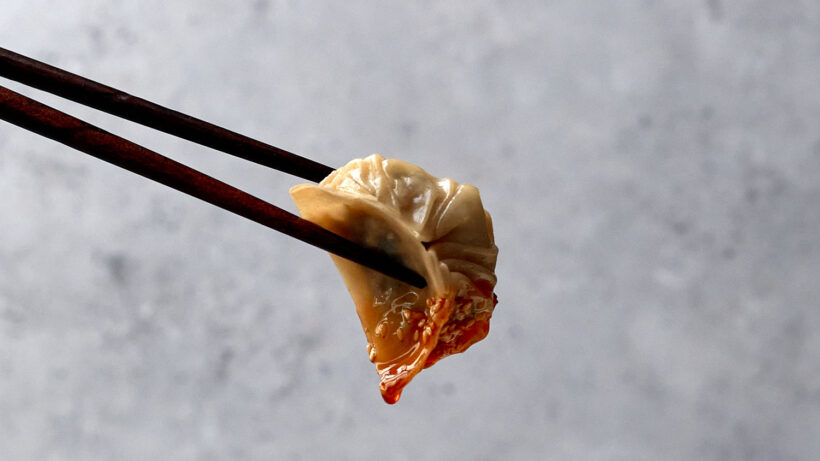
- If you’d like a dipping sauce for your dumplings here’s one to make at any point before or during the process. First, collect all of the ingredients. Chop up the scallions and add them to a small bowl. Follow the scallions with sliced garlic and ginger, sesame seeds, and chili flakes. Add the sesame oil to a pan and turn on the heat to medium-high. Let the oil heat until you just start to see wisps of smoke. Remove the pan from the heat and immediately pour the oil into the bowl of spices. They should bubble from the hot oil. At this point you can add the soy sauce and shaoxing wine.
Notes
- Use the edge of a spoon to peel back the skin on your ginger before grating it.
- The more uniform the filling is after mixing the more tender it will be after cooking.
- If you don’t have a scale, you are looking to have 8 roughly equal pieces to roll out the wrappers with the pasta roller.
- If you don’t have a pasta attachment or roller, this dough recipe makes between 32-40 wrappers depending on the size of each piece. If you can weigh out 13g pieces you will have about 32. If you use my preference of 10g, then you have 42.
Nutrition

Frequently Asked Questions
Not only is the liquid in the cabbage a bit salty, it can leak out or make your dumplings soupy after cooking if there is too much. You want your gyoza to be tender not soup.
Salting the cabbage pulls moisture from the surface of the slaw through diffusion. This also tenderizes the cabbage so it isn’t crunchy and unpleasant after cooking. If you decide not to use Napa cabbage, waxier/thicker types of cabbage will need a longer rest time after salting.
Absolutely you can. Most of the time I buy wrappers. They are a little thicker than fresh dumpling wrappers, but they are still great. And, the ease of just opening a package and shaping gyoza can’t be beat. Store bought wrappers are also a good way to practice before entering hard mode. Their thickness and stiffness lead to a much easier pleat.
This answer is my stroke of genius for the day. Playdough, full stop. Even if you don’t have kids and a ready supply on hand, a small jar is roughly $.50 or less. Although Playdough’s consistency is far firmer than a dumpling wrapper, it does get to the same thickness and it reacts in the same way that dough does when being rolled out. It also won’t stick to the table the way dough will.
Adding salt to the hot water and letting it dissolve, ensures that it flavors the whole dough and you won’t have just random crystals of salt here and there once it’s mixed.
YEP! I do have to say, that a thermometer is the only definitive way to tell that your dumplings have cooked through. An instant-read thermometer is a kitchen hero and a must have IMO. While you are waiting on your thermometer, here is a tip to help you. Use a toothpick to poke a small hole through the dumpling wrapper and into the filling. If the gyoza oozes at all when you remove it, it isn’t done cooking yet. If it comes out clean and nothing bubbles up, it’s cooked all the way.
Simple answer? Cornstarch. Long-ish answer? Mix about 1tsp of cornstarch into the gyoza steaming water before it goes into the pan. The cornstarch mixture will bubble and crisp during the second pan fry creating a nice skirt around the gyoza.
You are going to want to mush the garlic into a paste. To do that, either finely slice or mince your garlic and then use the back of your knife to smear the garlic against your cutting board until all you have left is a pile-o-paste.
Increase garlic to 3 cloves and use scallions (green onions). You will need about 4-5 large stalks (finely sliced, it should be about 1c or 35g worth) Scallions have a stronger flavor that sticks around much more when cooked, so you won’t need as much by volume. Don’t worry, the flavors are different, but scallions will still make a delicious gyoza.
I know this ingredient isn’t typical of a Japanese dipping sauce, as it is a Chinese cooking wine, but it has such a lovely flavor and it really compliments and livens up the sauce. To recreate something similar with Japanese ingredients and ingredients you should be able to find at your local supermarket, use 1 tablespoon (15ml) rice wine vinegar and 1/2 tablespoon (7.5ml) mirin.
Traditionally these dipping sauces are just soy, vinegar, and chili or sesame oil. Cooking the chili flakes in oil makes a chili oil, but you can skip this step if you want to use pre-made chili oil. The garlic, ginger, and sesame seeds can also be left out of the mix if you don’t want them. I recommend keeping the scallions, because they make the dip so yummy.
This dough recipe makes between 32-40 wrappers depending on the size of each piece, so break up the dough as evenly as you can, somewhere in that range. If you can weigh out 13g pieces you will have about 32. If you use my preference of 10g, then you have 42.
To roll out a wrapper, take a 10-13g piece of dough and roll it into a ball. Then give it press down with the palm of your hand to flatten and spread it a little bit. Gently pinch the top of the flattened disc and use a small roller to roll to the middle and then, with slightly more pressure, from the middle outward towards you. Don’t pick up the roller, its only job is to roll back and forth. Lift the dough and give it a quarter-turn (90 degrees) every roll forward and back. Continue rolling towards you with gentle pressure every quarter turn until the dough is rolled out into a thin, even circle roughly 3.5in (9cm).
Keep flour or cornstarch on hand to prevent sticking and use it as needed on both the roller and the wrapper. Wrappers don’t need to the perfect circles. Remember, you’ll get better with practice.


I very much appreciate the detailed, step-by-step instructions and observations. and the photography is great, of course. Can’t wait to make these, and next on my list, the pierogis (which my grandmother made all the time, and I miss terribly!).
Hi Melanie!
Thank you so much! Pierogi have always been a huge part of my family holidays. I’m glad I can help bring back some good memories for you.