Homemade Potato Gnocchi
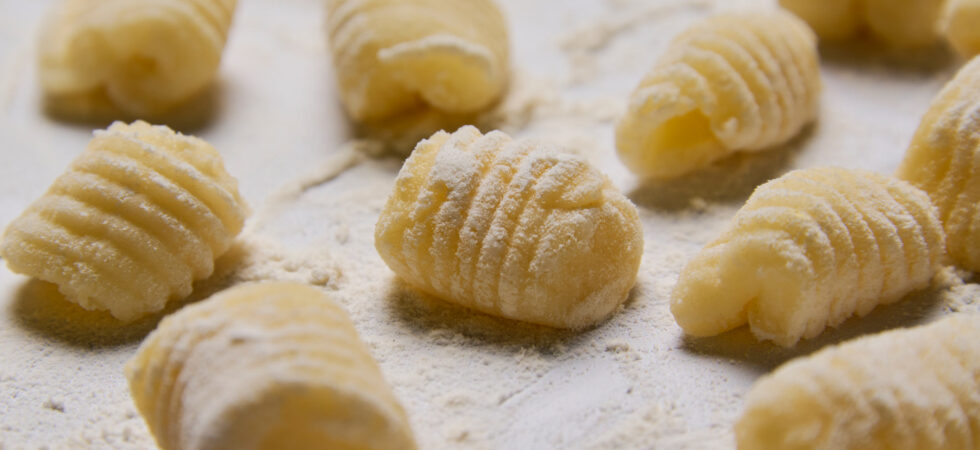
Homemade potato gnocchi can be tricky to make consistently, but with a kitchen scale, some handy tips, and practice, you too can enjoy these pillows of pasta perfection. Like a lot of pastas, making gnocchi is very much about knowing how the potatoes and then the dough are supposed to feel, which is difficult to do the first half a dozen times you make it. The best way to bridge the gap from beginner to seasoned gnocchi maker is to read as much as you can about the gnocchi process and ingredients, so you know what your objectives are. If you’ve been holding out, read through this post and give them a try. Now is the time! Carpe Diem!
Get the Recipe: Homemade Potato Gnocchi
Ingredients
Boiling Ingredients
- 1 tablespoon Diamond Crystal Kosher Salt, (Halved for 2 uses)
- 16 cups water , (Halved for 2 uses)
Gnocchi Ingredients
- 1 lb russet potatoes, (3 large – 4 medium potatoes)
- 2 egg yolks
- 1 tsp Diamond Crystal kosher salt
- 1/2 cup "00" flour + plus extra for shaping, (see FAQs for substitutions)
Equipment
- 1 kitchen scale
- 1 peeler
- 1 chef knife
- 1 cutting board
- 1 large pot
- 1 colander
- tongs
- 1 bench scraper (optional, but highly recommended)
- 1 fork or gnocchi board (optional)
- 1 spider or slotted spoon
Instructions
Homemade Potato Gnocchi
- Begin by filling a medium pot with 8 cups (1.9L) of water and ½ tablespoon of kosher salt. Next, peel, rinse, and halve (smaller) or quarter (larger) the potatoes into roughly the same-sized large pieces. (See FAQs for other potato cooking methods) Add them to the pot and bring the pot to a boil on your stovetop. It’s okay to allow some bubbles while boiling but keep them gentle. You don’t want the potatoes moving around too much in the water. Boil on medium for between 30-45 minutes (until fork tender).
- While the potatoes are boiling, separate the egg yolks from the whites into a small bowl and set the yolks aside. Also, measure out your 00 flour for the dough. Have it plus extra for dusting ready.
- Once a fork slides into the center of the largest piece(s) of potato without resistance, drain the pot over a colander. (See FAQ for a more detailed description of doneness) Use tongs to immediately add the pieces of potatoes to a potato ricer and push them through and back into the empty pot. When you’ve riced all of the potatoes, dump them onto a clean counter or work surface.
- At this point, add salt to the egg yolks and whisk or stir the yolks until they aerate a bit. Then, pour the egg mixture over the riced potatoes along with half of the flour. Use the bench scraper to begin incorporating the yolks and flour into the potato.
- To do this, use a chopping motion to work the ingredients together from left to right. Once you’ve chopped through, scrape under a section of potatoes, pick it up and place it on top of another section and begin chopping again. When the first round of flour has fully absorbed into the dough, sprinkle on the second. This should take 5 minutes or less. The dough will be slightly sticky, even when everything is fully incorporated. Use the extra flour on your hands and the work surface as you mix and shape the final dough, so it doesn’t stick to the counter. You are looking for a smooth, uniform dough.
- Once all of the ingredients are mixed well. It’s time to start shaping. Roll the gnocchi dough into a log shape and cut it into 100g pieces. (About 5 equal pieces of dough). Make sure to cover dough that isn’t being worked with, with cling wrap or a kitchen towel. And make sure to heavily flour any surface that dough is sitting on for an extended period of time.
- Take the cut pieces of dough and gently roll them back and forth with the top pads of your palms. As you roll, move your hands from the center of the log outward to stretch it longer. Stop once each roll is roughly 1/2in (1.3 cm) in diameter and 16 in (40.6 cm) long.
- Use a knife or your bench scraper to cut 1/2in x 1/2in (1.3 cm x 1.3 cm) dough squares from the strip. You should have about 25 gnocchi from each strip once you’re done.
- At this point, re-fill the potato pot or fill a new pot with another 8 cups (1.9L) of water and ½ tablespoon of kosher salt and bring the water to a very gentle boil. At the same time, make sure whatever sauce you intend to eat the gnocchi with is heating or ready.
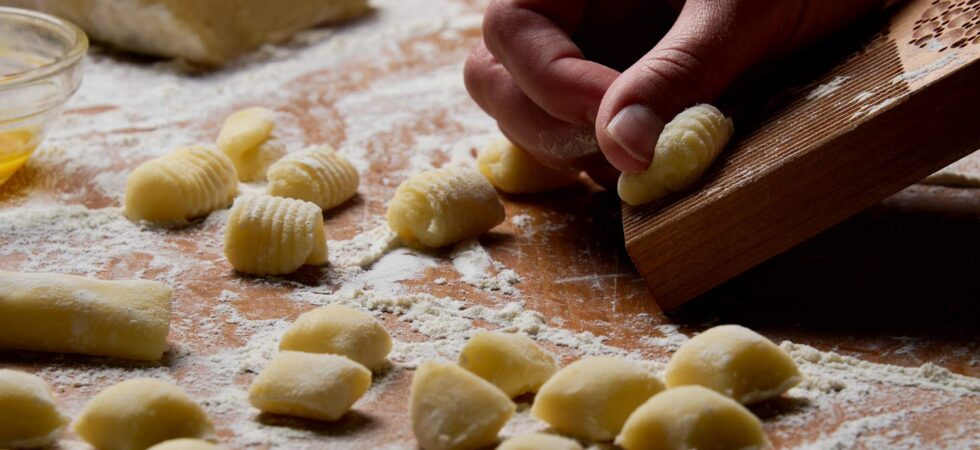
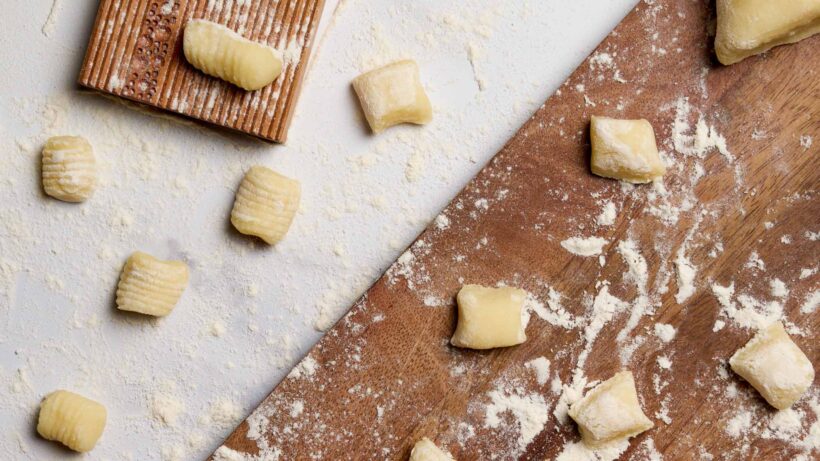
- From there, you need to decide if you want texture in your gnocchi. If you do, use the back of a fork or a gnocchi board. First, flour your instruments and hold them at about a 45-degree angle. Then, take a single gnocco and push your thumb into it just under the top while rolling downward. It will curl slightly around your thumb. Release once you reach about 2/3rds down the gnocco and it will roll off the rest of the way. For no-texture gnocchi, simply push a dimple into the center of it with your finger. (see notes)
- Let the gnocchi sit for 20-30 minutes before cooking. This lets them develop a bit of a skin on the outside before boiling. If you opted not to add texture, they will be ready fairly quickly.
- To cook the gnocchi, use a spider or slotted spoon to add them to the pot. The gnocchi will sink to the bottom and then start floating as they cook through. Give them 1-2 extra minutes once they float to ensure they are done. Use the same spider/spoon to take them out. Cook the gnocchi in 3-5 batches, depending on the size of your pot, until all of the gnocchi are done. They can be kept to the side, on a plate, until you are ready to add all of them to a sauce. (See notes for stipulation.) Add the gnocchi to their sauce and cook for another 3-5 minutes just to reheat them.
Notes
- Ricing should be done when the potatoes are hot, and dough mixing should be done when the potatoes are warm.
- It’s important to be gentle and not compress or knead the dough when mixing the gnocchi dough ingredients. Over mixing breaks down starch molecules in the potatoes (gummy texture) and develops gluten in the flour (chewy texture). Treat the dough the same way you would pie crust or scones.
- You can use your fingers to roll the gnocchi strings, but sometimes you can unintentionally indent the dough and cause them to not be uniform. For this reason, I suggest your palms until you get the hang of things.
- The dimple is important to shaping gnocchi, because it helps them cook through quicker and hold the sauce better than unshaped gnocchi. Using the “rigagnocchi” or gnocchi board on top of dimpling simply adds extra texture for more sauce!
- I wouldn’t recommend letting the cooked gnocchi sit longer than 15 minutes before being added to a sauce or covered and placed in a refrigerator. They can still dry out and get chewy. That’s why it’s important to get all of the gnocchi ready to cook at about the same time and why it’s nice that the cooking time is so short.
- For a slightly thicker sauce, save some pasta water and add it while simmering the gnocchi. The starches in the sauce with thicken it as it reduces.
- Gnocchi will keep for 2 days in the refrigerator. However, it’s best to cook only what you need and freeze uncooked gnocchi instead of making too much and storing it in the fridge. Pasta texture is always better freshly cooked instead of reheated.
Nutrition
Frequently Asked Questions
Yes! If you do not want to cook all of the gnocchi at once, put any extra gnocchi on a silicone baking sheet or parchment lined baking sheet. Make sure they aren’t touching. Cover the baking sheet with cling film and freeze the gnocchi in the freezer for at least 4 hours. Once frozen, scoop them into a bag and label it with the date.
You can boil the gnocchi as you need them for about 1 month after freezing them for the best texture. Follow the same indicators as you would boiling fresh gnocchi. They will sink and then float, etc.
I use 00 Flour specifically with any baked goods or pastas that I want to be tender for 3 reasons:
1. Soft Wheat: 00 flour is usually milled from soft (durum) wheat. Durum wheat has great structure but less elasticity than their red wheat counterparts (all-purpose and bread flours). Simply put, doughs with 00 flour in them are less chewy, making them ideal for the softer and lighter textured foods.
3. Protein Content: The protein content in most 00 flours is between 10-11%. Essentially, this is low enough to keep the pasta tender and high enough to also give the pasta structure.
2. Grain Size: 00 refers to how finely ground the flour is which ranges from 00 to 2. 00 flour is the finest level of flour. Finer milling means better gelatinization between the water and starches in the flour. Which means quick absorption and less overmixing.
Of Note: I used both King Arthur 00 Pizza Flour (10.5% protein) and Anna Napoletana Tipo 00 Extra Fine Flour (9-11%) during testing. Both worked beautifully.
Yes, and you can substitute all-purpose (AP) flour in a 1:1 ratio for 00 flour. However, some AP flours are better than others because of the wheat they use and their protein content.
Most all-purpose flours are milled from hard wheat, and they are typically higher in protein, so it will produce chewier gnocchi. King Arthur brand AP flour sits at 11.7%, while Gold Medal flour uses a mix of hard and soft wheats with a protein percentage of 10.7%. The only AP Flour that I know of that uses only soft wheat is White Lily, which has a protein content of 9%. This means less gluten formation, which is ideal in gnocchi.
If you were going to use AP flour instead of 00 flour for homemade potato gnocchi, I’d say try your hand at it with White Lily or Gold Medal brands.
The most traditional and lightest textured recipes for gnocchi use only potatoes and flour. The trouble with only these ingredients is, if they are not in near-perfect proportion, they fall apart really easily. Everything seems fine and then the gnocchi disintegrate when you boil them. That’s also where resting the shaped gnocchi is especially important.
IN PRACTICE: For the proper ratio of flour to potato, weigh the total prepared potato. Then, find the amount of flour you need by calculating 30% of that total. That 30% is the maximum amount of flour you should use in your dough. Add flour in thirds. Add the first 2 while mixing and the last third while shaping. So, say you have 100g of riced potatoes, you will need a maximum of 30g of flour to bind your dough together.
To make things easier and help bind the ingredients better, eggs can be added to the dough. The binding properties of egg means you can use less flour and a more forgiving dough. It does also mean you lose some of that lighter texture. But, not to worry, the trade-off is richer textured gnocchi. Not the same, but not a bad outcome.
IN PRACTICE: When it comes to how much egg to add. Some recipes call for 1 egg per 1lb (450g) of potatoes. I prefer to use 2 egg yolks per 1lb (450g). Albumen (egg white) is 90% water and only 10% protein, so it’s really not giving much to the recipes. And, in fact, is adding extra unnecessary water. Yolks, on the other hand, are about 50% water and 30% protein, and contains all of the egg’s fat (the remaining 20% of the yolk). This same fat makes the dough richer and softer than doughs that contain egg white.
There are two types of potato that are typically used in potato gnocchi. Yukon Gold and Russet. I prefer to use russet and made this recipe based on that variety. But let me give you more information on each, so you can decide which are best for you.
Russet: This potato is low in moisture and high in starch. They produce a lighter, fluffier mash and are great at absorbing whatever wet ingredients you add to them. They also have a stronger potato flavor than Yukon golds. The downside? You have to be careful when mashing them because their high starch content can cause then to go gummy quickly.
Yukon Gold: Yukon golds, which have a lovely buttery flavor, are your second option. This potato has generally less starch and more moisture than russets, so they are more forgiving (texture-wise) when mashing and mixing in ingredients. Their slightly waxy texture also helps them absorb less water when boiling.
For me, the russet’s lighter and fluffier texture is more appealing. But, if you want richer gnocchi, switch out the russets for Yukon gold.
So, I tried several different ways of cooking potatoes for gnocchi before deciding on peeling, cutting, and boiling them. Here are my notes on each option.
1. Bake the potatoes: They require less equipment than my choice of cooking, and the potatoes end up drier because they weren’t cooked in water (obvious, I know. lol) Less moisture, means less flour, which means lighter gnocchi.
But they also had some negatives. You lose more potato flesh baking than with any other method I tested. Even if you cut them in half and scooped out the potato with a spoon, it’s a bigger waste than using a peeler at the beginning. If you actually try to peel them right out of the oven, so they are hot when you rice them, you need protective gear or a towel to do it. And it’s messy. Lastly, in the same way that you can over boil potatoes you can also over bake potatoes. They end up with hard, dried out pieces that don’t soften or breakdown enough even after going through the ricer and the process of mixing ingredients.
2. Boil the potatoes whole, with skin on: This was supposed to be less watery than potatoes with the skin peeled off, but I see no evidence of that. Even starting with tap temperature water, which is supposed to help the skin keep from expanding and letting in water. These were basically the same texture as the next two options, with the mess of peeling hot potato. Some recipes call for an ice bath, to shock the potato skin and make them easier to peel and to cool the potatoes off enough to handle. The ice bath was not great for texture.
3. Peel & boil the potatoes whole: This was definitely a less messy option. And the texture was fairly good, but I found the baked potato and the peeled and cut up methods to have the best texture. I think the reason this didn’t work as well, is because the center of the potatoes just wasn’t cooking enough before the outsides were over cooked. So, this version needs potatoes with very similar diameters at the ends and the centers.
4. Peel, cut, & boil the potatoes: Considering ease, cleanliness, and texture, this is where I landed for my favorite method. Peeling the potatoes before cooking them means, not peeling when they are hot. Cutting the potatoes, means you can have more uniform cooking. And, although boiling (especially without skin) means more moisture, that’s something that not overcooking or letting the potato dry out a bit after ricing can’t fix. It’s also easier to visually see the potatoes are done without the skin on them. This just felt like a bunch of wins that let me have more consistent outcomes. So, I chose this method for the recipe. 🙂
Visually: Russets will just start to develop a starchy, sandy appearance on their outsides as they cook. But they will not have any outside layers breaking off during testing for doneness. If the outside of the potatoes has pieces separating while straining or testing, the potatoes are likely a bit over-cooked and water-logged. Don’t panic. We can overcome a bit of overcooking. (see next FAQ) It’s not over, until it’s over!
Physically: Russets are done when you can slide a fork into the largest pieces, and it doesn’t meet any resistance. Resistance will feel like you are scraping your fork against plastic. Your fork might stutter a bit as it goes into the potato or hit a hard patch. You should not have to alter the pressure of your fork against the potato to get further into the potato piece. It doesn’t matter if you are at the surface or center, it should all feel the same. This does not mean the potatoes are falling fully apart.
Always confirm doneness by checking 2-3 potatoes, a smaller and larger piece. Immediately drain the potatoes if they are all done.
If you over cook your potatoes two things have happened, internally and externally.
1. Internally: Starch granules in the potatoes swell excessively or even burst, allowing water to permeate the potato. This causes a waterlogged or mealy texture.
2. Externally: A lot of the starches, nutrients, and flavor from the potatoes will permeate the water. This loss can’t be added back into the potato. And the resulting mashed potatoes will be less flavorful and creamy.
TIP: Unfortunately, there’s nothing that can really be done about the flavor or nutrients. However, moving the riced potatoes to your stove top and turning it on low can help dry out the potatoes and combat the additional moisture. Keep them on the stove for 5-7 minutes and use a fork to gently fluff the potatoes 2-3 times, releasing trapped moisture from inside the mound of potato pulp. The gnocchi won’t be as silky as they could be, but you can still make good gnocchi if you get enough water out.
The best way to get the smoothest texture is to use a potato ricer. It breaks apart the pieces of potato while aerating them at the same time.
Other tools, like your trusty hand beater/mixer or potato masher do both of these, yes. But they do both poorly. I have never, in all of my years of mashing potatoes, had a fully smooth mash after using either of these tools. Close, yes! But not all of the way. Additionally, the constant agitation created during mixing first aerates and then compresses the potatoes. And that compression costs you the best gnocchi texture.
The ricer breaks the potato up super quick and then you can literally fold the rest of the ingredients in with minimal agitation. Exactly what you want for gnocchi. Trust me, it’s worth it.

