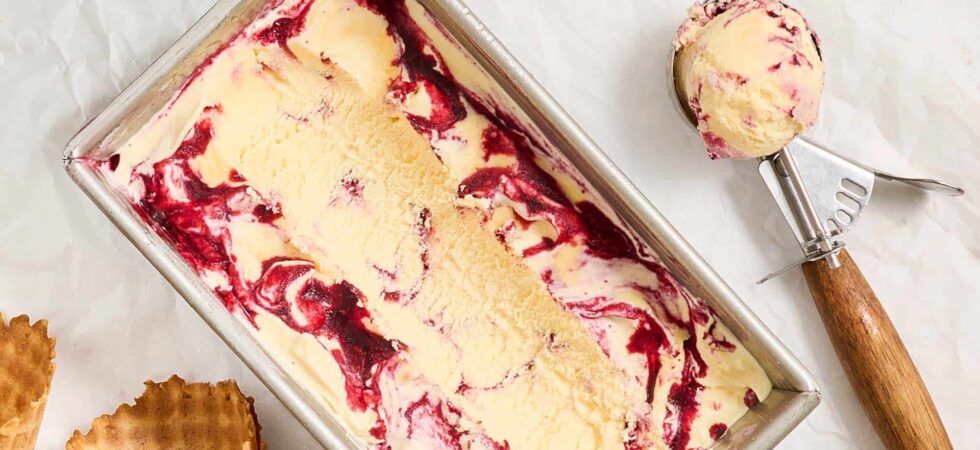
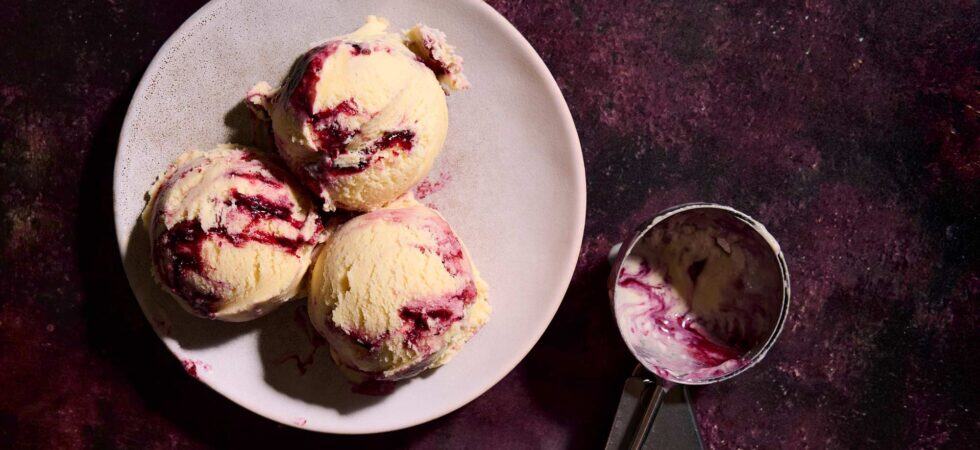
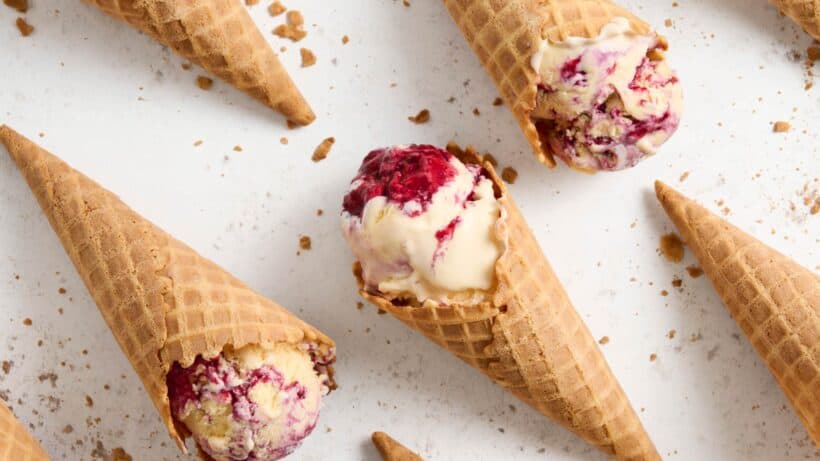
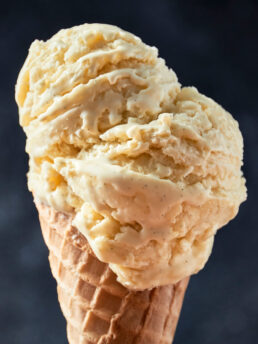
Sweet Corn Ice Cream with Blackberry Swirl
This Sweet Corn Ice Cream with Blackberry Swirl was inspired by America’s Test Kitchen’s use of leftover corn cobs to infuse a stock for soup. I watched a video on it and thought to myself, “Crème anglaise is like a cold, sweet soup, right? Why can’t I infuse that?” Don’t judge me. Ideas come from weird places okay?!
Anyway, what better to pair with sweet corn than another end-of-summer, seasonal ingredient: blackberries! Honestly, this worked out so much better than I was expecting. Blackberries are more tart than raspberies or blueberries and really give such a lovely, bright contrast to the sweet earthiness of the sweet corn. It was the perfect berry for the job, IMO. There is quite a bit of chill time built into the recipe, for infusing and developing flavor, but I promise you will not be disappointed. This ice cream is the perfect way to celebrate and commemorate the end of summer.
Get the Recipe: Sweet Corn Ice Cream with Blackberry Swirl
Ingredients
Sweet Corn Ice Cream Base
- 2 ears sweet corn, (about 450-550g)
- ½ cup sweet corn kernels
- 1 cup whole milk
- ¾ cup refined, granulated sugar
- 2 cups heavy whipping cream , (divided in half)
- 1¼ teaspoons Diamond Crystal kosher salt
- 6 egg yolks, (about 90-95g)
Blackberry Syrup
- 12 oz blackberries
- ¼ cup refined, granulated sugar
- 1 teaspoon lemon juice, fresh squeezed
- ¼ teaspoon Diamond Crystal kosher salt
Equipment
- 1 kitchen scale optional
- 1 chef, slicer, or paring knife
- 1 cutting board
- 1-2 medium bowls
- 1-2 small sauce pot(s)
- 1 high-powered blender
- 1 Fine Mesh Strainer
- 1 whisk, immersion blender, or hand mixer
- 1 spatula
- 1 instant read thermometer
- 1 small bowl
- 1 ice cream maker
- 1 quart-sized container (.95L) or loaf pan
- 1 chopstick or offset spatula
Instructions
Sweet Corn Ice Cream Base
- First, run a knife around the center of the cob and break the scored corn in half with your hands. Then, place the broken side down on a rimmed plate or wide bowl and cut the kernels off with a knife in strips, top to bottom. Once all the kernels are cut off, set aside ½ cup (75g) of the kernels and the spent cobs for the recipe. Feel free to do whatever you want with the remaining kernels.
- Next, mix and heat half the cream (1c or 240ml/250g), the milk, sugar, and salt in a saucepan until all of the sugar has dissolved and the mixture starts steaming (not boiling). Add in the spent corn cobs, turn off the heat, cover the pot with a lid, and let the mixture sit for about 30 minutes before moving it to the refrigerator. Let the corn steep in the sweet cream mixture for another 1.5-3.5 hours. The longer the chill, the stronger the flavor.
- After the sweet corn cream mixture has chilled, remove the cobbs. Before tossing them, scrape off any fat that solidified to their surfaces and give them a squeeze over the bowls. Pour the remaining liquid and kernels into a blender and blend on high until the liquid is smooth. Strain the sweet corn mixture over a bowl and clean the pot for re-use.
- In the clean pot, whisk the eggs yolks well. They will froth and lighten a bit when they are ready. Then, slowly, pour the sweet corn cream mixture from the bowl into the egg yolks. Whisk constantly for good incorporation. (If you have either, an immersion/stick blender or hand mixer will make this step faster.)
- Before cooking the ice cream base (a.k.a. custard sauce or crème anglaise) add the remaining cup of cold cream to a large bowl and set a fine mesh strainer on top. Place it in the refrigerator until it’s time to use it.
- Now, place the pot on the stove top over medium-low heat. Stir with a heatproof spatula until the mixture thickens and coats the spatula. This will take between 20-30 minutes. Make sure to check the temperature several times while heating the custard. Do not go over 180°F (82°C) while thickening. (I tend to keep mine between 170-175°F (76-79°C) to be on the safe side.) To check the viscosity, run a finger across the coated spatula. The custard base should not run back together.
- Take the cream out of the refrigerator and pour the thickened custard through the strainer. Stir it into the cold cream, to stop any carry over cooking. Cover and chill the mixture completely in the refrigerator. It should take roughly 4-8 hours.
Blackberry Syrup
- While the sweet corn ice cream base chills, make the blackberry syrup. Rinse the blackberries in the sink and then dump them into a small, clean pot. Add in the lemon juice, sugar, and salt. Heat and stir everything on a stove top between medium and medium high heat. Over 10-15minutes, the blackberries will breakdown into a rustic sauce. Feel free to mash or stir to your heart’s content to move things along.
- Once you have a loose sauce, strain it through a fine mesh strainer into a small bowl. Use a spoon to scrape and push as much liquid into the container below as you can. There should be roughly 5oz (150ml or 180g) of blackberry syrup. When mostly pulp and seeds are left, it’s time to thicken the strained blackberry syrup.
- Rinse the pot and pour the blackberry sauce back in. Boil the syrup on the stove top until it reduces by half (about 2.5oz, 75ml, or 90g). It should thicken to a similar consistency as maple syrup. When the pot is scraped, while stirring, the syrup should separate for a second and run back together. If it’s too thin, there won’t be any separation. It should not take longer than 10 minutes to reduce the syrup. When done, cover and chill the blackberry syrup in the refrigerator along with the sweet corn ice cream base.
Sweet Corn Ice Cream with Blackberry Swirl Assembly
- When ready to churn, pour the sweet corn ice cream mixture into an ice cream maker and freeze according to the manufacturer’s instructions. Once frozen, scrape about half of the ice cream base into an 8.5 x 4.5 x 2.5 in (21.6 x 11.4 x 6.4 cm) loaf pan or quart sized (.95L) ice cream container. Then, spoon half of the blackberry syrup on top of the sweet corn ice cream and use a long utensil like a chopstick or offset spatula to gently swirl the syrup and base together. The point is to spread it around and create marbleization not mix it in. Less is more. Repeat with the base and syrup once more, using the other half of each component.
- Once layered and ready, place the sweet corn ice cream with blackberry swirl into your freezer for at least 6 hours to harden. Scoop when frozen and enjoy.
Notes
- If the sweet corn ice cream base seems runny and is not thickening, DO NOT turn up the heat, just have patience and keep stirring.
- A lot of ice cream recipes use ice baths after tempering. You don’t technically need it for this recipe. Straining the hot custard into the cold cream stops any carry over cooking.
- An ice bath saves on refrigeration time before churning. But it also sacrifices flavor.
- Don’t have an ice cream maker? That’s okay! Put you fully chilled corn ice cream base in the freezer and after about an hour remove it and scrape down the ice cream that has begun to freeze around the edges. Return it to the freezer and check in every 30 minutes using a hand-held mixer to really break up any frozen sections. When the consistency is that of frozen yogurt, swirl in the blackberry syrup and place it back into the freezer until fully solid. It should be ready to eat in about 2-3 hours. It won’t be as creamy as a machine, but it’ll still be delicious.
- DON’T FORGET! Freeze the bowl of any churn style ice cream machines at least 24hours before making ice cream or it won’t be cold enough.
- The ice cream texture is its creamiest/freshest within 2 weeks of making it. However, it can last as long as 1 month in the freezer before developing freezer burn and/or a stale mouthfeel.
- This recipe fills up a 9x5x2.5 (22.86×12.7×6.35cm) loaf pan about ¾ of the way. If you want to use a different vessel or insulated ice cream container, just make sure it can hold up to 8c or 1.9L of ice cream
Nutrition
Frequently Asked Questions
1. Constantly stir: Do not walk away from the cooking custard. Continuously stir and scrape the bottom of the pot during cooking. It only takes a few moments for the custard to sit too long in one place and clump up. The fat, sugar, and water surrounding the egg proteins help lower the chance of scrambling, but it remains a concern. A few clumps might form here and there. You can strain them out but try to keep the custard as smooth as possible. I highly recommend using a spatula instead of a whisk, because a whisk doesn’t reach all the corners of a pan or fully scrape the bottom.
2. Watch your Temperature: Keep a temperature under 180°F (82°C) while thickening the sweet corn ice cream base. At this temperature, the eggs (protein) in the mixture scramble and clump, which causes the custard to break. I like to maintain between 170-175°F (76-79°C), to be on the safe side. But the mixture will thicken at anything over 140°F (60°C). At this temperature, egg yolks cook. Cooking at this low a temperature works, but it also takes a very long time to reduce and thicken.
2. Use a double boiler: Add about 1in (2.5cm) depth of water to a saucepan and place a heat safe bowl over the top of the pan. Turn the burner to medium/med-low so the water begins to simmer (NOT a rolling boil) and heat the bowl. Add all the tempered custard to the bowl and stir until the mixture has thickened and passed the spoon test. This step takes longer with a double boiler, but you have far less of a chance to scramble it. With a double boiler, the custard isn’t directly touching the pot, which is touching the heat source, so there is less intense heat transfer.
So, I know the go-to descriptions are coating the back of a spoon/spatula and fluidity after running your finger over the coated utensils. But quite a bit of nuance exists even in those phrases.
Here’s a larger description from uncooked to over-cooked crème anglaise (ice cream base) to help you out.
Stage 1: During the first 5-7 minutes at medium-low/low heat, the ice cream base remains very liquid. If you dip a spoon into the mixture and look at the back of it, the liquid beads up and runs off the spoon.
Stage 2: Over the next 15-20 minutes, the custard thickens and starts looking like fruit nectar or buttermilk. There is also a slight resistance as you stir. But the mixture moves easily, with the liquid trailing slightly behind the spoon instead of splashing freely. Look for a gentle swirling motion, with visible ripples forming on the surface. The cream coats the back of a spoon at this point. However, if you run your finger along its surface, the cream still runs too much. The coating looks thin and very see-through.
Stage 3: You shouldn’t have more than 5-10 minutes left at this point. Use the spoon test every 2-3 minutes until the cream doesn’t run back and looks hazy on the spoon. You should be able to turn the spoon gently side to side and not have the cream shift into the separation you made. (YOU’RE DONE!)
Stage 4: If you continue to stir and let the custard thicken into the consistency of caramel syrup, honey, or condensed milk, you cooked your custard too long. This does not mean you overcooked or scrambled it. It simply means that you evaporated too much moisture out of the ice cream base. And the less water in the ice cream base, the softer it will stay and faster it will melt.
You can completely negate the need to chill before spinning the custard, as long as you get the ice cream base down to 43°F (6°C) before churning it. To do this, nest the cooked sweet corn ice cream bowl into a larger bowl filled with ice. Stir until the aforementioned temperature is reached. You may need to add more ice or completely change out the larger bowl with fresh ice. Then, finish the recipe as written.
Of Note: Omitting the long chill time has a trade-off. Without that time to infuse, mellow, and become uniform, the ice cream’s flavor stays less developed.
So, I know you noticed me using the words crème anglaise in this recipe. What is it? Crème anglaise is a sweet cream custard sauce that makes up the base of French-style ice creams. It’s also a popular pour-over sauce for hot pastries and cakes, like apfelstrudel (apple strudel). You don’t need to churn it to ice cream when you can drink and dip right from the bowl, right?!
– American ice cream is made with milk, cream, sugar, and flavorings. It has a very high milkfat content to get around its lack of egg yolks as stabilizers, think 14-25% milkfat. American ice creams’ volume changes drastically during the churning process, sometimes exceeding a 50% increase in volume. That’s a LOT of air!
– Italian ice cream or gelato, like American ice cream, does not use eggs. It also uses more milk and less cream than all other ice creams. Gelato usually has a milkfat content of around 4-9%. Gelato gets its density and creaminess from how slowly it’s churned and from the warmer temperature it’s served at. Gelato is so beloved, because it doesn’t build up a coating of fat on the tongue, the way ice creams with higher heavy cream contents do. (see OF NOTE)
– French ice cream or crème glacée also uses egg yolks, but sometimes fewer yolks by weight than frozen custard. French ice cream’s custard base always cooks before churning. Any ice cream that uses less than 1.4% egg yolks and more than 10% milkfat must be labeled French ice cream in the U.S. The change in volume (overrun) typically won’t be more than 40% after churning.
– Frozen custard includes at least 1.4% egg yolks by weight and more than 10% milkfat. The volume should not increase by more than 30% when churning. Originally, frozen custard was made in small batches, to preserve freshness and wasn’t heated before churning. But commercially it has to be pasteurized to kill any bacteria before churning.
Of Note: No–churn ice creams notoriously create a layer of fat on the tongue, because they are made from sweetened, frozen whipping cream. I like no-churn ice cream recipes, because they are quick and approachable. I have two recipes for them myself. But, in my opinion, they are just not as enjoyable. Maybe that’s also a good thing. It’s like built-in portion control.
If you decide not to use all of the syrup in the ice cream, try this cocktail recipe. Mezcal, Blackberry Shrub Cocktail. It’s fruity and tart and smokey, the perfect trifecta if you ask me. You will need between ¾ – 1oz (22.5 – 30ml) of blackberry syrup per cocktail for this. Simply mix a touch of vinegar into the syrup until it has as much pucker as you like. Then mix up the cocktail with the remaining ingredients at their listed amount. I know the sage is only a garnish, but it is necesary to the cocktail. Do not skip it.

There may be affiliate links in this post. A Little Spoon, LLC is a participant in affiliate advertising programs designed to help content creators earn fees by linking to affiliated sites.