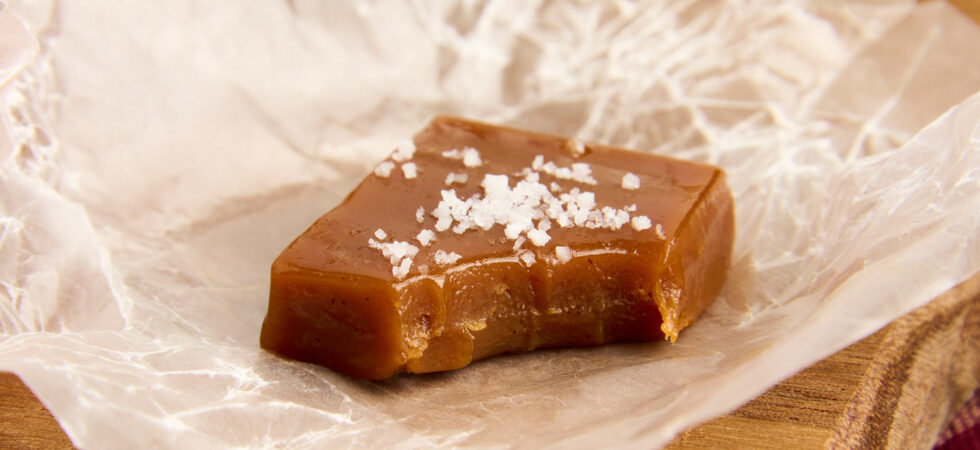
Get the Recipe: Apple Cider Caramel Candies, Dry Method
These dry method, apple cider caramel candies are flavored with reduced apple cider and cinnamon for perfectly set, silky, sweet treats!
Ingredients
- 2 cups apple cider, reduced to about 1/4c (60ml by vol.)
- 1 cup heavy whipping (double) cream
- 1 cup refined, granulated (caster) sugar
- 5 tablespoons European-style butter
- ½ teaspoon Diamond Crystal kosher salt
- ½ teaspoon ground cinnamon
- 1 pinch nutmeg, fresh grated, (optional)
- 2 teaspoons vanilla extract
Equipment
- 3 small sauce pot(s)
- 1 high heat, silicone spatula
- 1 metal whisk
- 1 instant read or candy thermometer
- 1 mesh strainer (only if needed, explanation in instructions)
- 1 8in x 8in (20.3cm x 20.3cm) dish
- 1 paring knife
- wax paper for wrappers
Print Recipe
Instructions
- Start by bringing the apple cider to a boil in a small saucepan on high, medium-high heat. Let the cider reduce to ¼ cup (60ml) in volume, stirring occasionally. This will take roughly 30-45 minutes. It will bubble and foam as it reduces and become jelly-like, when it cools a bit. It's okay if there is less than ¼ cup (60ml) after reducing, as long as the consistency is right, and it didn’t burn. Set the reduced cider aside.
- Next, heat heavy cream in a small saucepan to between 180-200°F (82-93°C). The cream should have steam coming off of it, but it should not bubble or boil. Once that temperature range is reached, turn off the burner and cover with a lid, to help keep the cream warm and stop it from reducing (evaporating).
- While the concentrate is reducing and the cream is resting, pour the granulated sugar into a medium saucepan. Heat the sugar on your stove top at medium heat. It will take a few minutes, but eventually the sugar will begin to melt. Gently move the sugar around the pot using a very clean and dry, high-heat spatula, to help the granules spread and melt faster. It will clump initially, but as the sugar becomes hotter and you continue to push it around the pot, the lumps will dissolve. Make sure to scrape around the corners of the pot, so no sugar sticks there. Any sugar stuck to the pot will pretty much stay there.
- The sugar should be completely dissolved when it is still cream to tan in color. Let it continue cooking until it is caramel to amber in color. (If you’ve ever made browned butter the colors will be similar.) Once you have a color you like, turn off the stove and move the pot off the burner. Grab a whisk and whisk in the butter, 1tbsp (14g) at a time. Again, don't forget about whisking into the corners of your pot. Once the butter is fully incorporated, continuously whisk a thin stream of cream into the caramel, until it has all been added. The cream will bubble up and steam a bit, but just keep stirring.
- Once the butter and cream are incorporated into the caramel, place it back onto your stove top and turn the heat up to medium-high. Use the thermometer to keep track of the temperature. Let the caramel heat to between 250-255°F (121-124°C). It’s going to be important to scrape the bottom of the pot with the high heat spatula every minute or so. This ensures nothing sticks and burns to the bottom and heat is evenly spread throughout the caramel.
- When the thermometer reads 250°F (121°C), immediately move the pot from the stove top and place it on your countertop (if it’s heat safe) to help pull heat from the pot. Whisk continuously until the temperature starts coming down. There will be carry over cooking, so whisking cool air into the caramel is very important. Especially since there is no butter or cream to incorporate this time.
- Keep whisking until the caramel’s temperature dips below 230°F (110°C). From there, it’s safe to let the caramel’s temperature come down on its own. (Feel free to keep whisking if you want cooling to move faster.) Once the caramel has cooled to below 170°F (77°C), mix in the apple cider reduction, spices, salt, and vanilla extract until the caramel is smooth and uniform, then set it aside.
- Next, prepare an 8in x 8in (20.3cm x 20.3cm) heat-safe container with parchment paper or by spreading a thin layer of butter over the bottom and sides. Then, use a spatula to scrape the caramel into the container. Push the caramel into the corners and level everything out evenly. Then, let the caramel cool on the counter for several hours, until it is room temperature.
- When room temperature is reached, heat a paring knife with hot water and run it vertically through the caramel at 1in (2.5cm) intervals. Then, repeat the 1in (2.5cm) slices horizontally. If the caramel sticks to the knife at all, just clean it, reheat it, and continue. Once the slices are all made there should be 64 apple cider caramel squares. Take them out of the pan/dish and wrap them individually in wax paper for safe keeping.
Notes
- The darker the melted sugar is before adding the other ingredients, the deeper and more complex the end flavor will be. Think brûléed sugar, toasted marshmallow, and molasses versus toffee and honey.
- Having very clean equipment is important when making caramel. Melted sugar likes to crystalize the second it touches foreign ingredients, including grease. If you are worried about oils left on pot surfaces or tools, after cleaning, use a bit of vinegar while you rinse to make sure everything is broken up in the wash.
- If any small clumps of sugar form while adding the butter or cream, do one of two things or a combination of both, depending on how many there are:
- Strain them out
- Turn the burner back on to low/medium-low and whisk the caramel around until the clumps dissolve.
- Do not leave clumps or stuck caramel in the pot before making caramel candies. It will burn during the second boil. If you cannot get everything to dissolve, clean the pot or use a second one.
- If the apple cider reduction is too cool when added, it won't easily melt into the caramel. If it clumps, just put the pot back on the stove, on medium-low, and whisk until smooth.
- Caramels can be stored at room temperature for up to 2 weeks, in the refrigerator for up to 1 month, and in the freezer for up to 3 months.
- Of Note! Storing caramel candies in the refrigerator may introduce moisture into the caramel (refrigerators have high humidity) and make them softer. It's best to store candies at room temperature or in the freezer, but it's totally up to you!
Nutrition
Serving: 11inx1in (2.5cmx2.5cm) piece | Calories: 37kcal | Carbohydrates: 4g | Protein: 0.1g | Fat: 2g | Saturated Fat: 1g | Polyunsaturated Fat: 0.1g | Monounsaturated Fat: 1g | Trans Fat: 0.04g | Cholesterol: 7mg | Sodium: 27mg | Potassium: 12mg | Fiber: 0.02g | Sugar: 4g | Vitamin A: 83IU | Vitamin C: 0.1mg | Calcium: 4mg | Iron: 0.02mg