Apple Cider Caramel Candies, Dry Method
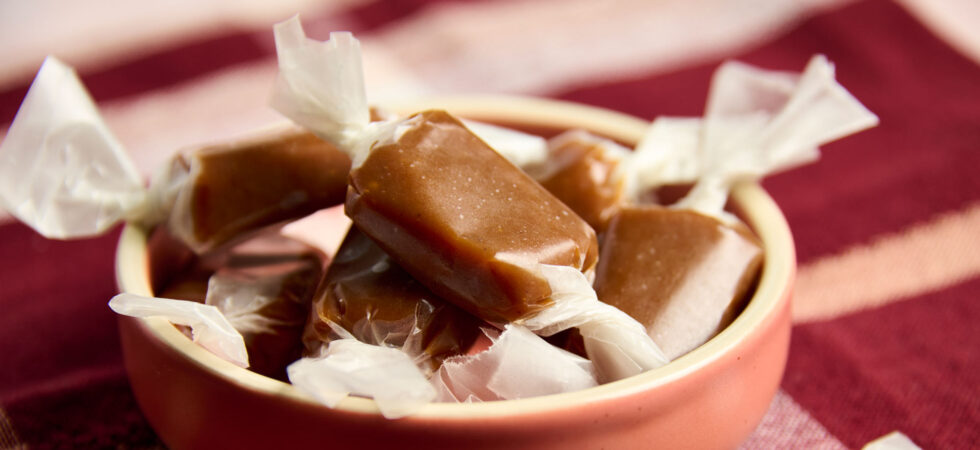
These Apple Cider Caramel Candies combine the powers of reduced apple cider, ground cinnamon, and dry method caramel (See FAQs) to make the candy equivalent of Captain Planet! They are everything you need to bring your fall cravings down to zero! (Phew! Aged myself BIG TIME there!) These candies are smooth, silky, slightly tart, and complex. And they set like a dream. Even cutting them is easy!
I will say, it took me a while to get this recipe right. Mainly because there’s not a ton about making caramel candies using the dry caramel method on the internet. Did I let that stop me? NOPE! It just meant more testing ingredient ratios and temperatures. And I was happy to put in the work, because it meant lots of caramel in my belly. (I mean test batches were still delicious; they just didn’t set right. Do you blame me for enjoying the journey?)
I prefer making these apple cider caramel candies with the dry method, because it’s less fussy and, as long as you don’t walk away from your stove, harder to burn than you think. What’s the trick? It’s all in the temperature!
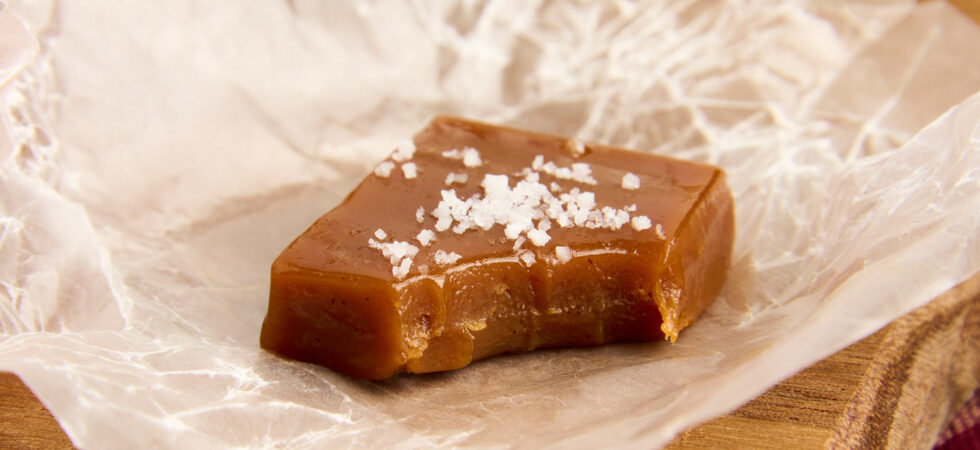
Get the Recipe: Apple Cider Caramel Candies, Dry Method
Ingredients
- 2 cups apple cider, reduced to about 1/4c (60ml by vol.)
- 1 cup heavy whipping (double) cream
- 1 cup refined, granulated (caster) sugar
- 5 tablespoons European-style butter
- ½ teaspoon Diamond Crystal kosher salt
- ½ teaspoon ground cinnamon
- 1 pinch nutmeg, fresh grated, (optional)
- 2 teaspoons vanilla extract
Equipment
- kitchen scale
- measuring Cups
- 3 small sauce pot(s)
- 1 high heat, silicone spatula
- 1 metal whisk
- 1 instant read or candy thermometer
- 1 mesh strainer (only if needed, explanation in instructions)
- Measuring spoons
- 1 8in x 8in (20.3cm x 20.3cm) dish
- 1 paring knife
- wax paper for wrappers
Instructions
- Start by bringing the apple cider to a boil in a small saucepan on high, medium-high heat. Let the cider reduce to ¼ cup (60ml) in volume, stirring occasionally. This will take roughly 30-45 minutes. It will bubble and foam as it reduces and become jelly-like, when it cools a bit. It's okay if there is less than ¼ cup (60ml) after reducing, as long as the consistency is right, and it didn’t burn. Set the reduced cider aside.
- Next, heat heavy cream in a small saucepan to between 180-200°F (82-93°C). The cream should have steam coming off of it, but it should not bubble or boil. Once that temperature range is reached, turn off the burner and cover with a lid, to help keep the cream warm and stop it from reducing (evaporating).
- While the concentrate is reducing and the cream is resting, pour the granulated sugar into a medium saucepan. Heat the sugar on your stove top at medium heat. It will take a few minutes, but eventually the sugar will begin to melt. Gently move the sugar around the pot using a very clean and dry, high-heat spatula, to help the granules spread and melt faster. It will clump initially, but as the sugar becomes hotter and you continue to push it around the pot, the lumps will dissolve. Make sure to scrape around the corners of the pot, so no sugar sticks there. Any sugar stuck to the pot will pretty much stay there.
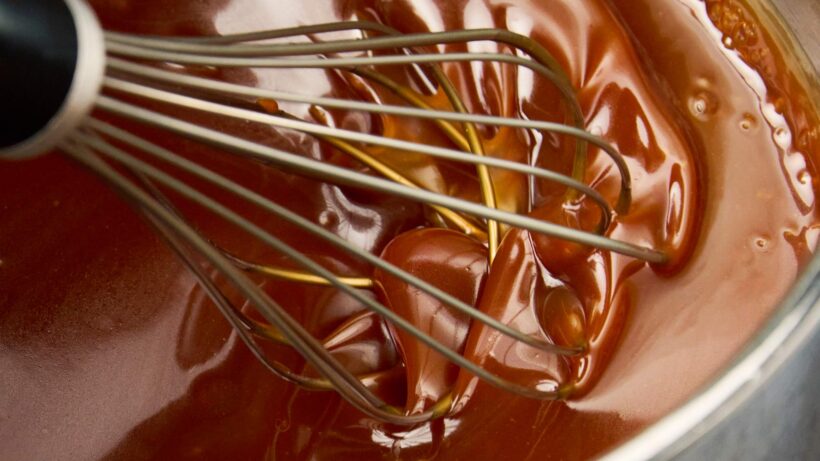
- The sugar should be completely dissolved when it is still cream to tan in color. Let it continue cooking until it is caramel to amber in color. (If you’ve ever made browned butter the colors will be similar.) Once you have a color you like, turn off the stove and move the pot off the burner. Grab a whisk and whisk in the butter, 1tbsp (14g) at a time. Again, don't forget about whisking into the corners of your pot. Once the butter is fully incorporated, continuously whisk a thin stream of cream into the caramel, until it has all been added. The cream will bubble up and steam a bit, but just keep stirring.
- Once the butter and cream are incorporated into the caramel, place it back onto your stove top and turn the heat up to medium-high. Use the thermometer to keep track of the temperature. Let the caramel heat to between 250-255°F (121-124°C). It’s going to be important to scrape the bottom of the pot with the high heat spatula every minute or so. This ensures nothing sticks and burns to the bottom and heat is evenly spread throughout the caramel.
- When the thermometer reads 250°F (121°C), immediately move the pot from the stove top and place it on your countertop (if it’s heat safe) to help pull heat from the pot. Whisk continuously until the temperature starts coming down. There will be carry over cooking, so whisking cool air into the caramel is very important. Especially since there is no butter or cream to incorporate this time.
- Keep whisking until the caramel’s temperature dips below 230°F (110°C). From there, it’s safe to let the caramel’s temperature come down on its own. (Feel free to keep whisking if you want cooling to move faster.) Once the caramel has cooled to below 170°F (77°C), mix in the apple cider reduction, spices, salt, and vanilla extract until the caramel is smooth and uniform, then set it aside.
- Next, prepare an 8in x 8in (20.3cm x 20.3cm) heat-safe container with parchment paper or by spreading a thin layer of butter over the bottom and sides. Then, use a spatula to scrape the caramel into the container. Push the caramel into the corners and level everything out evenly. Then, let the caramel cool on the counter for several hours, until it is room temperature.
- When room temperature is reached, heat a paring knife with hot water and run it vertically through the caramel at 1in (2.5cm) intervals. Then, repeat the 1in (2.5cm) slices horizontally. If the caramel sticks to the knife at all, just clean it, reheat it, and continue. Once the slices are all made there should be 64 apple cider caramel squares. Take them out of the pan/dish and wrap them individually in wax paper for safe keeping.
Notes
- The darker the melted sugar is before adding the other ingredients, the deeper and more complex the end flavor will be. Think brûléed sugar, toasted marshmallow, and molasses versus toffee and honey.
- Having very clean equipment is important when making caramel. Melted sugar likes to crystalize the second it touches foreign ingredients, including grease. If you are worried about oils left on pot surfaces or tools, after cleaning, use a bit of vinegar while you rinse to make sure everything is broken up in the wash.
- If any small clumps of sugar form while adding the butter or cream, do one of two things or a combination of both, depending on how many there are:
- Strain them out
- Turn the burner back on to low/medium-low and whisk the caramel around until the clumps dissolve.
- Do not leave clumps or stuck caramel in the pot before making caramel candies. It will burn during the second boil. If you cannot get everything to dissolve, clean the pot or use a second one.
- If the apple cider reduction is too cool when added, it won’t easily melt into the caramel. If it clumps, just put the pot back on the stove, on medium-low, and whisk until smooth.
- Caramels can be stored at room temperature for up to 2 weeks, in the refrigerator for up to 1 month, and in the freezer for up to 3 months.
- Of Note! Storing caramel candies in the refrigerator may introduce moisture into the caramel (refrigerators have high humidity) and make them softer. It’s best to store candies at room temperature or in the freezer, but it’s totally up to you!
Nutrition
Frequently Asked Questions
The difference between dry and wet method caramels are as follows:
Dry Caramelization:
In dry caramelization, sugar is heated directly without the addition of water. The heat causes the sugar molecules (sucrose) to undergo thermal decomposition (toasting), breaking down into simpler compounds (melting), and leading to the formation of caramel compounds that are responsible for color and flavor (more toasting/caramelization).
Butter and cream are added when visual cues are reached. (i.e. amber in color with no clumps) to stop the caramelization process.
PRO/CON: This method is faster, and clumping isn’t something to worry about, but it is very easy to burn if you aren’t mindful.
Wet Caramelization:
In wet caramelization, sugar is dissolved in water before heating. As the water evaporates, the sugar concentration increases, and caramelization occurs.
Butter and cream are added when specific temperatures are reached (i.e. 320-340°F) (160-171°C) to stop the caramelization process.
PRO/CON: This method is often considered more forgiving for beginners, because the water helps prevent rapid overheating and burning. There is a trade-off, however. This method takes longer and is more apt to clump than the dry method.
Most of the time clumps in caramel form because of two reasons:
1. Foreign objects from your utensils or cookware: It’s important to clean and dry your sauce pot and spatula/whisk very well before making caramel. Left over grease, food, or even water (after cleaning) can provide surfaces for the melted sugar to cling to and create crystalline structures (clumps).
2. Uneven heating: When making “Dry Method” caramel, there is a LOT of clumping at the start, as the sugar touching the bottom of the pan melts and the sugar on top hasn’t. Not to worry, since sugar is the only ingredient, it will all eventually melt to an even consistency, no matter how much you stir it. (Take that wet method caramel!) That being said, before you start introducing other ingredients with lower temperatures, it is really important to make sure that the sugar is fully dissolved. Any clumps of sugar that haven’t fully melted will seize as soon as butter and milk are added to the pot.
Additionally, not using a whisk to stir in the butter and milk will disperse their water and their temperature differences too slowly, also causing clumping. (And this time, it won’t fix itself.) Constant whisking and scraping around the corners of the pot while doing it are very important to clump free caramel. A spatula should only be used for scraping and dissolving, while the whisk should be responsible for all mixing.
If any small clumps of sugar form while adding the butter or cream, do one of two things or a combination of both, depending on how many there are:
1. Super simple, strain them out! When you are done mixing the caramel, pour it through a fine mesh strainer into a different pot or bowl. And if you only have a few large clumps, just pick them out with a fork or spoon.
2. Turn the burner back on to low/medium-low and whisk the caramel around until the clumps dissolve. I have had more luck with this tactic when I am working to unstick caramel to the bottom of the pot or for small bits than to melt larger clumps. (For large clumps, stick with option 1.)
NO! Sorry, that sounded harsh… I don’t recommend it if you can avoid it.
Okay fine, technically you can, but it’s much harder to mix in the cream first than the butter. Adding the butter first allows fat molecules to surround the hot sugar molecules and suspend them. This helps to hinder crystallization. It also tempers the sugar a bit, so the temperature contrast to the cream isn’t so intense. Lastly, there is more water in cream than in butter. Water and melted sugar are magnets to each other, and like to clump, A LOT. I promise, butter first is better.
I know it seems weird that you can add cold butter to the caramel, but you need to add warmed cream. Heating or tempering the cream helps with one, very important thing. If you add cold (from the refrigerator or even room temperature, though it’s still better than cold) cream to piping hot caramel, it WILL clump. The huge difference in temperature will immediately cause the sugar to seize causing a grainy texture, matte caramel, and/or clumps of hard sugar.
Easy, add 1/4c more sugar in substitution of the reduced apple cider and don’t mix in the cinnamon and nutmeg. Keep the salt though!
Infusing caramel is actually really easy. Simply mix in your spice blend with a whisk after the second boil but before it has solidified. Look for temperatures under 170°F (77°C). Subjecting spices to high temperatures over several minutes will burn them and can make them bitter.
Consider mixing and matching the following spices cinnamon, cloves, ground ginger, ground cardamom, ground coriander, ground black peppercorns, espresso powder, cayenne, ground pink peppercorns.
TLDR: I really recommend only using refined, granulated sugar for this recipe.
Why? Well, there are two reasons.
Refined sugar has all of the impurities filtered out during processing. This means there isn’t molasses, plant fibers, additional minerals, or any extra water to burn or cause clumps. Refined sugar also gives a consistently pure flavor for the same reasons. In other words, using refined sugar creates a controlled environment when it comes to flavor, melting, and caramelizing
Additionally, refined sugar melts easier and more uniformly than sugars with larger granules. So, you are less likely to burn some of the sugar while the rest is still dissolving. If you really want to lean into it, use superfine (caster) sugar.
Does any of this mean you can’t use unrefined, large, granulated sugars like, turbinado, demerara, muscovado, and natural cane sugars? NOPE. It just means that it’s easier if you don’t. Especially with “dry method” apple cider caramel candies. The higher temperatures are just not to be messed with.
Of Note: If you don’t want to buy superfine (caster) sugar, but you want to experiment with it to see the difference, use a blender or food processor to blitz regular granulated sugar. Et viola! Superfine sugar.
Sure can! Add up to 1/4 cup (60ml) of liquor to the apple cider caramel candies (or just caramel candies) for a boozy option. Whisk in the liquor after the cream, during the first boil. The temperature of the caramel will be low enough for the liquor to mix in easily. Make sure to incorporate it into the caramel fully before starting the second boil. As long as you hit 250-255°F (121-124°C) during the second boil, the caramels should set. I recommend infusing with brandy, triple sec, or whiskey.
Add your herbs/flowers to a tea bag or sachet and toss them in the cream when heating. Let everything steep for 30 minutes, gently mixing every 10 minutes. Fish the baggie out before pouring the cream into the butter whisked caramel. Heat the cream at the same time as you reduce the cider or in advance of making the caramel to allow for the steep time.
Consider herbs like thyme, sage, rosemary, and bay laurel. Great floral additions would be dried lavender, rose hips, violets, chamomile, and elderflower. Go a little stronger than you think when flavoring caramel with herbs and florals. The cooking process (boil 1 & 2) will cook out a bit of the flavor infused into the milk.

