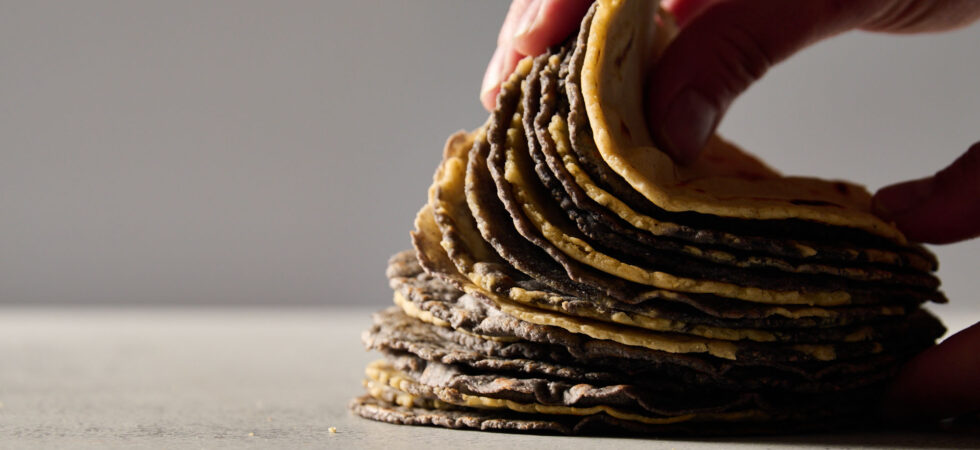
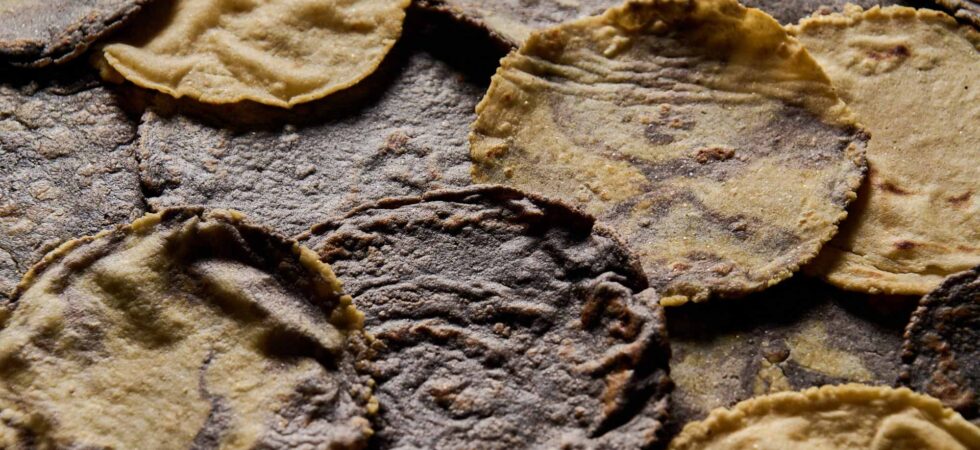
Corn Tortillas with Lard (Tortillas de Maiz)
Corn Tortillas with Lard? Yes, I know how it sounds. Typically, the dough used for tortillas is just masa harina, water, and salt. But I use lard in my flour tortillas and though, “why not?”
Honestly, I like the texture of this dough better during shaping. It’s more forgiving and takes longer to dry out. And, if you use your own animal fat, your corn tortillas can be far more flavorful. The added fat also keeps the cooked tortillas softer, which I like.
Give it a try! Let me know what you think! Am I in the clear or is this an abomination?
Get the Recipe: Corn Tortillas with Lard (Tortillas de maíz)
Ingredients
- 2 cups masa harina
- 2 tablespoons lard
- ½-1 teaspoon Diamond Crystal kosher salt, (to taste)
- 1 cup very warm water, (110-120°F or 43-49°C)
Equipment
- 1 medium bowl
- 1 fork
- 1 damp cloth or cling wrap
- 1 tortilla press (optional, see notes)
- 1 large plastic bag or wax paper
- 1 comal, griddle, or crepe pan
- 1 pancake spatula
Instructions
- First, add the masa harina and lard to a medium sized bowl. Use your fingers to break up the lard and thoroughly coat the pieces as they get smaller, until you have a sandy, uniform mixture. Next, fill a measuring cup with the warm water and pour in half of it into the bowl, loosely mixing the mixture a bit with a fork. Then, add the salt to the remaining water and stir until the salt dissolves fully.
- Add the water mixture to the bowl and use a fork to mix everything together until the water is absorbed and it starts to clump together. At this point you can begin mixing with your hands until the dough fully combines and comes away from the sides of the bowl. It should feel like brand new playdough when done. If it feels a little dry add water ½tbsp (7.5ml) at a time. The dough should be hydrated, but not sticky. It should not feel like it's leaving any residue on your hands.
- Wrap or cover with a damp cloth, and let it rest for 30 minutes. Setup your workstation at your stovetop. Then, divide the dough into 12 equal pieces (roughly 38.5g each) and re-cover. Turn on your burner and heat a non-stick pan with at least 10in (25cm) of flat surface to medium-high heat (see notes). It's preferable to use a griddle-like pan that can take relatively high heat for an extended period of time.
- While that is heating up, you can shape one of the dough balls using a tortilla press. First, cut a plastic bag down the sides from top to bottom and place a dough ball in between the layers. (see notes for other options than a single-use bag). Press the dough into a tortilla and peel the flattened dough away from the plastic like a sticker.
- Take the tortilla and lay it into the pan to cook for 30 seconds. Quickly flip the tortilla over and cook for another 30-60 seconds. The tortilla should begin to smell like roasted corn. Now, flip the tortilla back to the other side and cook for another 30 seconds. If your pan is heated properly and the first sear worked, the tortilla will begin to puff up. You can promote puffing by lightly tapping the center of the tortilla during the final cook. Sometimes there are weak spots which release the steam that should make your tortillas puff. Try pressing down on the hole with your spatula to seal the steam back in and promote inflation.
- Adjust your pan temperature after the first tortilla depending on how slowly or quickly it cooks. Place the tortilla into a warmer or on a plate with a towel or paper towel over it. Repeat the process for all 12 tortillas.
Notes
- Use your tap for the warm water. Most water heaters are set to have a maximum temperature in that range.
- Instead of a single-use plastic baggie, you can also put cling wrap on the top and bottom of the press or use wax paper. I made a more long-term way to keep the tortillas from sticking to my press and slit a reusable, gallon-sized (3.79L) bag down the sides. It’s lasted 2 years so far! I just clean it with soapy water. 🙂
- If you don’t have a press, use a rolling pin. Do the same with the plastic bag, then roll turning the bag in a circle as you go.
- If it’s helpful, my stovetop has 15 heat settings (some half steps) that go from 1 to 9. I keep my heat on 8 when I make tortillas.
- If your tortillas aren’t puffing, try turning the heat up. Chances are that your pan isn’t hot enough.
- When a tortilla puffs it means that moisture was trapped inside and turned into steam. This makes them a little softer than ones that don’t puff. If your tortillas don’t do the signature puff, that’s okay. They will still be much better than store bought corn tortillas.
- Tortillas can be stored for 1 week in the refrigerator and up to 1 month in the freezer. (see FAQs for instructions)
Nutrition
Frequently Asked Questions
Traditional corn tortillas are only made with masa harina, water, and salt.
When I learned to make flour tortillas, we used lard. And I carried that forward with my corn tortillas. I prefer tortillas with lard for a few reasons:
1. You can add a ton of flavor if you use animal fat.
2. The dough is softer and much more pliable right from the start. My instructions say to let the dough rest for 30 minutes, which lets the corn flour hydrate. But the lard almost negates the need for resting.
3. The dough stays hydrated longer and is less sensitive to sitting out while you make each tortilla. In doughs with only flour and water, it’s really important to keep them covered. They dry out very quickly. And this leads to issues pressing and cooking the tortillas if you aren’t fast enough.
In the refrigerator, the number of days they will still be good is determined by the type of lard you use. If you use shelf stable animal-based or plant-based lard, then the tortillas will last roughly a week. If you use an unrefined, animal-based lard, they will last 2-3 days. In the freezer, tortillas will last about a month before they start taking on freezer burn.
I like to stack the cooked tortillas and wrap them in paper towel, then slide the wrapped stack into a resealable bag. The paper towel is optional, but it helps keep any condensation build up between the tortillas and the sides of the bag off the surface of the tortillas, which can make them go bad faster.
Here are three different options for freezing the tortillas, depending on what works best for how you plan to use them.
1. Freeze in a stack: I suggest doing this, only if you plan to defrost the entire stack of tortillas together. Trying to peel a single tortilla away from a stack that was frozen together is asking for broken tortillas. If you freeze all of the tortillas together, then take them out of the freezer and put them in the refrigerator until they are fully defrosted. From there they should release easily from one another.
2. Freeze in a stack with parchment paper dividers: This is my go-to way to freeze tortillas regardless of how I plan to use them. Freezing with dividers ensures the tortillas can’t stick to each other and can be defrosted one-at-a-time. You can defrost the tortillas in the refrigerator or at room temperature. Because they aren’t connected, the tortillas will fully defrost at room temperature in a matter of minutes.
3. Freeze individually, then stack: Freezing the tortillas spread out in a single layer, with no overlapping, is a great way to avoid waste. It does require you to use a solid container for storage and not a bag. If the tortillas aren’t frozen together, they will not stack perfectly, which can lead to breakage when frozen.
You can reheat corn tortillas in one of three ways.
1. Stovetop: In my opinion, this is the best way to reheat tortillas. Just place each one individually down into a pre-heated pan (no butter or oil) for 15-30 seconds on each side. They should not only warm up but get back their toasted goodness. If you plan to heat more than one tortilla, stack them on a plate wrapped in a clean kitchen towel or put them into a tortilla warmer.
2. Oven: Turn on your oven to between 200-250°F (93-121°C). Then, stack and wrap the tortillas with a wet cloth, paper towel, or with aluminum foil. Place the stack in a casserole dish or oven safe container with a lid. Let the lid sit slightly ajar to let out a bit of steam if necessary. Cook them for about 5-10 minutes.
3. Microwave: Reheating corn tortillas in the microwave can be a delicate situation. It’s really easy to overheat and harden them. Your best friend in this situation is steam. Get a bunch of paper towel pieces damp and stack however many tortillas you plan to immediately eat (1-2 per person for tacos) with a wet paper towel in between each tortilla. Run your microwave for 15-seconds if you are heating 1 tortilla, 30-seconds for 2-4 tortillas, and 60-seconds for 5-8 tortillas. Leave them in the paper towels right up until you need them. Repeat for the second round, if needed. You only want to reheat these once. The more you heat tortillas in the microwave the harder they will become.
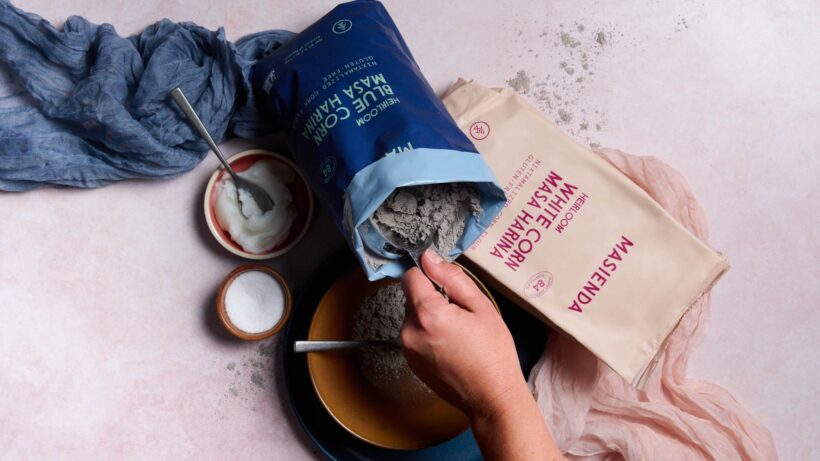
The three main brands of masa harina where I live are Pan, Maseca, and Masienda. Any one of these brands are a good choice for Masa Harina.
I used Maseca exclusively for a really long time and only recently tried Masienda. And I have to say, “I am sold on Masienda (not sponsored).” It’s more flavorful than Pan and Maseca and the grind feels finer. It’s now my go-to corn flour.
Both masa and masa harina are made from nixtamalized corn.
However, masa (or “dough”) is freshly ground and masa harina (or “dough flour”) is dehydrated masa that is finely ground.
That’s why, you add water to masa harina when making tortilla dough.
NO! Sorry I didn’t mean to shout. I just wanted to be very clear in my response. Cornmeal, even finely ground cornmeal, has not been nixtamalized. So, it is not the same thing as cornmeal, and it will not act the same way.
Yes, with a caveat. If you are using fresh hominy to make masa, you won’t need any lard.
I’ve found the texture of fresh masa to be very similar to the dough in this recipe. And fresh masa doesn’t dry out as quickly as a masa harina (corn flour) and water mixture, so the lard kind of becomes unnecessary.
It depends on what is most convenient for the person making them. I know that sounds vague but hear me out.
If you are vegan or vegetarian, skip the lard and use vegetable shortening at a 1:1 ratio. Some good brands to be on the lookout for are Crisco or Spectrum.
For anyone who wants to use a healthier, more traditional lard (derived from pork) that is also shelf-stable, use La Preferida or Armour brands.
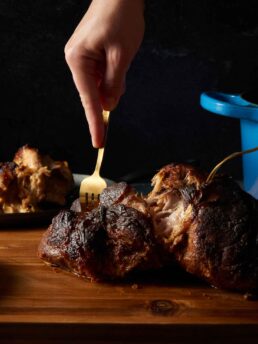
And, for anyone who wants to give up shelf stability for flavor, use rendered fat from your latest, roast dinner. Match the fat with whatever protein you are using in your tacos, enchiladas, etc. So, if you are using shredded chicken, stick with chicken schmaltz; for shredded or sliced pork use pork lard; and for shredded or sliced beef use warmed beef tallow (tallow is HARD at room temperature).
Can I make rendered fat at home to use in tortillas?
You sure can! I prefer to collect animal fats from the meals I’m already making (stocks and roasts). To be clear, this is not the same as rendering fat so that it’s shelf stable, but it’s good enough for me. (thanks freezer!)
Anyway, you know that layer of fat on top of your beef or chicken stock? Or the oil slick on your last braised pork roast? Yeah, those are perfect for this. If you really want to get wild, bacon grease is another option, though I’m not sure what to pair with that.
Moving on…
Collect as much of the fat as possible into a bowl. If some stock or small pieces of meat/bone hitched a ride as well, that’s okay. Next, place a fine mesh strainer over a fat separator or deep, see-through container and pour the contents of the bowl through the strainer and into the bowl. Give everything a few minutes to settle. Anything that isn’t fat should fall to the bottom of the container and you should see a definitive line where the fat and stock separate.
From there you can do a few things:
1. Pour the stock/drippings from the fat separator into one container and then the fat into another container once everything else is gone. You can even pour the fat directly into silicone molds for pre-measuring. Then, refrigerate or freeze the fat. (This is my preferred method) I also like to pop the fat pucks out of the molds once they freeze and keep them loose in a baggie, in the freezer, for when I need them.
2. Ladle the fat out of your see-though container and into another one (or silicone molds) until you can’t get any more fat without stock or broth getting in. Once separated, freeze or refrigerator your stock.
3. Place the container with both fat and stock into the refrigerator, to let the fat harder and the stock gel up. Once everything solidifies, you can remove the fat from the top and put it into a separate container for your use.
Because the fat isn’t rendered until pure, you’ve got about 1 week shelf-life in the refrigerator or up to 4 months in the freezer. Make sure you label your containers!
There are so many applications for corn tortillas with lard. Here are 3 options you can try with recipes from my website.
1. Cut the fresh tortillas into strips. Then, use an air fryer or hot oil to fry up crunchy tortilla strips. They are perfect to garnish pozole verde or ceviche;
2. Make mojo pork and use the shredded pork to make Cuban-style street tacos (I feel like tacos are the most obvious answer, but here we are); and
3. Cut the fresh tortillas into equally-sized triangles, just like you would cut a pizza. Then, use your air fryer or oil to make tortilla chips for salsa verde.

There may be affiliate links in this post. A Little Spoon, LLC is a participant in affiliate advertising programs designed to help content creators earn fees by linking to affiliated sites.