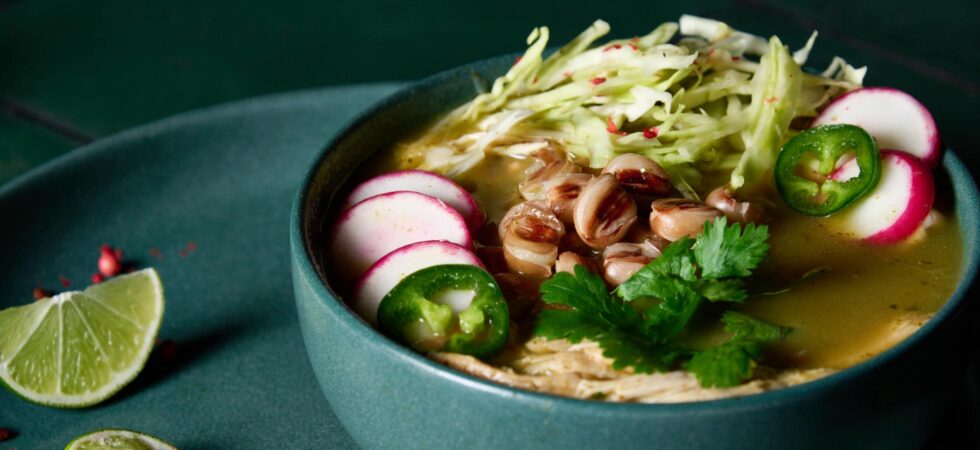
Pozole Verde
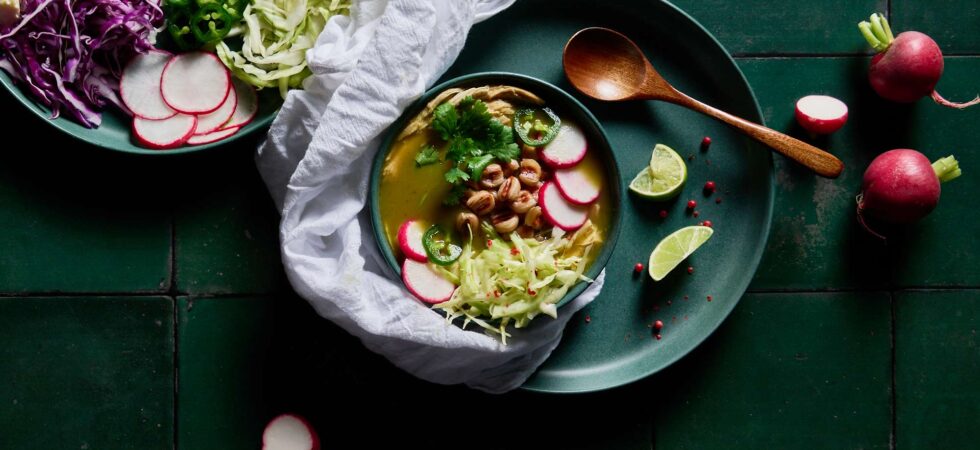
What’s pozole verde? Well, imagine what would happen if salsa verde and chicken soup had a baby and you’re on your way to understanding what the fuss is about. It’s bright, fresh, vegetal, and spicy, (if you want it to be 😉). Topped with all the crunchy goodness of fresh radishes and cabbage, this soup is the perfect transition between seasonal springtime and summertime crops. Crops that are wildly important to my home state of Florida and that I sourced as locally as I could.
Why you ask?
I recently took part in a southwest Florida farm tour, to learn about how our food gets from seed to farm to table. To say this trip was eye-opening is an understatement. Farmers are up against a lot! And, learning what we can do as consumers from the very people who put in the work every day will stay with me forever. If you’d like to read some of my takeaways and how you too can support our farmers, click here, to jump to the section. Otherwise, let this one request be where I leave you.
If what you are shopping for is in season for your locale, try to buy local (from your state or province) and then from your region and then from your country, before buying imported produce. This supports our farmers and their families, puts money back into our local economies, and helps our environment.
Stores stock what we buy. So, use your buying power and “be the change…”.
This post was written in partnership with The Florida Fruit & Vegetable Association (FFVA).
Get the Recipe: Pozole Verde
Ingredients
Hominy
- 12 oz dried field corn kernels
- 1¼ teaspoons pickling lime, (A.K.A. Cal or calcium hydroxide)
- 12 cups water
- 1 tablespoon Diamond Crystal kosher salt
- ¼ white onion
- 2 bay leaves
- ½ teaspoon whole black peppercorns
- ¼ teaspoon cumin seeds
- 3-4 whole cloves
- 2 cloves fresh garlic, crushed
Chicken Stock
- 1, 4-6lb rotisserie chicken
- 12 cups water
- ½ white onion
- ⅓ bunch cilantro stems, bottom (harder) stems
- 2 bay leaves
- ½ teaspoon whole black peppercorns
- ½ teaspoon coriander seeds
- ½ teaspoon cumin seeds
- ½ teaspoon Mexican oregano
- ½ lime
Pozole Verde
- 1 white onion
- 10 med tomatillos
- 3 poblano peppers
- 1-2 jalapeño(s)
- 1 tablespoon neutral oil
- ¼ teaspoon whole black peppercorns
- ¼ teaspoon coriander seeds
- ¼ teaspoon cumin seeds
- 4-6 cloves roasted garlic, 2-3 (20g) cloves of fresh garlic
- ⅓ bunch cilantro, middle (softer) stems and some leaves
- ½ oz fresh lime juice, ½ lime
- 8 cups chicken stock
- 6 cups hominy
- 1½ lbs shredded chicken
- kosher salt to taste
Equipment
- 1 large mixing bowl
- 2 large pots
- 1 chef knife
- 1 cutting board
- 1-2 sachet(s) or disposable tea bag(s)
- 1 Fine Mesh Strainer
- 1 baking sheet
- 1 high-powered blender
Instructions
HOW TO USE THIS RECIPE
- The instructions for this recipe are for a fully, from-scratch version of pozole verde. If you intend to use pre-made stock, pre-nixtamalized corn, or canned hominy, please check the notes and FAQs for more information.
HOMINY
- First, pick through your dried corn for broken or bad (brown/black) pieces. Next, weigh your leftover corn kernels to determine how much pickling lime you will need. In a separate bowl add 1% the weight of the kernels in pickling lime to about ½ cup (120ml) of water. (so, 340g of kernels will need 3.4g of calcium hydroxide) Mix both ingredients to make an alkaline slurry and ensure the calcium hydroxide breaks down well. Then, add the rest of the water, your dried kernels, and the solution to a pot and give everything a brief mix.
- Place the pot onto your stove top and bring everything to a gentle boil for at least 30 minutes. (The time is going to depend on the thickness of the kernel and its hull (pericarp). You’ll know the kernels are ready when two things happen. 1. You can start to peel off the pericarp. 2. You can easily bite or cut a kernel in half and about 50% of it will be cooked through. You’ll see a thin white line (un-cooked) and then darker (cooked) flesh around it. (Just for an example… I once nixtamalized an heirloom purple corn that took over 90 minutes during the first boil.) I recommend going by feel more than time for a lot of this recipe.
- Once the kernels are ready, turn off the burner and let everything sit for 8-12 hours. After they sit, it’s time to de-hull the hominy. (Reminder to start the chicken stock before this step, for timing purposes) Strain them into a colander and then rinse them thoroughly with water. The skins should start to slough off the hominy a bit. To help the process you can take handfuls of hominy and rub them together. Once rinsed, clean your pot to re-use it or grab a new one. One-by-one fully peel off the pericarp and pinch off the tip cap (the piece at the tapered end of the kernel that would have attached it to the cob)
- Place, each de-hulled kernel into the pot until you’re done. Then, cover the hominy with 12 cups (2.8L) of fresh water (it should cover the hominy by least 2-3 inches or 5-7.6cm) and bring everything to another gentle boil on your stovetop for 2-4 hours. About 1 hour into cooking, add the onion and salt to the pot. Then, use the flat of the blade on a chef knife to crush the garlic. Now, add the garlic and the rest of the spices to a sachet or disposable tea bag and place it into the pot, so you can easily take it out when the hominy is done.
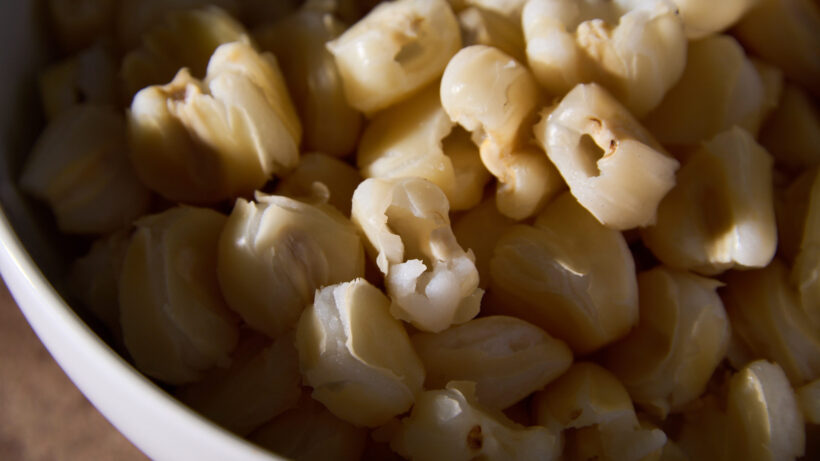
- When done, the hominy will bloom, and the center will pop open (see hominy picture for reference). I would also recommend trying a piece of hominy every 30 minutes or so after the first 2 hours, to determine texture. It should feel starchy but have a clean bite, like al dente pasta.
- Drain your hominy and set aside.
CHICKEN STOCK
- For the chicken stock, break down the chicken with a boning knife. Separate the thighs, wings, and drums from the main part of the bird. Then twist off the spine to separate it. Leave the breasts attached to help keep them intact for shredding later.
- Add the pieces to a stock pot and cover with 12 cups (2.8L) of water. Add in the onion, cilantro stems, bay leaves, spices, and lime half. It's up to you if you want to use another sachet for the spices and herbs. Bring everything to a gentle boil, uncovered, for 6 hours.
- About 2 hours into cooking, take out the chicken breasts, thighs, and drums to pick the meat off of the bones for the soup. Shred everything up and place it into a lidded container. Add a little bit of stock to the container as well (to keep the chicken from drying out). Refrigerate the chicken until needed.
- Strain the stock when it’s finished. Return it to its rinsed pot and keep it heated, on low, on your stovetop.
POZOLE VERDE
- First, turn on your oven to 425°F (218°C) with a sheet pan inside. Let it come to temp and get everything nice and hot for at least 30 minutes.
- While the oven and pan are heating up, clean your tomatillos, slice your peppers in half and remove their seeds, and cut your onion into 6ths. Drizzle them with oil and toss to coat. Set aside until ready to cook in the oven.
- Then, take out your blender and set it aside on the counter with the lid off. Next, toast your spices in the pot that you are going to cook your pozole in. Turn your burner on medium-high and toss in the black peppercorns, coriander, and cumin. Move the spices around the pot by shifting it back and forth every 30 seconds or so. Once you can smell the spices, take them off the burner and dump them into your open blender.
- Add in salt and the middle ⅓ of your cilantro bunch as well as the roasted (see FAQ for roasted garlic info) or fresh garlic and lime juice.
- Your oven and pan should be properly pre-heated by now. Carefully pull the pan out of the oven and add the prepped peppers, onions, and tomatillos onto it. Place it back into the oven and let them roast for 10-15 minutes. Then, turn your oven to broil and let them char for another 5 minutes.
- Take the roasted ingredients out of the oven and use tongs to add everything to the blender. (see notes about peeling peppers) Blend until smooth and then pour your salsa verde into a separate pot or large saucepan. Cook the salsa on medium until it darkens a bit, about 5-10 minutes. (this deepens the flavor even further) Then pour the cooked salsa verde into the pot with chicken stock to combine them. Now, you can add in your hominy and the shredded chicken. Warm everything through on the stove top for 15 minutes.
- While the soup is warming, prep whatever toppings you’d like to use. I like sliced radishes, shredded cabbage, and cilantro leaves. (see FAQ for more options) Once done, salt to taste and ladle yourself a bowl of pozole verde. Lastly, add your preferred toppings and enjoy!
Notes
- Notice the way I use the bunch of cilantro: Leaves are used for garnish, Middle (softer) stems and leaves are for the salsa verde, and the bottom (harder) stems are for the chicken stock.
- Several other ingredients are also used in multiple places. So, make sure you read each list and combine like ingredients before purchasing them from the store.
- Keep an eye on the hominy both as it soaks and as it goes through its second boil. You might need to add more water to keep it submerged.
- To me, 1 tbsp (15g) Diamond Crystal kosher salt to 12 c (2.8L) of water is the perfect saltiness for pasta water, so I used it for the hominy. It works well for my taste, but you can add less to start and then increase until you’ve salted the water to your liking.
- If you really want every last piece of meat, put a large bowl and inset colander into your sink when the chicken stock is done. Pour the stock into the colander to catch the meat letting the liquid pass through to the bowl below. Double strain the stock through a fine mesh strainer and then pick through the colander for smaller pieces of meat.
- If you can’t find poblano peppers, Anaheim or cubanelle peppers will work too. (Of note: the flavor will be a different, more acidic and less vegetal) For jalapeño you can substitute with serrano peppers. Expect extra heat with serrano.
- If you want to take the skin off the peppers after you roast them, you can place them into a bowl or plastic bag to sweat for 5 minutes and then peel them. I don’t do this here, because the blender will take away the need to peel the peppers. But I totally understand if you want to peel them.
Nutrition
Frequently Asked Questions
Yes. I do. There are a lot of overlapping instructions in this pozole verde recipe. So, I did make a countdown to help… Use this as a reference as you move through the instructions for the best time management. Or make the hominy and stock ahead and just worry about the pozole verde instructions on the day of making this dish. (see FAQs for where pre-nixtamalized hominy and canned hominy fit in)
– 20 hours: Pick through corn
– 19.5 hours: Make alkaline solution and start 1st boil
– 18 hours: Remove from heat and rest at room temperature
– 7 hours: Start chicken stock
– 6 hours: De-hull hominy
– 5 hours: Start hominy 2nd boil & Shred chicken
– 4 hours: Add aromatics to hominy pot
– 3 hours: start checking hominy (strain between now and T-minus 1 hour)
– 2 hours: preheat oven
– 1.5 hours: roast garlic, if you plan to use it or make it same day (see FAQ)
– 1 hour: roast peppers and onion & strain stock
– 45 minutes: blend and cook salsa verde
– 30 minutes: combine stock, hominy, and salsa verde
– 20 minutes: prep toppings
– 0 minutes: serve!
Hominy is what we call corn kernels that have been through the nixtamalization process. So, if you are starting from scratch, after the first boil and rest you now have hominy.
You can purchase hominy that has been dehydrated after nixtamalization or hominy that has been cooked and canned. (Instructions for using those with this recipe are later in the FAQs.)
Nixtamalization is what makes field corn suitable for human consumption.
During the process field corn (maize) kernels are cooked and soaked in an alkaline solution. The solution is usually made with water and calcium hydroxide (lime), but it can also be accomplished with water and wood ash. From this, the kernels and their hulls (pericarps) hydrate and soften. They also might take on a yellowish hue and distinctly corn scent.
The proteins in the corn that previously would have been very difficult for a human’s digestive system to break down are weakened. Also, niacin (vitamin B3), that was previously trapped as niacytin, becomes present in the kernel.
I found mine online as “pickling lime,” but I’ve also seen it called “culinary lime”.
If you are looking for a local option, it can also be found in most Latino/Hispanic/Mexican supermarkets under the name “Cal” or “Mexican Lime”.
If you are having trouble finding it with these search terms, try looking up its scientific name: calcium hydroxide.
Tip: A little goes a LONG way, so don’t buy the biggest amount you can find.
If you’re interested, the pH range of this solution is generally between 10 to 12. So, test away with pH testing strips… for SCIENCE!
The solution should be visually milky and smell earthy but not acrid, like chemicals.
My research turned up another test, simply tasting the solution.
BEWARE, if the lime isn’t properly dissolved it can cause gastrointestinal distress. Yes, everything that just came to mind can happen.
If you still want to try this method, just dip your finger into the pot with ALL of the water, slurry, and kernels mixed together and give it a lick (also for science of course). The solution should taste a bit sour and bitter. If it doesn’t it’s too weak.
The corn needed to make hominy is called field corn. It might also be labeled dent, so look for those two options if you plant to make hominy from scratch. Do not use sweet corn.
Field corn is not the same as sweet corn. The carbohydrates (sugars) in sweet corn are much higher than in field corn. You could never get the same neutral flavor needed for hominy or masa (tamales or tortillas). It also has far less amylopectin than field corn. Amylopectin is the type of starch that is essential for creating the proper texture and consistency in masa dough. i.e. sweet corn would make a watery mess. It’s also softer in general, so the alkaline solution needed for nixtamalization would destroy the kernels.
You betcha! I know I went overboard with all the from scratch stuff this time, so I get it. Most of the people I know who use hominy in a soup go to the canned version for ease. And, in this case especially, it 100% is easier.
Here’s the thing though, canned hominy can be a bit watery. So, try doing this to help with that textural issue. (It still won’t be as good as rehydrating and cooking pre-nixtamalized corn or doing everything from scratch, but we work with what we have, no?)
Ready for a fun trick and instructions? Here I go!
1. Preheat your oven to 425°F (218°C).
2. Drain and rinse 2. 15oz cans (g) of hominy.
3. Spread the hominy on a lined baking sheet.
4. Roast them for 12 minutes.
And that’s It! I promise cooking out the moisture from the can tightens up the kernels and gives them a starchier texture. I like to add them to the pozole verde, maybe, 5 minutes before serving. It’s just enough time to let them take on some flavor, but not enough for them to go back to the same canned texture.
Oh! And this can take place after your oven has pre-heated for the peppers but before they go in.
Also, eating them right from the oven gives them a bit of a crunch which is really nice for a snack. I know it will go away when you add them to the pozole verde, but snacks are fun!
This is the third option for pozole hominy, and while I don’t think it’s as good as starting from field corn kernels, it’s wildly better than canned hominy. Which makes it a really nice, in-between. And you won’t need to de-hull the hominy, which I LOVE!
When looking for pre-nixtamalized kernels look for anything labeled “Mote Pelado”. “Mote” refers to cooked corn kernels and “Pelado” means peeled or husked. Pretty straight forward.
instructions are as follows:
1. Pick through the hominy, to remove any broken or bad (brown/black) pieces.
2. In a pot, rehydrate the hominy in 12 cups (2.8L) of water (It should cover the hominy by least 2-3 inches or 5-7.6cm) for 12 hours.
3. Rinse the hominy and then change the water (12c or 2.8L again) to start cooking.
4. Bring everything to a gentle boil on your stovetop for 2-4 hours.
5. About 1 hour into cooking, add the onion and spices to the pot. With a chef knife, using the flat of the blade, crush the garlic and it to the pot as well.
6. When done, the hominy will bloom, and the center will pop open (see hominy picture for reference).
7. Drain your hominy and set aside to add to the pozole verde later.
As you can see, the instructions are basically the same as starting from field corn. The only difference is soaking in water instead of an alkaline solution and the hominy have been pre-peeled for you.
If you wanted to start this with the timeline in mind, I’d say about 14 hours before serving is a good place to begin.
One extra thing to pay attention to; and this could just be because I used heirloom corn when I was developing this recipe, but I would rather be safe than sorry. In my experience, pre-nixtamalized corn cooks faster than home-nixtamalized corn. So, closer to the 2-hour mark than the 4-hour mark. Be vigilant!
Technically, no.
It’s kind of like not taking the hulls off of chickpeas (garbanzo beans). The taste isn’t hugely impacted, but the texture and way it looks will be. If you wanted to roast the hominy and eat them, I’d say to leave on the skin. But, when the texture is important, for things like making masa or eating in soup, so is de-hulling.
But, as usual, you do you!
Unfortunately, you’ll need to pick the hominy that have cooked all the way through out of the pot and leave the rest to keep cooking. I’d say to start checking for more blooming every 15 minutes and repeat the process until all of them are cooked to perfection or to whatever your current amount of patience will allow.
In some cases, some of the hominy will bloom and the others won’t. The main reason this could happen is uneven cooking. (I know obvious, once you’ve read it.)
A few things to do, so this doesn’t happen are:
1. Make sure there is enough water to cover the hominy at all times.
2. Place a lid on top of the pot, slightly ajar, to help maintain the cooking temperature a bit more.
3. Stir the hominy occasionally during cooking to move the kernels around.
Traditionally, fresh garlic would be used. But I have a garlic sensitivity, so I roast mine. Honestly, I prefer most things with roasted instead of fresh garlic. It’s kind of like browning butter. If you can add so much extra flavor, why wouldn’t you right?
Want to try the recipe with roasted garlic? Here are the instructions. You can do this ahead or while the oven is preheating at T-minus 2 hours.
For the roasted garlic, preheat your oven to 400°F (204°C) cut the top of garlic bulb so the tops of each clove have been sliced off. Then place the bulb in the middle of a piece of aluminum foil, drizzle about 1tbsp (15ml or 12g) of olive oil over the top and wrap up the whole thing so it won’t leak. Bake for 40 minutes. Then, separate the cloves from the bulb for the recipe.
Most grocery stores sell rotisserie chickens in their hot-food section. Also, some stores, like Costco, sell both rotisserie chicken and pre-shredded chicken. (If you want to skip making stock and braising the chicken, this is an option.)
If you want to make your own roasted chicken, bake a fresh chicken in the oven at 325°F (163°C) until the internal temperature is 165°F (74°C). For extra flavor and crispy skin. Salt it, under the skin, a day before and leave it uncovered in your refrigerator. Then spread butter with any herbs and spices you’d like under and over the skin before baking. (I recommend using a similar flavor profile to the pozole verde; cumin, black pepper, Mexican oregano, coriander, lime zest, etc.)
Of course! It will take longer to braise the pork to a point of shredding (6-8 hours, in your oven at 325°F or 163°C in a Dutch oven with the lid slightly ajar and chicken stock + aromatics 2/3rds of the way up the roast). But pork is still a light enough protein, that it will work well here too.
You can also use Braised Mojo Pork leftovers instead of chicken.
Honestly, there are so many toppings worth putting on pozole verde.
Traditionally, fresh sliced radishes, shredded cabbage, a dollop of sour cream, and/or a lime wedge are used to top a bowl of pozole.
Some other toppings I encourage you to try are avocado, cilantro, crushed pink peppercorns, red pepper flakes, tortilla strips, cancha, cold-soaked red or white onion slices, and queso fresco.

2024 FFVA Farm Tour
As I mentioned above, I’d like to share a few things that have stayed with me from touring farms and plant research centers in southwest Florida. I will never look at buying local and eating seasonally the same way! (And I know I’m sharing Florida and U.S. numbers, but no matter where you live in the world, let this be something to think about and maybe a call to action. Food and farming is a global matter that effects everyone.)
- The produce we are eating today is the product of 7-10 years of research and development (those Punnett squares just keep coming back). So, researchers are working on produce today that we won’t see in our stores for a decade!!!
- Florida supplies between 200-300 different commodities annually from 9.7million acres of farmland. Simply put, this state is a powerhouse for fresh produce.
- I know we all think of Citrus when we think of Florida, and we are 1st in the U.S., so it’s warranted. But Florida is also 1st in production of snap bean, cucumbers, bell peppers, watermelon, and squash, and 2nd in tomatoes, cabbage, avocados, and strawberries!
- Today, less than 2% of the U.S. workforce are farmers and by 2050 we expect the world to house 9 billion people. The farmers who are left are doing all they can to ensure they grow enough for everyone, all while overcoming obstacle after obstacle to their businesses: hotter temperatures, more destructive storms, rising costs, supply chain instability, land development, and pests and diseases that find their way to the crops. You name it, they’re living it.
- So, here’s the deal. It’s up to us to support our local, state, and U.S. farmers. Stores stock what we buy. So, use your buying power and “be the change…”. If what you are looking for is in season (wherever you live) look for or ask for produce from your state or the U.S.

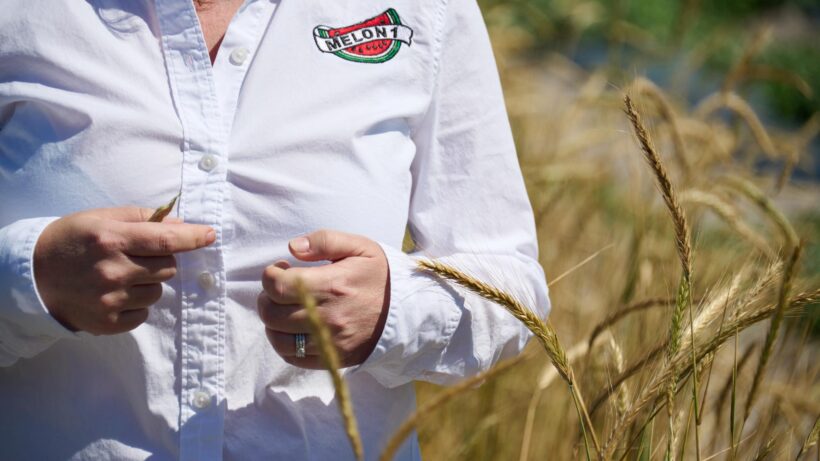
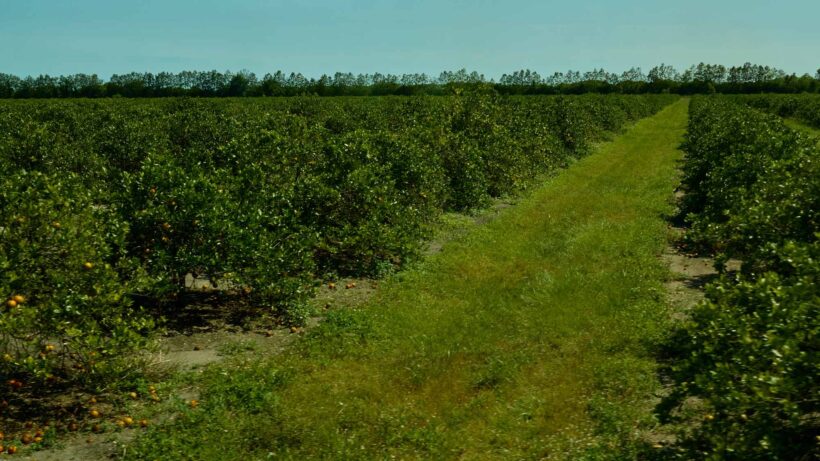
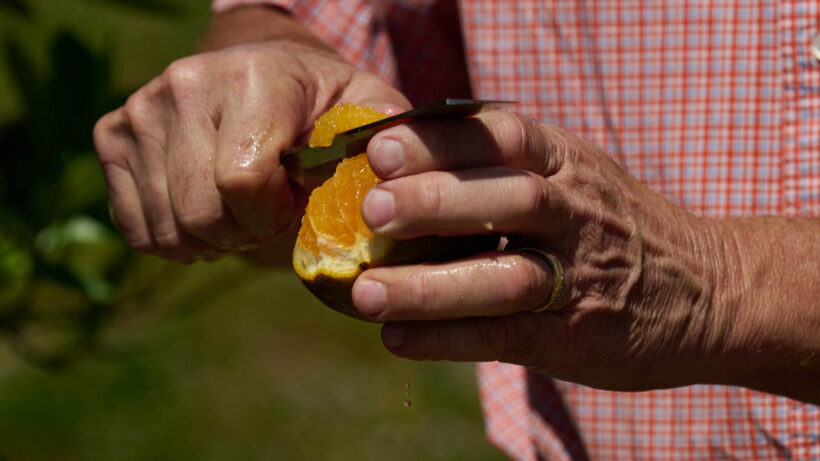
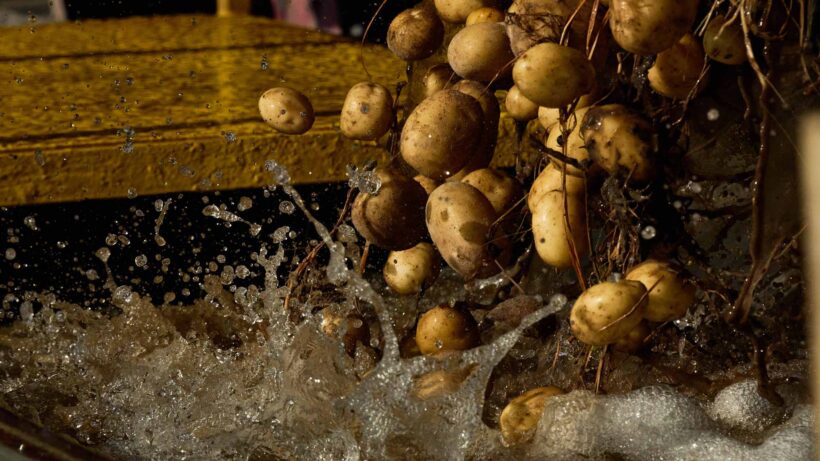
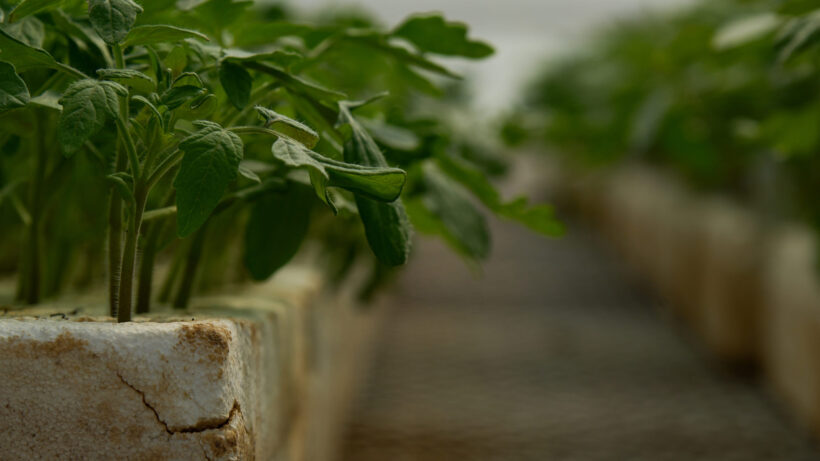

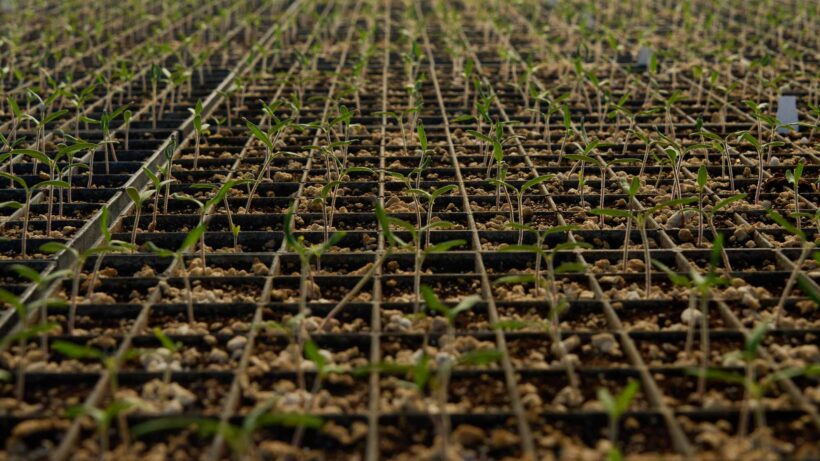
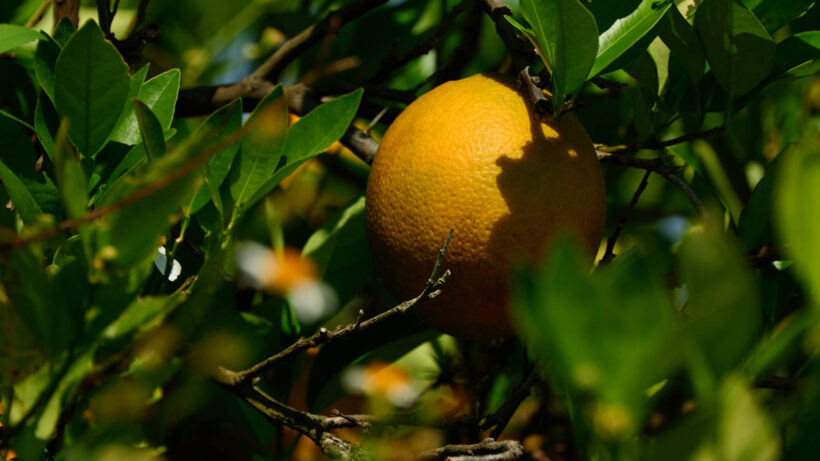

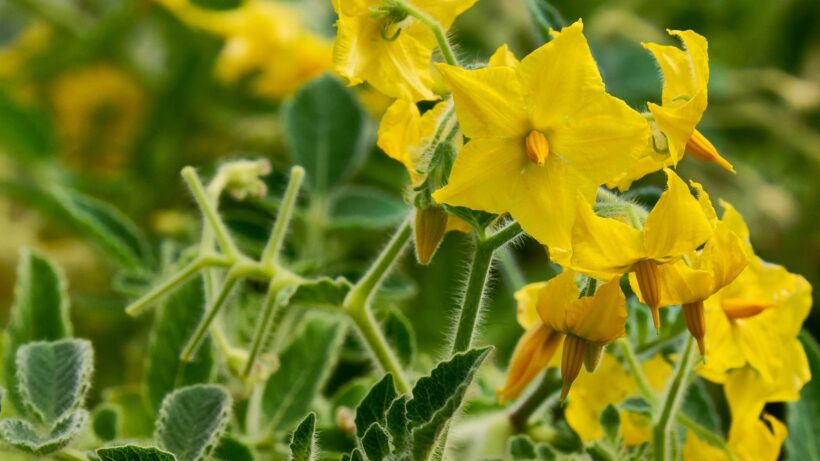
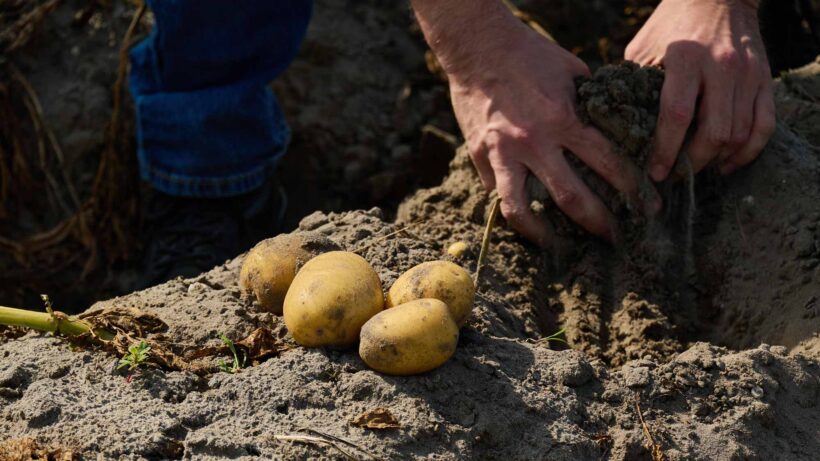
I thought I’d also share some of my favorite pictures from touring the facilities and farms.
This post is sponsored; meaning I was compensated to research, develop and photograph a custom recipe. All opinions here are my own.


There may be affiliate links in this post. A Little Spoon, LLC is a participant in affiliate advertising programs designed to help content creators earn fees by linking to affiliated sites.
“Stores stock what we buy. So, use your buying power and be the change…”. Love that! I will have to share this recipe with my dad. Looks good!
Thank you Karimah! I hope he likes it! 🙂
“If what you are shopping for is in season for your locale, try to buy local (from your state or province) and then from your region and then from your country, before buying imported produce.”
I love this tip! So much YES!
I’ve never had Pozole and it looks so delicious. Can it be made with red tomatoes, too, in place of tomatillos?
Hi Ciji!
There are 2 types of pozole, pozole verde and pozole rojo. I’m sure you can guess which uses which type of nightshade. Pozole verde requires tomatillos for their tart flavor, higher acidity, and denser texture. If you’d like to use red tomatoes I recommend checking out pozole rojo, which uses red tomatoes and dried peppers (which have ripened all the way to their red color and are then dehydrated) for their flavor and color. Maybe one day, I’ll add that to my recipe collection!
And, Thanks for reading the extra content and buying local produce! 🙂
This is the ultimate hug in a bowl we need! I love the celebration of in season produce. Absolutely gorgeous!
Thank you Nicole! I’m so glad you enjoyed the recipe and the bonus content!