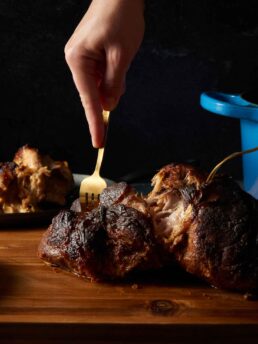
Dry-Brined, Reverse-Seared Prime Rib
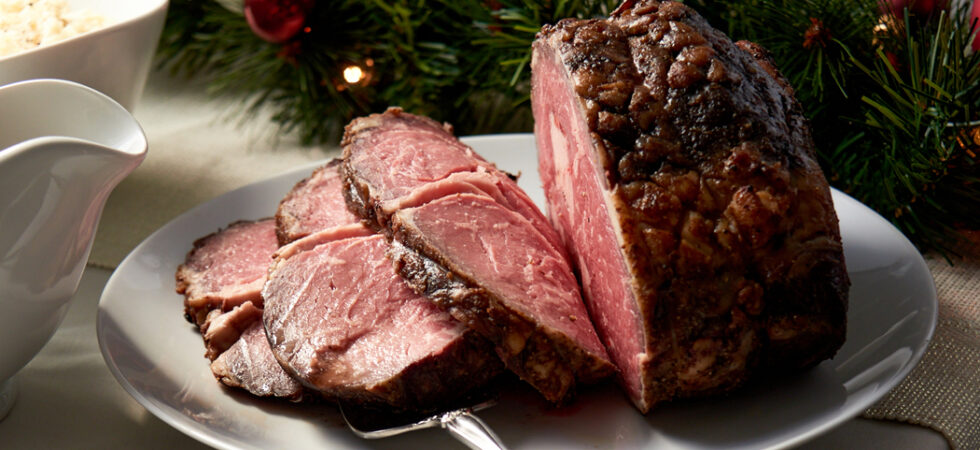
So this post is both a recipe and a guide. The recipe card below will provide instructions on how to cook a dry-brined, reverse-seared prime rib; my preferred way to cook a standing rib roast (prime rib). The notes, however, will get you past delicious and help you transcend into, “OMG (insert your name here) this is the best prime rib I’ve ever had!” Please, if you want to really understand all of the small ways to set yourself up for success, troubleshoot, and fully understand the ins-and-outs of cooking prime rib, read the notes.
On to the recipe!
Get the Recipe: Prime Rib
Ingredients
Prime Rib
- 5 lb bone-in, prime rib "standing rib roast"
- 5 teaspoons Diamond Crystal kosher salt
Prime Rib Dry Rub
- 1¼ teaspoons mushroom powder
- 2½ teaspoons onion powder
- 1¼ teaspoons garlic powder
- 2½ teaspoons black pepper, fresh ground
- ¼ cup canola oil
Equipment
- 1 cutting board
- 1 boning knife
- 1 cooling rack
- 1 folding roasting rack (optional)
- aluminum foil
Instructions
- You'll need to purchase your standing rib roast 2-3 days before you plan to cook it. Try to find a "standing rib roast" that has strong marbling in the rib cap and thin spider-webbing fat marbled into the center eye cut. As soon as possible, get the roast out of store packaging and prep it for the dry brine.
- If the bones have not been pre-cut off the roast, take a boning knife or other long thin knife and cut the main roast free from the bones. Make sure you are cutting as close to the bone as possible, so you don't lose mass from the prime rib unnecessarily. Keep the ribs for au jus. Next, cut off the tapered tail of the rib cap for a more circular shape (prevents uneven cooking) and easier trussing. That can also be kept for au jus.
- Trim down the fat covering the rib cap (fat cap), if it has one, to between 1/4-1/2in (.6-1.2cm). Then, run the tip of your knife along the outside of the roast to score the fat cap in a 1.5in (3.8cm) crosshatch pattern. Be careful not to cut into the meat. Next, use a paper towel to pat the prime rib dry.
- Sprinkle and rub 1tsp (2.5g) of salt per 1lb (455g) over the entire roast. Be sure to rub the salt into the scoring you've done and spread it as evenly around the roast as possible.
- Next, truss up the roast without the bones attached. To do this, cut a very long piece of kitchen twine. If it helps with an estimate, you will be creating loops that go around the roast every 1in (2.5cm) or so. It's better to go longer, than you think you need, as it's easier to cut excess twine than not have enough and need to start over.
- First, decide which end of your roast is going to be the "front" and which is going to be the "back". Starting at one end of the twine, tie a loop around the "front" of the roast and knot it. Then, with the loose end of the string create a loop by crossing twine from the tied and loose ends and threading the roast through the loop, until you are roughly 1in (2.5cm) back from the first tie. Next, as if you were tying a shoe, thread the loose end of the twine through your loop where it overlaps and pull to tighten. Make another loop and do the same thing: overlapping; threading; looping; and tightening, until you get to the back of the roast. Tie off the twine, and cut any extra, unused length.
- Place the roast on a cooling rack inset into a sheet pan and put it in your refrigerator, uncovered, for between 2-3 days.
- On the day of baking the roast, take the dry-brined prime rib out of the fridge and let it come to room temperature for at least 1.5 hours, but no more than 3. Preheat your oven to 200°F (93°C) about 30 minutes before it's time to bake. While the oven is heating up, rub the roast with the oil and dry rub.
- Place the prime rib on a roasting rack in an uncovered roasting pan and bake until the internal temperature reaches 125-130°F (52-54°C) degrees. This should take between 2.5-4 hours. (see temperature chart and thermometer options in the FAQs)
- Remove the roast, cover it with foil, and leave it to rest for 1 hour.
- During this time, bring your oven to the highest temperature it can go, typically between 500-550°F (260-288°C). After, resting, take the foil off of your prime rib and bake for between 6-10 minutes. The outside with bubble, brown, and crisp before your eyes. Do not walk away, you are basically broiling the whole thing. Once, done, take the roast out and feel free to immediately slice and serve with au jus or gravy.
Notes
- If you cannot find Diamond Crystal kosher salt, use 2/3 teaspoon (2.5g) Morton Salt per 1lb (455g) of meat. Morton Salt crystals are more compact than Diamond Crystal salt crystals, so measuring by volume may cause you to over-salt your roast if you aren’t careful.
- The rub ingredients can be increased or decreased depending on the weight of your roast. The ratio is as follows per 1lb (455g) of meat: 1/4tsp (.7g) mushroom powder; 1/2tsp (1.9g) onion powder; 1/4tsp (.7g) garlic powder; and 1/2tsp (1g) black pepper.
- If you cannot find mushroom powder, ignore my rub ingredients and buy Lipton’s original onion soup mix as a substitute.
- Leftover meat will keep in the fridge for 2-3 days after cooking. If you want to freeze your leftovers, they will keep for about a month in the freezer.
- Be careful when reheating, as any heat above your initial doneness temperature will cook the meat more. I other words, it’s best to slice the meat and then use surrounding ingredients like sauteed onions and mushrooms with hot au jus to reheat the slices. Yum!
Nutrition
Frequently Asked Questions
Dry brining is the technique of flavoring and tenderizing meat using just salt. Essentially, the salt pulls moisture from the surface of your meat through diffusion. It then dissolves into a very concentrated wet brine using the food’s own moisture and diffuses back into the meat,creating equilibrium on either side of the surface of the meat. Okay, so that’s the flavor boost part. Here’s where the tenderizing comes in. As the salt solution gets pulled back into the meat, it will start to denature and breakdown proteins it comes in contact with. This ensures that the contracting filaments in proteins relax and that the cells absorb more moisture, keeping them tender during cooking.
Reverse searing is when you cook food at a very low temperature until its center hits an optimal temperature. Then you drastically increase the heat to char and roast the outside, while not impacting that perfect internal temperature. This cooking technique helps retain moisture and tenderness, especially with meats. Muscle fiber tends to shrink and contract when introduced to high heats. With roasts, it keeps the dreaded gray ring to a minimum. Repeat after me, “Just because the rib cap has a ton of marbling, does not mean it’s okay to over cook it!”
As a matter of fact, if you have the time, feel free to cook your roast at the very lowest your oven will go. Mine cooks as low as 150°F (66°C). This basically means, none of the meat in my roast, aside from the crust, would even be able to get over medium doneness. Conversely, you can roast up to 250°F (121°C) without introducing the maillard reaction. There will be a bit more gray (doneness) in the rib cap, but not enough to really worry about it. 200°F (93°C) is really just my happy medium between the two.
Not everyone likes meat cooked to medium rare. And, that’s okay! I give friends a hard time, but honestly I just want them to be happy with what they are eating. If you happen to fall into that boat, here’s a chart with different levels of doneness and their corresponding internal temps, before and after carryover cooking.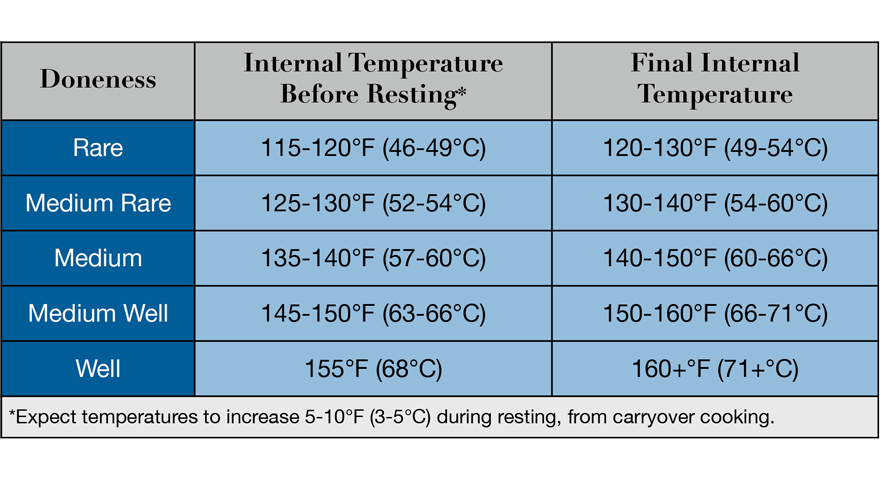
I know the timing I gave in the recipe is a huge range. For a smaller roast, start checking the internal temperature with an instant read thermometer at 2 hours and for a larger one, start checking at 3. Also, be aware, the last 20°F (11°C) goes pretty quickly. Keep close to the oven near the end.
Timing the point at which your roast is ready is really a learned skill. There are many reasons why a prime rib could take less or more time to come to temperature. 1) Initial internal temperature before roasting. 2) The temperature of your oven. 3) The diameter of your roast.
If you are really worried about overcooking, you can also use a probe thermometer that stays in the roast while it cooks in the oven. I do still recommend that you double check with an instant-read thermometer. Sometimes a probe thermometer can conduct extra heat down the metal prong and show as a bit hotter than the roast’s actual temperature.
Of Note: My favorite probe thermometer and instant read thermometer are made by ThermoWorks. Check out the ThermoWorks site. Their RFX wireless system (probe thermometer) works over wifi. So, you can literally leave your house and still get temperature readings over their app. Most probe thermometers use bluetooth. Which means you’re stuck hovering next to your oven to stay connected the whole time. This and the number of sensors in the RFX probes were a game changer for me. Their Thermapen instant read thermometer is also one of the best on the market. It’s quick and precise, and hasn’t failed me in the 3 years I’ve had one.
If ThermoWorks products are too expensive for your taste. Have no fear; Take a look at the ThermoMaven instant read thermometer. It’s what I used before the Thermapen. It’s not as quick, but it’s still a solid instant read thermometer.
To help you decide on bones or no bones for roasting, here’s an easy consideration that relies solely on your kitchen equipment.
If you have a roasting rack, use the recipe as written. A roasting rack keeps the roast from touching your roasting pan, so there is no need to have the bones re-attached. If you do not have a roasting rack, keep the bones tied (trussed) and let them work as an insulator from the bottom of the pan. (more on trussing with bones below)
If you keep the bones tied on and use a roasting rack, prepare for your roast to have an ombre result of doneness, with a rare bottom. I like to call that decision “BIG regret”.
We have established if you don’t have a roasting rack it’s best to keep the bones tied onto the roast while cooking. You still need to prep the meat however. Some supermarkets use stretchy cord to truss their standing rib roasts. In this case, just slide them off, dry and salt the meat, and then reattach the bones to dry brine with the same fastenings.
If your roast doesn’t have any cord or has a rigid butcher’s twine. Here’s what you do. Cut the bones from the roast as described in the recipe above or cut the twine keeping the bones attached to the roast. Then, prep the meat for dry-bringing. Lastly, tie new cord around your roast and bones with kitchen twine. This style of truss, will not be continuous like the non-bone roast. Using separate pieces of twine, circle the roast and bones one at a time beginning in the center of the cut. Tie and knot each length of rope with loops/ties on each side of a bone working your way out. By starting in the middle you ensure the meat won’t slide around and gape or off-set in any places along to the bone. Kind of like, taping wrapping paper to a box before folding so it doesn’t move.
Okay, I tested beef back ribs, oxtail, and neckbones to determine what I kind of already knew. Use them all. I am so sorry! lol.
Here’s the deal. Each of these imparts a different flavor and/or texture than the other so if you want a full flavored au jus, it’s best to use all three. If you cannot find all three here’s a description to how each stock renders down. This way you can decide what works best for your tastes. This will also be helpful if you cannot find all three cuts in the store.
Beef back ribs, give the best overall flavor. The stock from these is bright, bold, and flavorful. There isn’t a ton of body, but if you only want to use one kind of bones, I would recommend these over the others. Additionally, if you want to make a gravy the body of the stock won’t even matter, as a roux will thicken the stock.
Oxtail, was my runner up in flavor. They had a noticeably lighter and less bold flavor than the beef back ribs. However, oxtail is a powerhouse in texture. Because oxtail has so much cartilage and fat, it creates a stock that has a very silky, creamy mouthfeel. Using these bones in my au jus gave it a decadent texture that was missing from just the beef back ribs.
Neck bones definitely had the least amount of flavor and body of the three. These should only be used for enhancing flavor. I say this because, the flavor that was present was beautifully deep and meaty. I attribute this to the shear amount of marrow in these bones. Mixing the neck bone stock into my au jus, really rounded everything out.
Take a look at my resource blog post about purchasing prime rib to learn all of the inside information.
Get the Recipe: Au Jus
Ingredients
- 2 lbs beef back ribs (including ribs from the roast)
- 1 lb oxtail
- 1 lb beef neckbones, (also called soup or marrow bones)
- 1 yellow onion, quartered
- 1/2 a head of garlic
- 1 teaspoon black pepper, fresh ground
- 2 teaspoon kosher salt
- 1/4 cup canola oil
Equipment
- 1 chef knife
- 1 cutting board
- 1 stock pot
Instructions
- Sometime between when the roast goes into the fridge and the day you cook it, make the au jus. Preheat the oven to 400°F (204°C). Place the ribs you cut off of your roast, plus the rest of the au jus ingredients onto a baking sheet. Quarter a yellow onion and half a head of garlic. Coat with oil and season with salt and pepper. Toss to fully coat the bones and aromatics and then bake for 45 minutes.
- Once baked, add everything into a stock pot and fill until all of the bones are covered with water or chicken stock if you really want to go big. Don't forget to deglaze your baking sheet with some water and the back of a spoon. To do this scrape and dissolve all of the nicely browned bits into the water. Pour that into the stock pot as well. Cook for 4 hours or until the marrow in the bones looks pitted and the cartilage in the oxtails becomes translucent.
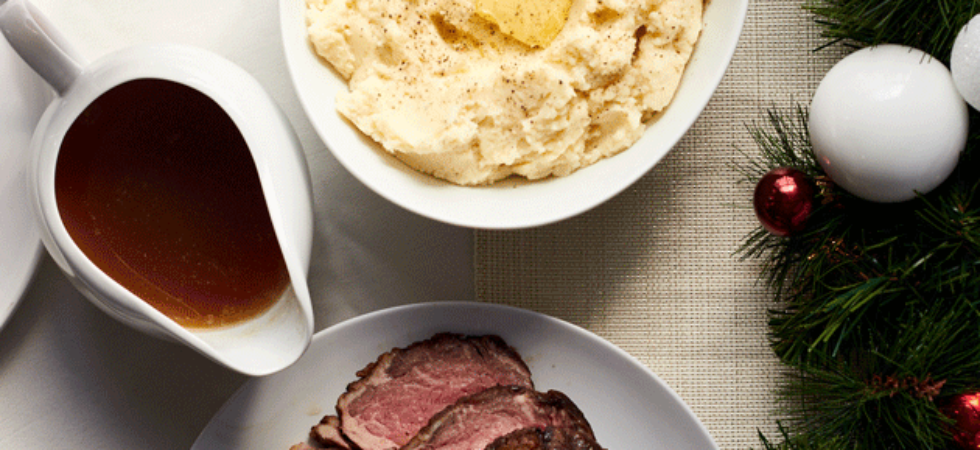
- Strain the liquid out, separating the juice from the fat, and save both in lidded containers until it's time to use or finish into a gravy. You should have roughly 4 cups (960ml) of stock. About 30 minutes before eating the Prime Rib, reheat your au jus and whisk in a pat of butter to give it a more creamy texture.
Notes
- If you want to make gravy, you still need to make au jus. It’s what you do to the au jus afterward that is important. To make gravy, reheat or keep the finished au jus in a small pot on the stove. Next, measure out 15-16g, by weight, of both all purpose flour (2 tablespoons) and saved beef fat (1 tablespoon+1 teaspoon, from the drippings) per 240ml (1 cup) of au jus.
- In a separate sauce pot, heat up beef fat until fully melted and fragrant and then add in flour. It’s important to cook out any liquid that hitched a ride with the fat before adding in your flour otherwise, “Oh hey! NOODLES!” To help you, if there is any water present the oil will sputter when it gets hot and stop when the water has cooked out. With a flat wooden spatula, stir the roux for at least 15 minutes to cook out the flour flavor and turn it into a slightly toasted, blonde roux. Then, add in re-heated, au jus and whisk until everything comes to a boil. At this point you can turn down or turn-off the heat. Continue whisking until the gravy thickens enough to coat the back of a spoon.
Nutrition

There may be affiliate links in this post. A Little Spoon, LLC is a participant in the Amazon Services LLC Associates Program and the ThermoWorks affiliate advertising program, both designed to help content creators earn fees by linking to their sites and affiliated sites.
This is the 2nd time ive made your recipe. I cannot express how amazing this truly is. You must try this. The flavors compliment eachother so well. Some prime ribs seem to need the au jus but this one does NOT.
I will continue to use this recipe for every prime rib I make. Might even try to adjust the seasonings for a general steak rub!
Thank you for the review! 🙂 Merry Christmas!
What an incredible recipe!! Came out perfect, followed the recipe step by step (minus for the au jus because the store didn’t have any neckbones).
Perfect prime rib. Will be making again.
Thank you for sharing such a wonderful review of my recipe and your Christmas dinner. I am so grateful that I get to help foster new traditions and fill happy stomachs.