Homemade Cherry-Almond Pop Tarts
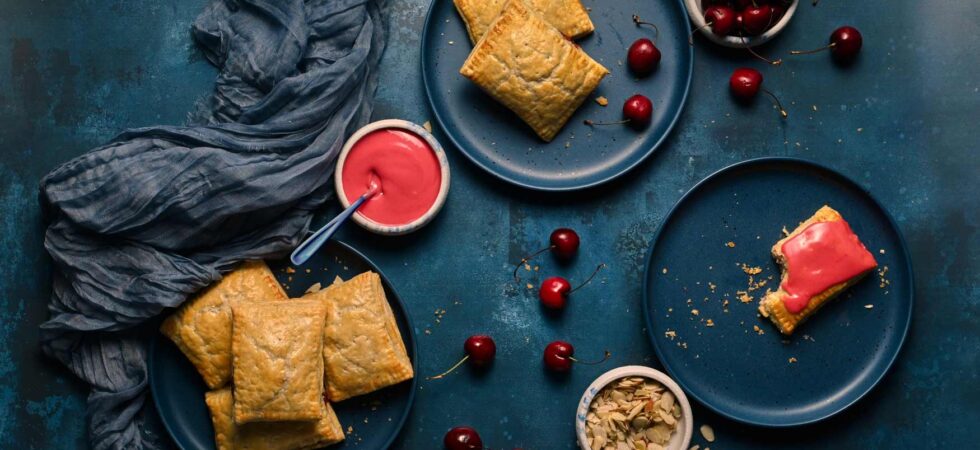
I’m using the term Pop-Tarts™ loosely with these homemade, cherry and almond pop-tarts. The comparison is truly only in the visual sense, as the brand Pop-Tart™ has become ubiquitous with a turnover that is just rectangular instead of triangular.
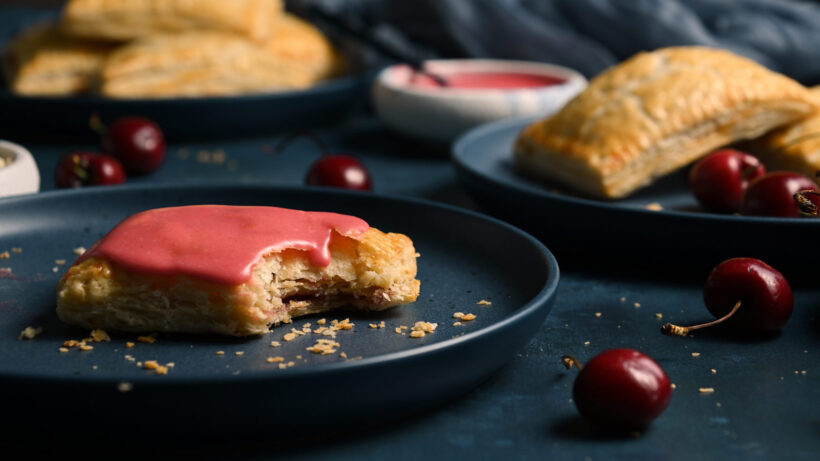
These golden, flakey pastry pockets (🤔, much better) are filled with a deeply cherry flavored filling and topped with a tart, almond-cherry icing. Like most of my recipes, they take time. However, every component can be made ahead of time for easy assembly and a deserved delicious morning treat.
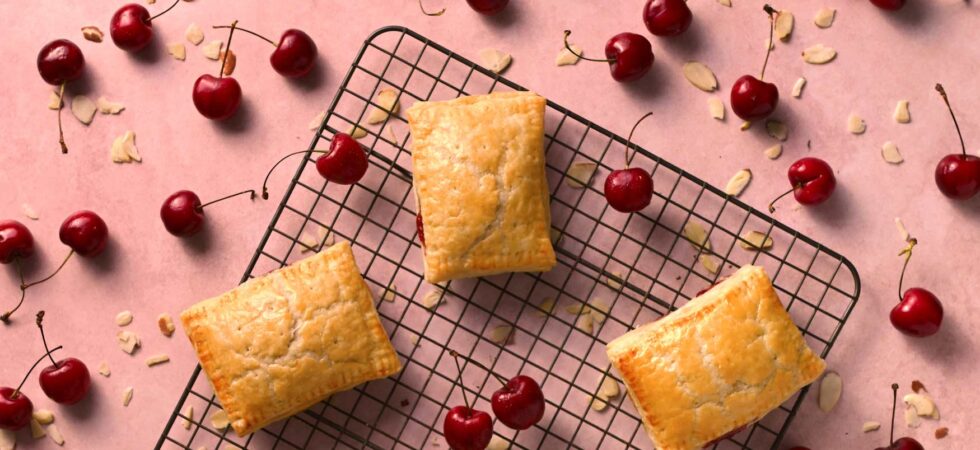
Get the Recipe: Cherry Almond Pop Tarts
Ingredients
Pie Crust (Shortcrust Pastry)
- 2⅓ cups White Lily All Purpose Flour
- 1 tablespoon brown sugar
- 1 teaspoon kosher salt
- 14½ tablespoons unsalted butter
- 6-8 tablespoons ice water
- 2 teaspoons almond extract
Cherry Filling
- 2 cups pitted, fresh cherries
- ½ cup granulated sugar
- 1 teaspoon lemon zest, (1/4 of 1 lemon)
- 2 tablespoons lemon juice
- 2 tablespoons cornstarch
- ⅛ teaspoon kosher salt
Cherry-Almond Icing
- 3 tablespoons cherry filling
- ½ teaspoon almond extract
- ¼ teaspoon citric acid
- ¾ cup powdered sugar , (icing sugar)
- water, (for preferred texture)
Egg Wash
- 1 egg
- 2 tablespoons milk
Equipment
- 1 food processor (optional)
- 1 large mixing bowl
- Measuring spoons
- measuring Cups
- 1 kitchen scale
- cling wrap
- 1 cherry pitter (other options in FAQs)
- 1 microplane or fine grater
- 1 Small Sauce Pot
- 1 instant read thermometer
- 1 countertop or immersion blender (other options in FAQs)
- 1 Fine Mesh Strainer
- 2 1qt (1ltr) bowls
- 1 Whisk
- 1 Rolling Pin
- 1 ruler
- 1 knife, pastry cutter, or pizza cutter
- 1 baking tray
- 1 silicone sheet or parchment paper
- 1 pastry brush (other options in FAQs)
Instructions
Pie Crust (Shortcrust Pastry)
- Measure out and cut your butter into 1/2in (1.25cm) cubes. Then, put them in the freezer while you prep everything else.
- Add the flour, sugar, and salt to a food processor and pulse 3-4 times until fully mixed. Fill a small bowl roughly 1/3rd of the way with ice; then add water until the ice floats off the bottom of the bowl. Give the ice and water a good mix to make sure it’s very cold and set aside. Last, measure out your almond extract into an unused measuring cup and set aside.
- Now, take the butter out of the fridge and add it to the food processor. Pulse into the flour mix (3-4 times) until small pea-sized pieces form. Next, mix 2 tablespoon (30ml) of ice water with the almond extract and slowly pour that into the processor pulsing as you go. You can then, slowly, add more ice water a tablespoon (15ml) at a time.
- As you add water, you will see the dough lose its sandy texture and turn yellow as the flour hydrates. To test if it’s ready, take off the top of the processor and pinch some of the dough between your fingers. If it sticks together, you can stop there. If it’s still a little sandy and falls apart, add some more water.
- Once you have your dough ready, you want to keep it as cold and unworked as possible. Dump everything out onto a large piece of cling wrap and fold it over the dough to compress it and finally seal it off. No kneading! The more you work the dough, the harder it will be. Rest the dough in the fridge for at least 2 hours, though. It’s better overnight.
Cherry Filling
- While the dough chills, pit the cherries and add them to a small sauce pot. Next, dump in the sugar, lemon zest, lemon juice, and salt. Turn the burner to medium-low and cover with a lid. Let the cherries cook down for about 10 minutes, or until they have released their juice and softened.
- At this point, pour the cherries into a stand blender or bowl with an immersion blender to really break down the filling. (see FAQs for filling textures and types) Once blended, pour the filling through a fine mesh strainer, to catch the cherry skin and keep the filling smooth. Next, add the cornstarch, thickening agent, and mix very well with a whisk. When you can no longer see any white, turn the heat up to medium-high heat and take out your instant read thermometer. Gently stir the mixture as it boils and test the temperature until it hits between 217-221°F. (103-105°C). The heat and the cornstarch will have thickened the mixture a bit.
- Take the filling off the stovetop and add the needed amount for icing into a separate bowl. After, place the filling into the refrigerator for roughly an hour or until it’s chilled al the way through.
Cherry-Almond Icing
- For the icing, pour almond extract and powdered (icing) sugar into the bowl with the separated filling. Whisk everything together. At this point, you can add water to get it to your preferred consistency for topping the pop-tarts (spread or drizzle). Once happy, add in the citric acid. I prefer a tart icing. I suggest you measure out the instructed amount and then add a little at a time, to your taste. Once done, set it aside on the counter.
Assembly
- When the dough has fully rested and the filling has chilled, take the dough out of the refrigerator to begin assembling the cherry and almond pop-tarts. Cut the dough in half by weight, if possible. Lightly flour your counter and place half the dough on top. Return the other half of the dough to the refrigerator. Now it’s time to roll. Don’t be afraid to flip the dough over adding flour as you go, to make sure it’s not sticking. Roll the dough out big enough to make two single folds. First, fold the left and right sides over themselves, press down a bit, and then fold over the top and bottom to make a square/rectangular shape.
- Now that you have a relatively square shape with neat edges, the aim is to end up with a perfectly 12in x 8in (30.5cm x 20cm) rectangle. To do that, roll about 1/2-1in (1-2.5cm) larger on all sides so you can cut down to the appropriate size. Use a ruler and a pastry cutter (pizza cutter/knife) to make the rectangle. Then, measure and cut out 8, 3in x 4in (7.6cm x 10.2cm) rectangles from your larger one. It will fit as 4 columns and 2 rows.
- Once cut, transfer the mini rectangles to a lined baking tray and take out the second half of the dough. Re-flour the counter and repeat the process of folding, rolling, shaping, and cutting out 8 more rectangles. From here, retrieve the chilled jelly filling from the refrigerator and whisk together an egg and 2 tablespoons (30ml) of milk for an egg wash.
- Now to assemble a pop-tart. Use a pastry brush to lightly paint the egg wash onto 1 rectangle on the baking tray and 1 rectangle from the counter. Then, spoon 1 tablespoon (15ml) of filling onto the baking tray’s dough. Spread the filling around a bit so it’s in a rough rectangular shape with 1/2in (1cm) of edge. Take the dough from the counter and, very gently, lay it directly over top of the filling. Quickly press down the edges on all four sides to make sure the filling doesn’t escape. If a bit does that’s okay. Now that you’ve trapped the jelly, fully seal the edges by crimping the sides with a fork. Poke some holes into the top of the pastry with a toothpick or a fork, to let steam escape. Repeat this process 7 more times until you have all 8 pop tarts made.
- Now, chill the tray of pop-tarts in the refrigerator for 20 minutes. While that is happening, heat your oven to 375°F. (191°C). Once ready, take out the pop-tarts and brush the tops with egg wash. Bake for 25-30 minutes or until golden brown. Let the pop tarts cool to touch (10-15 minutes) before spooning some icing on top of each one. Feel free to top with sliced almonds as well.
- Store at room temperature for a day, in the fridge for up to 5 days, or for a month in the freezer.
Notes
- If you don’t have a cherry pitter, use a rigid straw, chopstick, or piping tip (for frosting/icing). If the cherry has a stem still, pluck it off and then push the instrument through the top until it hits the pit. Keep pushing until the pit pops out of the bottom.
- This is a loose filling. If you want the jelly to set more, increase the cornstarch 1 teaspoon (2g) at a time. With each cornstarch addition you’ll want the filling to be cooler than boiling when you add it. Mix it in and then reheat to activate and thicken.
- A single fold in pastry technique is the same motion as making a letter fold (tri-fold) with a piece of paper. Fold one side over 1/3rd of the way. Then, take the remaining 1/3 of unfolded dough and fold it over the first fold to make three layers.
- You may have a bit of filling left over and will definitely have some dough scraps. If you roll the dough up, re-wrap, and chill it for 30-60 minutes, you can make 1-2 more pop-tarts. The dough won’t be quite as flakey because it’s been worked, but it will still be good.
- Don’t place the pop-tart dough onto the filling at an angle or it will push the jelly towards one side. Go directly over the top and lay it down evenly.
- If the dough edges stick to the fork when crimping, place the finger-pressed pop-tarts into the refrigerator for 5-10 minutes to chill and then finish crimping.
- If you want to drizzle the icing and don’t mind it running downtime sides of your pop-tarts, add water to the mix to thin it out.
- You can microwave frosted pop-tarts or bake unfrosted ones to reheat them. Baking is better, but if the pop-tarts are topped with icing they will burn.
Nutrition
Frequently Asked Questions
If you don’t have White Lily Flour on the shelves in your supermarket, use regular all purpose flour and add 1 teaspoon (5ml) of either lemon juice or white distilled vinegar to your pie crust mix. This will inhibit the gluten development in higher protein flours and keep your crusts flakey and soft. For reference, White Lily Flour is a low protein (8%) flour made from soft winter wheat.
Before you ask, although cake flour is equally as low in protein, I found it lacking. Cake flour developed a chew when baked that wasn’t unpleasant, but also wasn’t crispy or flakey. If you wanted to attempt substituting a specialty flour for White Lily Flour, I suggest using pastry flour.
Okay there are two reasons for tri-folding the dough as written in the notes. Folding changes the circular or oddly shaped dough, once cut in half, into a shape much easier to roll out into a rectangle without misshapen corners or wonky sections. Second, it gives just a little bit more layering when baked. It’s not a rough puff or full puff pastry, but it definitely gives your pop-tarts a bit more height and flakiness.
There are actually quite a few options here:
1. Pectin is a natural, vegan gelling agent derived from mostly citrus or apples. I suggest using original Sure Jell powdered pectin made to use with sugar. You’ll need 2 teaspoons (4.5g) of pectin per 2 cups (300g) of pitted cherries. To use it, switch the thickener and divide the sugar in half. Pectin needs to be dry mixed with sugar so it doesn’t immediately clump when introduced to liquid. So, half the sugar goes into the first cook down, while the pectin is mixed into the second half and set aside. After boiling, blending, and returning the filling to the sauce pot, bring it back to a boil and slowly mix in the sugar-pectin combo. Be careful not to let the temperature dip as you add in the pectin. It will begin to set if it the temperature drops too much. From there follow the instructions as written.
2. Xanthan Gum is derived from sugars made during fermentation of corn, soy, or wheat. It is used as an emulsifier, and will give the filling a raw egg like elasticity that is useful in keeping it from spreading as filling or icing. This was probably my least favorite texture out of the thickeners I tested (cornstarch, pectin, and xanthan gum) but it definitely works and you can’t tell once the pop-tarts are baked. To use this you will need 1/4 teaspoon (.9g) per 2 cups (300g) of pitted cherries. Add the xanthan gum at the very end with a hand or stand blender.
Honorable mentions I haven’t tested, but are worth attempting:
1. Chia Seeds: (1-2 tablespoons (20g) per 2 cups of pitted cherries) Chia seeds are going to also create a raw egg like texture before baking. Of note: If you don’t want to blend the seeds into the juice, it’s probably best to tinker with the icing before adding the seeds. I suggest starting with 2 tablespoons of juice instead of 3 since you are working with an un-thickened filling.
2. Nothing: There is something to be said about using a cherry reduction. As long as you are cooking the juice low and slow, it will thicken without burning. If you want to try this method, I’d increase the ingredients for the filling by 50% or simply double them so you will have enough once you finish. Also, this will take time, think somewhere between an additional 30-60 minutes.
I am THAT person when it comes to texture, so I prefer a silky jelly. But, I get it if you want a chunky, jam-like filling. To embrace the thicc, you have two options:
1. Chop up the cherries to your size of choice before boiling them and then leave the filling as is (no blender or strainer).
2. Skip the countertop blender for an immersion blender and leave the sauce rustic before thickening it (no strainer).
Knowing if your filling will set takes an instinct that I just do not have. But, I will crawl so you can walk dear friends. And, until you are experienced enough to run, have no fear and use the cold plate test. Before you start the filling, put a thick (ceramic, porcelain, glass) plate into your freezer to chill. Then when you finish your filling and turn off the heat. Get out your cold plate and spoon a bit of the jelly onto it. You can let that sit on the counter or in the refrigerator for about 2 minutes and then check to see if it’s begun setting.
Extra anecdote: I did notice that the pectin continued to set when left overnight, unlike the cornstarch and xanthan gum. Those stayed about the same once chilled.
If you don’t have citric acid for the icing, you can also use lemon juice. Keep in mind, it won’t be quite as tart and you may need to tinker with the viscosity of the icing, since you are adding liquid and not powder. The ratio is roughly 1:4, 1 tablespoon of citric acid to 4-5 tablespoons of lemon juice. So, you’ll need 1-1 1/2 teaspoons (5-7.5ml) of lemon juice to replace the 1/4 tsp (1.6g) citric acid.
The best option would be a clean, unused paint brush. You can also use a paper towel, coffee filters, or your fingers in a pinch. The award for most creative option I’ve seen online goes to: a small bouquet of leafy greens. I mean, how fun does that sound?!
You betcha! You can purchase either pie crust or puff pastry at the store to act as the shortcrust and any fruit preserves would work fantastically here. Not me grabbing as many jars of apricot preserves as I can right now. lol. Just start the recipe from the icing step and work through it from there. I would recommend replacing the filling before the pastry. There isn’t anything like fresh pastry dough. And, jelly/jam can be temperamental depending on lots of factors: ripeness of the fruit, type of fruit, temperature and time on the stove, etc. If you cut a corner, filling is the first to go in my book.

