Overnight Banana Bread
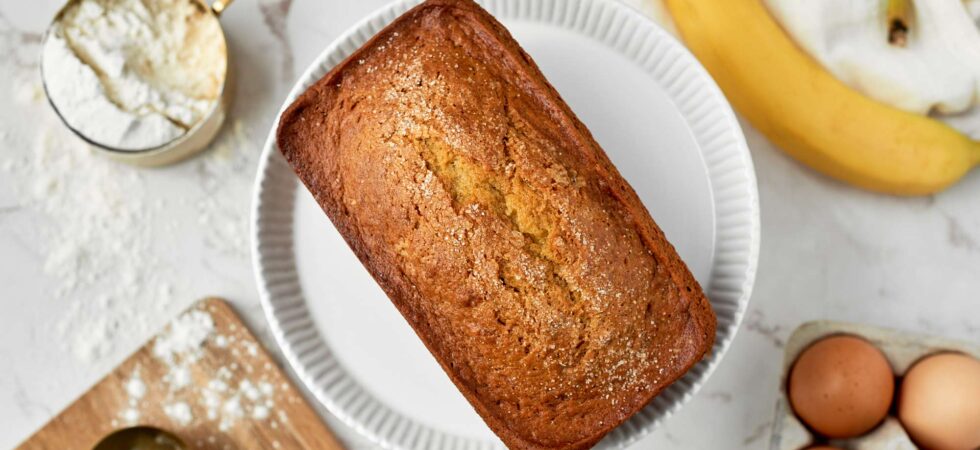
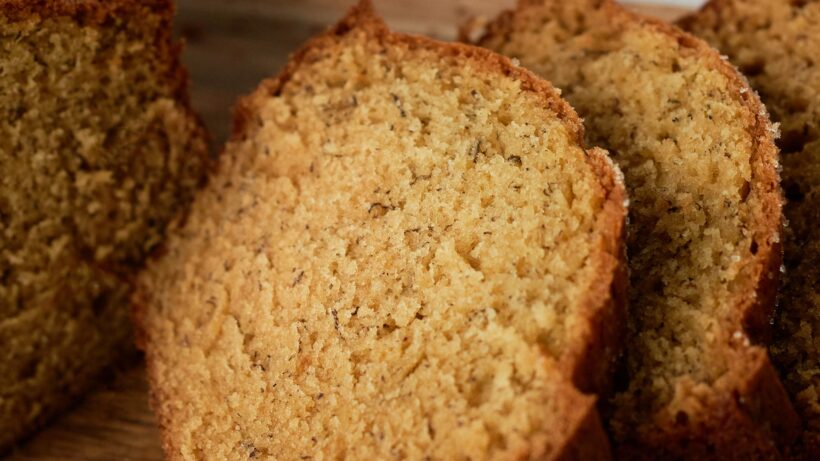
This is the first overnight banana bread recipe you will ever try and the last one you will ever need. It has a very light, tender crumb from high hydration (because we don’t use the gross word that shall not be named), a little added protein (in the form of peanut butter powder), and batter rested overnight. Check out the FAQs for all the science on why overnight banana bread is going to change your life. Okay, that might be a bit dramatic, but it’s REALLY YUMMY!
Anyway, this is a family recipe for Banana Bread that I’ve tinkered with, technique-wise, for a better final product. Growing up, I made this loaf with my sister and mother so many times that I had it memorized before I was out of elementary school. 😎 I’m really excited to share one of my core memories with you. Hope you enjoy!
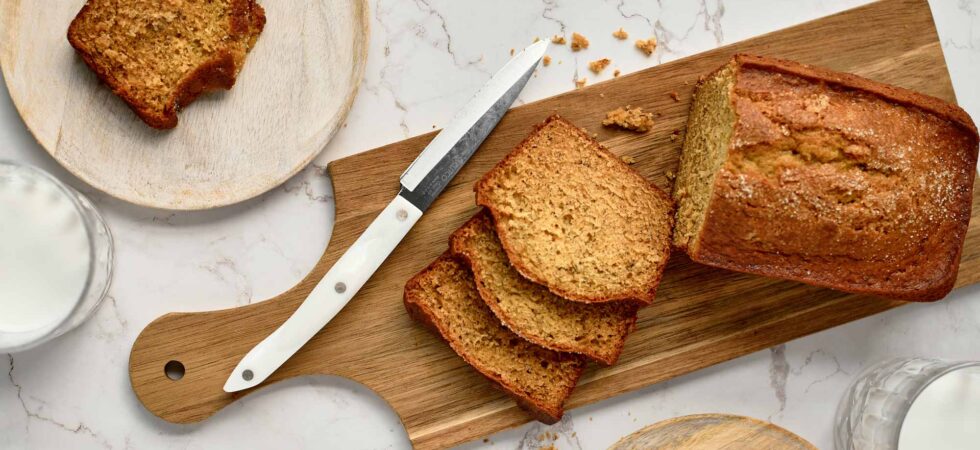
Get the Recipe: Overnight Banana Bread
Ingredients
- 1½ cups all-purpose flour
- 2 tablespoons peanut butter powder, (Allergy? See Notes)
- 1 teaspoon baking powder
- ½ teaspoon kosher salt
- ½ cup unsalted butter, softened (1 stick)
- 1 cup granulated sugar
- 2 large eggs, (50-55g each)
- 1 cup very ripe banana , (about 2 bananas)
- ½ tablespoon pure vanilla extract
- 1 teaspoon baking soda
- 2 tablespoons store-bought orange juice
Equipment
- 1 loaf pan
- measuring Cups
- Measuring spoons
- 1 kitchen scale
- 1 spatula
- 1 stand or hand mixer
- 1 large bowl
- 1 medium bowl
- 1 small bowl
Instructions
- In a medium bowl, whisk the first 4 ingredients until incorporated and set it aside. Next, measure out the rest of the ingredients, separately, and prep the bananas by peeling them.
- Now, in the bowl of a stand mixer, beat the softened butter until fluffy and lighter in color, about 2 minutes. Gradually add in the sugar, beating until well blended, another 2-4minutes. Scrape down the sides of the bowl with a spatula and beat in egg 1 at a time until the mix looks like a whipped frosting. Again, scrape down the sides of the bowl and then check the bottom to make sure your mixture is well combined and homogenous. Now, add in the bananas and the vanilla extract. The mixture will look like it curdled. Don’t panic, it’s supposed to look like that!
- In a separate small container whisk the baking soda and orange juice together. They should froth. Add this to your batter and then gradually pour in the flour mixture. Mix until the batter just comes together and you can no longer see any dry flour.
- Turn off the mixer, scrape the sides of the bowl and gently fold from the bottom of the bowl up to make sure all of the ingredients are well-combined. Then, cover the batter by lightly pressing cling film across the top of it and up the sides of the bowl. Put the batter into your refrigerator to rest and chill overnight. (See notes & FAQ)
- When ready, preheat the oven to 375°F (191°C). Then, using butter and flour or cooking spray, coat a 9x5x2.5in (22.86×12.7×6.35cm) metal loaf pan and set it aside. Once the oven is preheated, remove the batter from the refrigerator and scrape it into the prepared loaf pan, with a spatula, about ⅔ of the way up the sides. Place it into the oven. Then, immediately turn the temperature down to 350°F (176°C).
- Bake the banana bread until a tester comes out mostly clean (just a few structured crumbs) when inserted and removed from the center of the loaf. Bake time will be between 55-65 minutes and the internal temperature should be between 180-190°F (82-88°C), if you want to test doneness with a probe thermometer. Let the bread sit in the pan for 5-10 minutes before turning it out onto a rack to cool.
Notes
- *IMPORTANT* This recipe, as written, will not have a significant domed top. In order to get that classic domed top, you’ll need to add an extra 1/4c (30g) all-purpose flour to the mix. The banana bread is still delicious with the extra flour, but the crumb isn’t quite as light. I was going for texture over optics with this recipe.
- You can skip the overnight rest without affecting the banana bread’s flavor. It is mainly for texture, and it is optional if you want to bake as soon as the batter is mixed. (See FAQ for rest time differences)
- The batter is thick when chilled but will soften the longer it’s out, because the butter in the batter hardens in the fridge. Just push it into place with the spatula or let it sit until it softens and fills the pan on its own.
- If you forgot to soften your butter before creaming, fill a glass jar with tap-hot water for a minute, pour it out, and then place the empty glass over the butter. The air temperature in the glass will help soften the butter without melting it. You can also, cut your butter into 1tbsp (14g) pats and arrange them on a plate with little overlap so they soften faster. More surface area means faster heat transfer between the butter and the ambient air around it.
- If you have a peanut allergy or don’t have access to peanut butter powder, no worries. Substitute it with equal parts milk powder or toasted milk powder. They provide the protein you would be missing if you don’t add the peanut butter powder.
- I’ve noticed fresh squeezed orange juice doesn’t react as well to the baking soda, producing less rise. You can still use fresh squeezed juice, but the loaf will be better with store bought OJ.
- If you want your banana bread to have a crunchy sugared top, sprinkle a good layer of granulated sugar over it before the loaf goes into the oven. I like to run a line of sugar down the center where it domes.
Nutrition
Frequently Asked Questions
As a banana ripens its complex carbohydrates (starches) and disaccharides (sugars) break down into much simpler sugars.
The overall process can be summarized like this:
– Starch (complex carbohydrate) + amylase (enzyme) → Maltose (disaccharide) → Glucose (monosaccharide)
– Sucrose (disaccharide) + invertase (enzyme) → Glucose (monosaccharide) + Fructose (monosaccharide)
Additionally, bananas develop a stronger flavor and aroma due to the production of various volatile organic compounds (VOCs). These compounds include esters, alcohols, and acids like isoamyl acetate (which creates the characteristic floral banana smell), ethanol, and ethyl acetate.
VOCs are created as by-products of the above enzymatic reactions during the breakdown of sugars.
Tacking onto the previous question’s response, allowing the bananas to ripen so you have extra sugars, liquids, and acids provide several things to your banana bread.
1. A little extra hydration, for a more tender loaf.
2. More sugar + protein interaction, for better structure and air bubble capture.
3. Lower pH (acidic) to react with the leavener (baking soda and baking powder) for production of carbon dioxide gas (i.e. better rise and a lighter crumb).
4. A more uniform batter and thus a uniformly flavored and risen loaf.
There is one more thing ripening does and it has nothing to do with structure. I want you to think about a green or perfectly yellow banana’s flavor. Unripe or just ripe bananas taste less sweet and less like, well, bananas. Without ripening, the stronger banana flavor/aroma would need to be added with artificial ingredients or your loaf might not taste like banana bread. We can’t have that!
I understand the worry about holding onto produce past its “expiration” date. So, use these indicators to help you decide when your bananas are ready for baking this recipe for banana bread.
1. Peel appearance: The banana peels need to be almost black or fully black.
2. Fruit appearance: The inside fruit will no longer be white. It will take on a slightly wet translucence and turn a uniform beige/tan color.
2. Smell: The bananas should smell strongly of banana, with a slight undertone of alcohol.
3. Texture: The bananas should be soft or mushy when gently squeezed. They should sag a bit when you pick them up and feel heavier than they look.
VERY IMPRTANT: If you see any mold or white spots developing on the peel, liquid seeping through the peel, or fruit flies on the bananas, they have ripened too far and might not be safe to eat. Toss them. If you open a banana and parts of the fruit have darker brown or black spots on the now tan flesh, also toss them. Hope this helps!
If you don’t have ripe bananas, you can do a few things.
1. If you have a week/few days before you need to make some banana bread and you need them to ripen faster, place the bananas in a sealed paper or plastic bag. The ethylene created as they sit will remain in the bag and concentrate instead of dissipating, quickening the ripening process.
Some extras to take this option further:
– Add other ethylene producing fruit to the bag, in addition to your bananas (apples, tomatoes, avocados, apricots, and pears). It increases the ethylene concentration and speeds up the process further.
– Keep the bag in warmer places like the top of your refrigerator, next to your oven, or by a windowsill; Though, keep the fruit out of direct sunlight. We aren’t planning on cooking the bananas yet! The warm temperature will increase ripening.
– As with heat, humidity also increases ripening. If you are using a plastic bag, spray some water into it before adding the bananas.
2. If you don’t have any time, you can also place the bananas on a lined tray in a 300°F (149°C) oven until they turn completely black and their peels get shiny. The timing will depend on how ripe the bananas were before you baked them as well as their size, so just keep an eye on them. If they leak a bit that’s also okay. Make sure to let the bananas cool completely before adding them to your batter.
DISCLAIMER: While these methods can expedite the ripening process, they don’t perfectly replicate the natural development of flavors and aromas that occur during slow ripening; the oven even more so than the bag technique. Are they effective for quickly achieving a sweeter, softer banana? YES! Will they work in a pinch and give equally good textural results? Also, YES. Will they taste the same? Unfortunately, No.
Originally, I decided to try resting the batter because I saw a reddit post mention resting muffin batter for higher domed, bakery-style muffin tops. And, I said to myself, “If it works for muffins, will it work for banana bread or other quick loafs?”
This recipe has never had the best rise, because it has such high hydration. And I didn’t want to change the ingredients or their ratios, because the banana bread is already so good. If time could be the only change, I’d gladly update the instructions and call it a day. So, I experimented with 3 different rest times. Here’s what I experienced during testing.
– NO Rest: This is how I grew up making this recipe. I promise, it’s still delicious and light. In fact, I had a higher dome from this batter. I believe this is because the baking soda sitting overnight with the acid from the OJ and bananas neutralized it a bit, so the baking powder was left to do most of the heavily lifting (literally!).
So, if this proved my theory wrong, why do I suggest the overnight rest anyway? Keep reading!!!
– 1 Hour Rest: No difference from the no-rest. SKIP!
– Overnight Rest: Resting the banana bread batter overnight significantly changed its texture for the better. The rest allowed the flour to completely hydrate and the starches to begin gelling, which helps retain moisture during and after baking. I honestly didn’t think this banana bread could get better, but the crumb was even softer than the original. It did have a tighter crumb (smaller air bubbles) and less rise because of it, but moisture retention and tenderness went through the roof. In my opinion, well worth something as simple as an overnight stay in a refrigerator.
So, you decide, to rest or not to rest? I leave that decision up to you!
To freeze, let the loaf fully cool before slicing it up. Just like letting steak or chicken rest after cooking, resting allows for any moisture in the overnight banana bread to be fully captured back into its crumb before slicing.
After cutting slices in your desired thickness, cut strips of parchment paper and tuck them between each slice (so the pieces don’t stick together once frozen). Place the banana bread, with separators, into a gallon sized freezer bag. Then, put it in the freezer for up to one month.
To defrost a slice, you have a few options:
– Reheat it on the bread/baked goods setting in your microwave. (If you don’t have this setting, use the lowest power setting in 10-15 second increments.)
– Leave it out on a counter to come to temperature.
– Place it in a heated oven for a few minutes.
Plain banana bread isn’t your thing? That’s a okay. I got you! Here are several popular variations to try.
Adding a swirl:
If you want to add a swirl of, say, chocolate ganache (use the ganache from this recipe Homemade, Ganache-Swirled Marshmallows) or peanut butter (microwaved peanut butter in 15-second increments), here’s what you do.
Heat or cool your swirl to around 82-86°F (28-30°C) just before you are ready to add your batter to the loaf pan. Add in half the banana bread batter and pour in about 1/4c (60ml by vol.) of your swirl. Take a butter knife and run it through the batter and swirl a bit and then add the rest of the batter on top. You can add more swirl on top, but it may increase the chances of burning while you bake, so be careful how much swirl is exposed. You can always cover the loaf with aluminum foil after about 40 minutes of baking to make sure the top stays protected from the heat.
Adding Mix-ins:
If you want to ditch the swirl, you can add up to 1 cup of mix-ins to the batter; think nuts, chocolate morsels, or dried fruit.
I’d suggest roasting your choice of nuts (walnuts, pistachios, pecans, etc.) at 350°F (176°C) for 5-10 minutes, cooling, and chopping them. Make sure to toss the mix-ins in some flour, to coat the pieces, before adding them into the batter. It will help keep them from sinking to the bottom of the loaf during baking. I know it looks thick when chilled, but once the banana bread goes into the oven and the butter melts it thins out quite a bit.
Chilled butter is straight out of the refrigerator and between 32-35°F (0-1.5°C)
Softened butter has been left at room temperature long enough that when you press into the butter it indents slightly with some resistance. Softened butter is not spreadable and should be between 62-68°F (17-20°C) if you check its temperature.
Room temperature butter is spreadable. If you press down on room temperature butter, you finger will immediately sink down and begin melting it. Its temperature range is between 70-74°F (21-23°C)


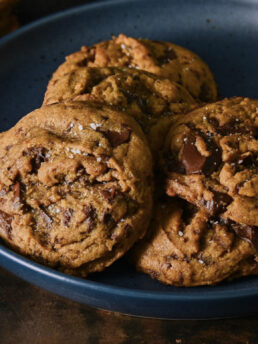
I followed the recipe & it came out perfect! I’ll be making this again and again. Light crumb, excellent flavor.
Thank you! I’m so glad you enjoyed the recipe. It’s one of my favorites!