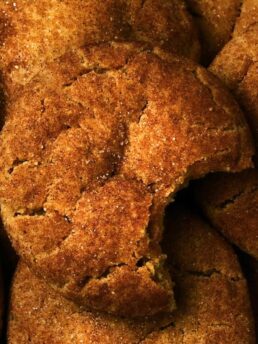
Avalanche Bars
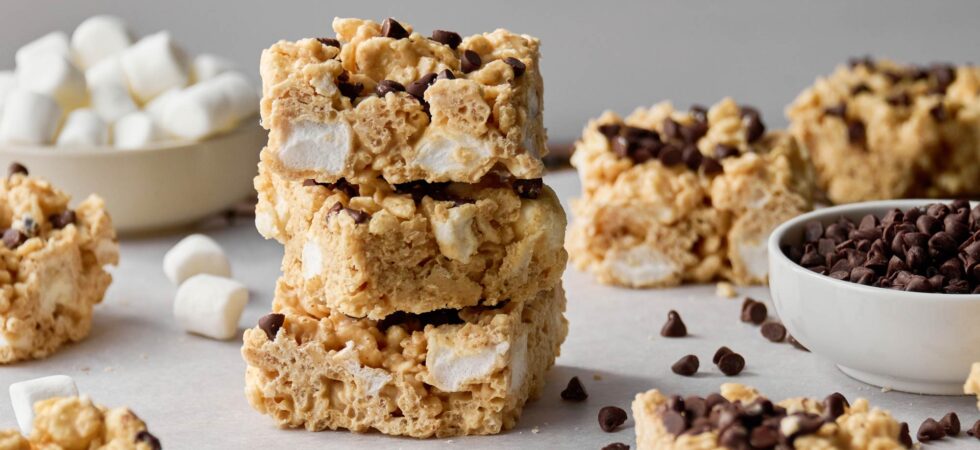
Avalanche Bars are not only built different, they are quite simply BETTER than traditional rice Krispie treats. They are crunchy and delicate, and melt in your mouth in a way that rice Krispie treats could never. Think of avalanche bars as muddy buddies (puppy chow) in bar form, without powdered sugar.
So this holiday or get together, save your arm strength for all of that mixing and the elbow grease for the aftermath bowl scrubbing and still get all of those “AMAZING” compliments.
Fair warning: I use toasted milk powder in this recipe, which is exactly what it sounds like. Milk powder that has been toasted into a browned-butter-flavored obsession of mine. If you haven’t already been turned into a convert, toasted milk powder is optional.
Which means, If you already have it or don’t want to use any, this recipe takes 15 minutes (maybe) of active time. If you are curious about making and using toasted milk powder I have a guide you can read here: The Ultimate Guide to Toasted Milk Powder. Toasting milk powder does add about an hour to the recipe. But, it can be made in bulk and kept as a pantry staple for 6 months. To make it worth your while, I have also linked a bunch of other recipes below that use toasted milk powder. 🙂 Welcome to the dark side of the flavor revolution, we have the best cookies/treats.
Get the Recipe: Avalanche Bars
Ingredients
- 3 cups rice Krispies
- ⅓ cup semi-sweet, mini chocolate chips
- ¼ tsp Diamond Crystal Kosher Salt
- 1½ cups mini marshmallows
- 12 oz white chocolate bars
- 2 tbsp toasted milk powder (optional)
- ¼ cup creamy peanut butter
Equipment
- 1 sauteé pan optional for toasted milk powder
- flat edge spatula
- 1 cutting board optional
- 1 chef knife
- parchment paper optional
- 1 heatproof, large bowl
- 1 9in x 9 in (23cm x 23cm)
Instructions
TOASTED MILK POWDER* (SKIP IF HAVE IT OR DON'T WANT TO USE IT)
- *This recipe only uses 2 tablespoons (12g) of toasted milk powder. Unfortunately, it can’t be purchased pre-made. So, I suggest making at least 1 cup (100g) of toasted milk powder at a time and keeping it in your pantry for later use. Lucky for you, it is also an optional ingredient if you don't have the time.
- Now that we have established that, to make toasted milk powder, add as much powdered milk as you'd like to make to a pan. Turn the burner to low/medium-low temperature for about 1 hour. Just like a roux, keep moving the powder around the pan so it doesn’t burn. Breakup any pieces that begin to clump together as best as you can. The powder will go from an ivory color all the way to a toasted deep golden color.
- If too much of the milk powder is sticking to the bottom of the pan and you are having trouble scraping it up, turn your heat down or remove the pan from the burner to scrape and then return it to the heating element to continue. When you achieve a warm light brown color, remove from the burner and set aside to cool.
AVALANCHE BARS
- Start by prepping a 9in x 9in (23cm x 23cm) pan by spraying it with cooking spray. Then, measure out the rice Krispies, chocolate chips, salt, and mini marshmallows into their own bowls and set aside. Next, chop the white chocolate bars into small pieces and set aside.
- Prepare a double boiler by filling a medium pot with roughly 1in (2.5cm) of water. Nest a heat safe bowl into the pot and place it on your stovetop. Turn the burner to heat the water in the below pot and add in the white chocolate pieces. As the bowl heats and the white chocolate begins melting, measure out and add in the toasted milk powder and peanut butter. Mix in the toasted milk powder and peanut butter until fully incorporated and all of the white chocolate has melted.
- Remove the bowl from the top of the pot and set it on your counter. Pour in the rice krispies and mix until they are fully and evenly covered. Let the mixture cool just a little bit and mix in the marshmallows, again until fully incorporated and evenly mixed.
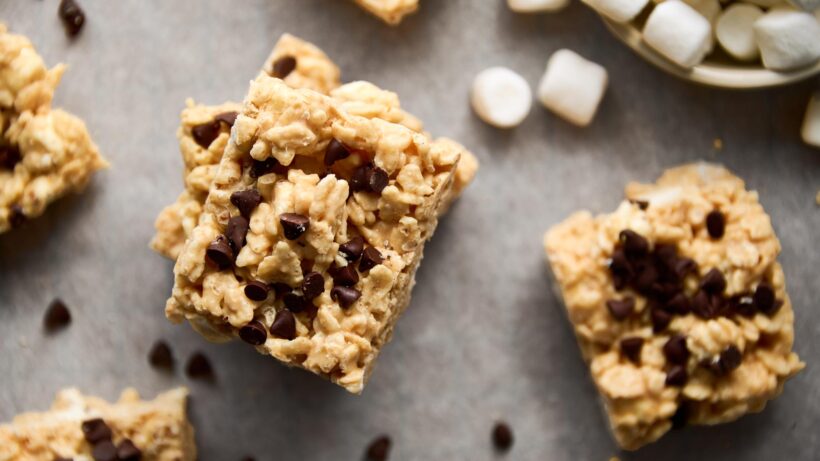
- Using a spatula, scrape the avalanche bar mixture, thus far, into your prepared pan. Gently spread and press the Krispies mix into the pan. Let them cool for another 2-3 minutes, so they can cool to the point that the chocolate morsels won’t melt. Sprinkle the mini chocolate chips over the top of the avalanche bars. Then, let the finished bars rest at room temperature for 2 hours or until the chocolate has fully cooled and hardened.
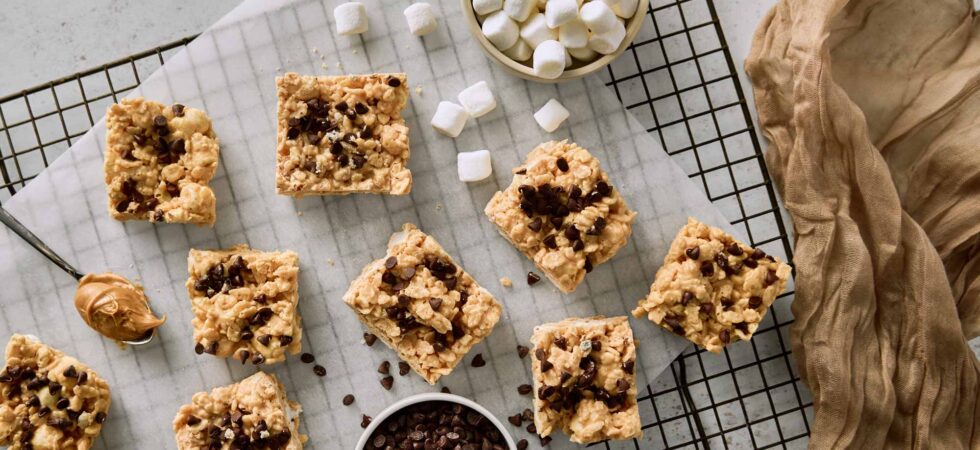
- When ready, pop the whole square out of the pan and onto a cutting board. Then cut 9 – 16 individual avalanche bars and serve.
Notes
- If you don’t want to create a double boiler to melt the white chocolate, see the FAQs for microwave instructions.
- To speed up the chilling/resting time, put the bars in the refrigerator. As soon as they lift as one square without bowing/bending, they are ready to cut and serve.
- I’ve added the toasted milk powder into my version of avalanche bars for a browned butter flavor, but it is technically optional. So add it or don’t depending on what you like, if it’s already in your pantry, etc. (See FAQ for more information on toasted milk powder.)
- If you still want easy avalanche bar removal, but don’t want non-stick cooking spray touching your bars, spray the pan and then insert parchment paper on top of the spray. Once the bars have hardened, pull the parchment paper up and place it on your cutting board. You might want to skip the spray completely, but it helps hold the parchment paper in place while you spread out the warm avalanche bars. I don’t recommend skipping it.
- Want more than 9-16 bars? No problem. This recipe easily scales up to any multiplier. Just make sure to consider the container size you are using when increasing the recipe.
Nutrition
Frequently Asked Questions
If you want to melt the white chocolate without a double boiler no problem! Use a microwave.
Add your chopped white chocolate to a microwave safe bowl that will hold all of the ingredients, minus the mini chocolate chip morsels. Turn on the microwave for 30 seconds and then give the chocolate a mix. Moving forward, microwave the chocolate in 15 second increments until it’s 90% melted with a few pieces that aren’t fully melted down.
At this point, remove the bowl and mix until the chocolate has fully smoothed out. Carry over cooking will continue to melt the pieces as you stir. Add in the peanut butter and toasted milk powder and continue stirring until homogenous. Continue the recipe, as written, from “Mixing in the Krispies.”
Of course! Do what works for you! I prefer sticking to chocolate bars a base chocolate (but, I’m also the first to admit I’m a snob when it comes to chocolate, so no shame here.) Use 12oz of white chocolate morsels if you’d like.
In explanation of my recommendation…Here’s how I see it. Chocolate chips are generally made with more stabilizers and preservatives than their bar counterparts. While this helps them hold their shape for things like cookies, it often has a negative impact on taste and texture. Chocolate chips also use less cocoa butter, which makes them less smooth when melted.
Now, before you point out my obvious hypocrisy…Yes, I know I use mini morsels as a topping. And, mini morsels have even more surface area to cover with anti-caking agents. I have two explanations:
1. I wanted them to look pretty in my pictures. 😉
2. I only use 1/3 cup (70g) of semi-sweet chocolate to top the bars. This is about 3/4 of a chocolate bar (not that much). If you don’t Chop down to the size of mini morsels, there’s not a lot to go around. And, if you do, there will be A LOT of shavings and flecks meaning melting and mess. TLDR: it’s easier and less messy
Honestly, morsels and chips are really just a convenience item. There are very few applications where it isn’t better to buy a quality chocolate and chop to your preferred size chips.
Well, it’s exactly what it sounds like. To make toasted milk powder, you toast powdered milk on your stovetop until it turns a warm golden brown color and smells nutty and caramelized.
If you’re thinking, “toasted milk powder sounds weird.” Seriously, hear me out. When you brown butter, you toast the milk solids in butter. The browned milk solids create that nutty, caramelized flavor. Now, butter is only comprised of 1-2% milk solids, so a a stick and a half of butter (what is typically used in cookie recipes) only has 1/2 tablespoon (3-5 grams) of milk solids in it. If you toast dehydrated milk (powdered milk solids), you create the browned butter flavor without needing any butter. And, you can also use as little or as much as you like.
This means you have:
1. Browned butter flavor without needing any butter.
2. Not having to change recipe ratios because browning butter decreases your moisture content by 1 tbsp (15ml) per stick of butter.
3. Having the best of both worlds, because you can have browned butter flavor and still cream your softened butter and sugar (traditional) or softened butter and flour (reverse creaming).
4. Saving time because you don’y need to wait for the browned butter to harden before using it.
I’m not kidding when I say toasted milk powder changes the game.
For even more information check out my Ultimate Guide to Toasted Milk Powder.
I like to toast the milk powder until it’s the same medium umber color that milk solids get when you brown butter. So, I suggest using that as a benchmark. Technically, however, anything between ochre and the medium umber is good-to-go. The darker the color the more nutty and caramelized flavor you will have. It takes about 30 minutes to toast 1 cup of powdered milk in a 10in pan. Less powder means faster toasting. More powder will take longer.
You bet! Just make sure they taste good with a subtle peanut butter flavor. Any Chex cereal would be a peak avalanche bar option, since they are so similar to puppy chow (muddy buddies). If you want to have fun, I suggest trying Mini Reece’s Puffs, Fruity Pebbles, Kix, and Cherrios. Have fun experimenting!
Customizing avalanche bars is very similar to customizing cookies. Consider some of the following options:
1. Change up the nut butter and the type of chocolate you melt. (Use almond butter and white chocolate.)
2. Consider adding other mix-ins. (Candies, like Reese’s pieces, Reese’s cups, Butterfingers, Andes Mints, Funfetti Morsels, etc. can really mix things up!)
Your imagination is the limit.

There may be affiliate links in this post. A Little Spoon, LLC is a participant in affiliate advertising programs designed to help content creators earn fees by linking to affiliated sites.
Question:
How many 12 oz white chocolate bars are needed for Avalanche Bars?
Hi Ginny! It’s 12oz of white chocolate total, so you will probably need 3, 4oz bars or 4, 3.5oz bars. I’ve been seeing the 3.5oz bars more and more frequently in grocery stores lately. Hope this helps!