Transform Your Snickerdoodles with Toasted Milk Powder
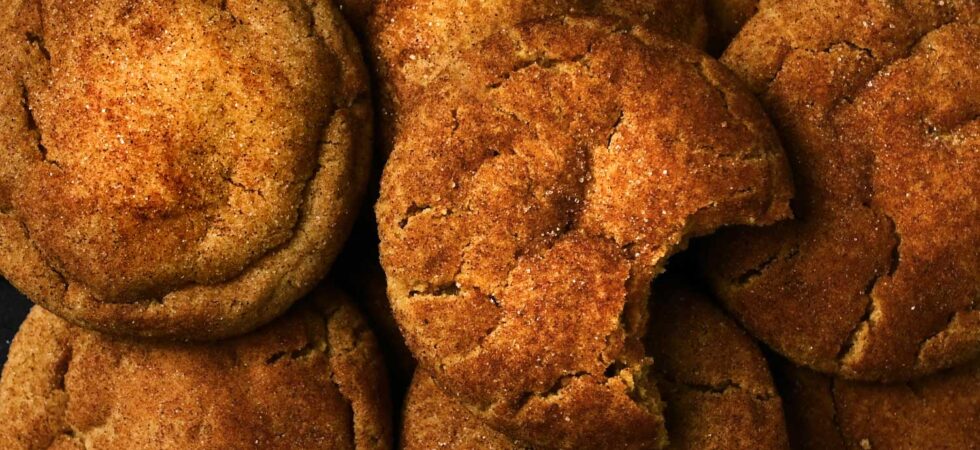
When I developed this snickerdoodle recipe, I wanted it to check all the boxes:
- Be instantly recognizable as a snickerdoodle from sight and taste;
- Have a flavorful dough that is enhanced, not overpowered by the cinnamon-sugar; and
- Be thick, soft, and chewy!
It took a while to get it right, but I am glad I didn’t give up, because these snickerdoodles are perfection!
This snickerdoodle recipe uses toasted milk powder, buttermilk powder, and cornstarch for a flavorful, tender cookie that’s delicious right out of the oven or even after a few days on your counter.
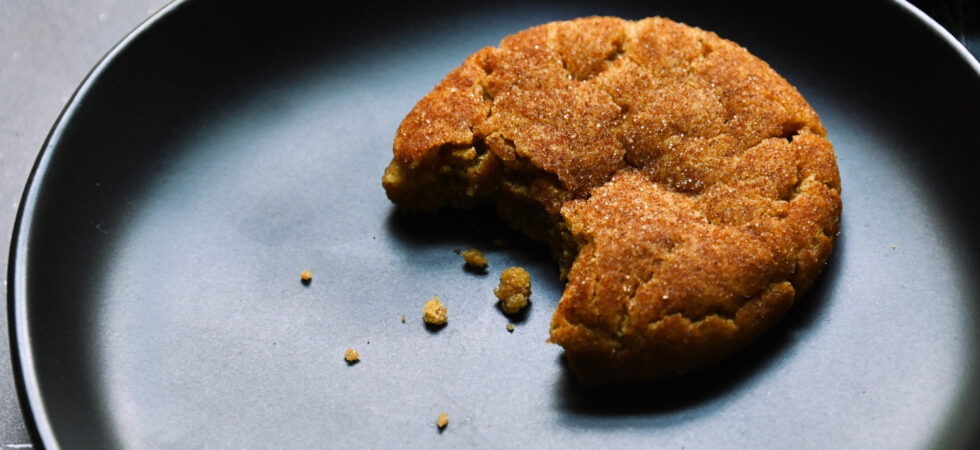
Get the Recipe: Snickerdoodles with Toasted Milk Powder and Buttermilk Powder
Ingredients
Cookie Dough
- 2 cups All Purpose Flour
- 1 teaspoon baking soda
- 1 tablespoon buttermilk powder
- 1/4 cup toasted milk powder
- 1/4 cup cornstarch
- 3/4 cup unsalted butter
- 1/2 cup unrefined, granulated sugar
- 1/2 cup packed, dark brown sugar
- 1 egg + 1 egg yolk
- 2 teaspoons vanilla extract
- 1/2 tablespoon Diamond Crystal kosher salt
Cookie Topping
- 1 tablespoon ground cinnamon
- 1/4 cup unrefined, granulated sugar
Equipment
- stainless steel or non-stick pan
- measuring Cups
- spatula
- Measuring spoons
- kitchen scale
- small bowl
- stand mixer with bowl attachment
- cookie scoop
- parchment paper or silicone baking mat
- baking sheet tray
Instructions
- First, measure out and set your butter on the counter to soften. Then, toast the milk powder in a pan on low, to medium low temperature for about 1 hour. Just like a roux, keep moving the powder around the pan so it doesn’t burn. Breakup any pieces that begin to clump together as best as you can. The powder will go from an ivory color all the way to a toasted deep golden color.
- If too much of the milk powder is sticking to the bottom of the pan and you are having trouble scraping it up, turn your heat down or remove the pan from the burner to scrape and then return it to the heating element to continue. When you achieve a warm light brown color, remove from the burner and set aside to cool.
- When the toasted powder is about room temperature, whisk together the flour, baking soda, toasted milk powder, buttermilk powder, and cornstarch. Set the flour mixture aside, measure out the sugars, and set that aside as well.
- Begin the cookie dough, by beating the butter on medium speed until it lightens and becomes fluffy. This will take between 3-5 minutes. At that point, add both the brown and granulated sugars and continue beating for another 2-3 minutes. The mixture will go from very grainy to mostly uniform in color and texture (though it won’t be completely smooth).
- At this point, scrape the butter and sugar mixture down the sides of the bowl and turn the mixer to low. Add the egg + plus yolk and mix until it’s fully incorporated. Then, add in the salt and vanilla extract and continue beating for about 30 seconds, to make sure they are mixed in pretty well.
- Next, pour in the flour mixture in small increments, to keep it from puffing out of the mixing bowl. As soon as the flour mixes in, stop the machine. Do NOT overmix. The dough should be very soft. If you overmix the dough it will toughen.
- Grab a #24, 2in (5cm) cookie scoop (it should hold roughly 2.5tbsp or 45-50g of dough). Scoop cookies onto a silicone or parchment lined baking sheet until you run out of dough. Gently roll each scoop into a ball with your palms and place it back down onto the tray. Chill the cookies in the refrigerator for 20 minutes.
- While the cookies are chilling, mix the cinnamon-sugar topping and preheat your oven to 375°F (190°C). After chilling, separate the balls onto two silicone or parchment lined baking sheets. Arrange them roughly 1 1/2-2 in (3.8-5 cm) apart. For better consistency in baking, leave the cookies for the second tray in the fridge while you prepare the first tray.
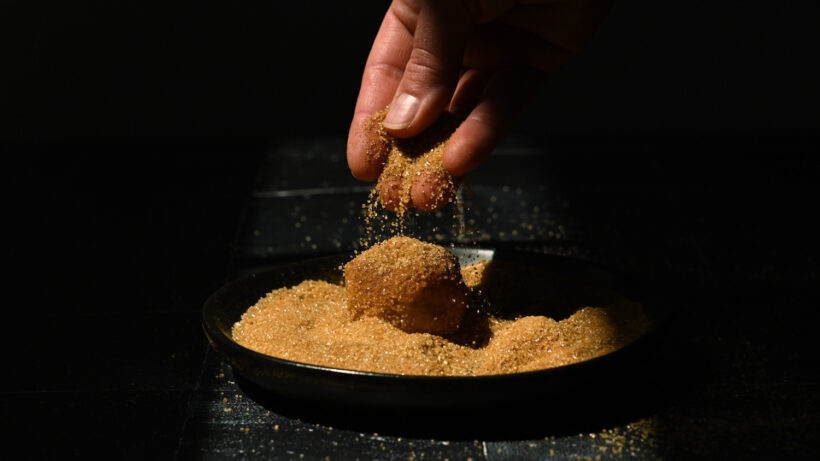
- For the first few cookies, roll the balls in your hands again until they heat enough on the outside to become tacky. Then, cover the cookies with the cinnamon-sugar topping. (see notes for topping tips).
- Place the first tray in the oven. As soon as they are in, turn the temperature down to 350°F (177°C) and bake for 10-12 minutes. When done, the snickerdoodles should be nicely and uniformly domed and the top/middle should not look wet. Let cool for 10 minutes before moving to a cooling rack.
Notes
- To speed up chilling the toasted milk powder, pour it into a different container and/or place it in the refrigerator.
- Another way to save time and, honestly, have a fun pantry staple for all sorts of baked goods, is to make 1-2 cups (100-200g) of toasted milk powder at a time. I am working on a toasted milk powder recipes series, so you’ll have plenty of goodies to make, don’t worry!
- If you only have refined, white sugar in your pantry, change the following ingredients… add 1/2tsp (2.5g) of baking powder to the dry ingredients and reduce the kosher salt to 1tsp (4.4g). (See FAQ for more information and explanation.)
- The more you roll the cookies in the cinnamon-sugar topping, the more they accumulate cinnamon and the less the sugar granules stick. To combat this, try working quickly and only cover sections once. You can also gently press the bottom of the cookies into the topping at the very end and then turn them over so the top has a fair amount of sugar on them.
- Store the snickerdoodle cookies for up to a week on the counter. You can also freeze the baked cookies for 1 month or the uncooked cookie balls (pre-cinnamon-sugar topped) for up to 3 months.
- If baking from frozen, add 1-2 minutes to the oven time.
- To reheat previously baked snickerdoodle cookies, throw them in a warm oven or microwave them on the reheat bread setting. If you don’t have that or a similar setting, use the lowest power in 10-15 second increments.
Nutrition
Frequently Asked Questions
Yep, a few things about that. For everyone who says a snickerdoodle is just a sugar cookie coated in cinnamon sugar (completely what I thought from my previous experiences), I was pleasantly surprised to be only half right. Traditionally, snickerdoodles have between 1-2 teaspoons of cream of tartar worked into the dough. It gives them a tart flavor and some extra rise not present in sugar cookies. However, a lot of people don’t like the chemical acidity that lingers after the cookie has been eaten. Thus, plenty a bakeshop leaves the cream of tartar out. Ergo, the sugar cookie with topping generalization.
In regards to this recipe. I am not a fan of cream of tartar in this application, so I substituted with buttermilk powder in my recipe.
TLDR: Both are acids, and Acid + Baking Soda = BUBBLES (rise) in baking. Unlike cream of tartar, buttermilk powder has proteins that contribute to texture as well. Buttermilk powder also has a more tangy and less tart flavor profile than cream of tartar.
Cream of Tartar:
Commercially produced cream of tartar is a byproduct of wine production. It forms inside wine barrels during the fermentation process and is scraped off and collected as a powder.
In chemical terms, cream of tartar is potassium hydrogen tartrate which is basically partially neutralized tartaric acid, a natural acid found in grapes. Tartaric acid is, in fact, naturally present in many other fruits, including tamarind, pineapples, and bananas.
Cream of tartar can be combined with baking soda and used as a leavening agent in baked goods that call for baking powder.
Buttermilk Powder:
Cultured buttermilk is what happens when the liquid left over after churning butter from cream is left to ferment. During fermentation the bacteria in milk convert lactose into lactic acid. Fresh buttermilk might be slightly tangy. But, until it’s left for 12-24 hours to ferment, the flavor we associate with buttermilk isn’t fully present. Buttermilk powder is simply dehydrated cultured buttermilk.
Buttermilk, in liquid or powder form, is combined with baking soda in the same way that cream of tartar and other acids can be mixed to create rise in baking. Not found in cream of tartar, the proteins in buttermilk powder (casein and whey) have additional benefits in baking. Casein contributes to the structure and texture of baked goods. Whey contributes to their moistness and tenderness.
Sure! If you can’t find buttermilk powder (it should be right next to the regular powdered milk in your supermarket) or you just don’t want to use it, you can absolutely substitute with 1 tsp (3.2g) cream of tartar.
If you don’t want to use either, because of their tang, I suggest you substitute with 1 tsp (5g) of baking powder. It will make sure the cookies rise correctly. This is in addition to the 1/2tsp baking powder for anyone using white (refined) sugar.
At first I used a 3/4 to 1/4 ratio of brown sugar to granulated sugar and found that the cookies didn’t spread enough. This is because brown sugar does 2 things. It reacts with the baking soda in the dough to increase rise and it promotes some gluten development which slows the spread of cookies. White sugar does neither of these.
So, I updated the cookies to a 1/2 and 1/2 ratio and was rewarded with a slightly less thick cookie, that was actually softer, because white sugar aerates better into butter creating a softer crumb.
Happy with the ratio, I moved onto flavor/texture comparisons in just the granulated sugar portion of the snickerdoodle cookie dough.
Surprisingly yes! TLDR: change the following ingredients… add 1/2tsp (2.5g) of baking powder to the dry ingredients and reduce the kosher salt to 1tsp (4.4g).
Now for the nerdy part. Not only did I experiment with different brown sugar to granulated sugar ratios, I also compared the cookies using toasted, unrefined, and refined sugar during recipe testing. While I ended up using unrefined sugar in the final recipe, I want to make sure I share all the knowledge. So, keep reading for information about refined sugar and toasted sugar.
Well, instead of instructing you lovely people to go out and buy unrefined sugar, I thought let’s science the crap out of this until I can get something closer to the final snickerdoodle recipe. Here’s what I came up with.
1. Add 1/2tsp (2.5g) of baking powder to the dry ingredients to combat spread, create more rise, and impart a softer/cakier texture in the cookie.
Why baking powder? Refined sugar, has a neutral pH. So, as far as I can tell, it had less reaction with the baking soda once I substituted raw sugar for refined sugar. Baking powder is needed to create additional chemical leavening once the baking soda and buttermilk powder do their thing. Additionally, the reaction created by baking soda and any acidic ingredients typically produce a more dense and chewy texture, while baking powder creates a lighter and airier crumb. Since my cookies were too dense and chewy already, I knew baking powder was the additional leavener I needed.
2. Reduce the kosher salt to 1tsp (4.4g) to mellow out the tartness of the buttermilk powder and the now, bit of cream of tartar (baking powder) we’ve added to the cookie. This worked like a charm. I contemplated decreasing the amount of buttermilk powder as well, but that would create more spread. And, I was already working to stop that. By adjusting the ingredient that enhances flavor, I was able to tone down the snickerdoodle without harming any chemical reactions.
And, just like that, these cookies were saved!
I will say my unrefined sugar, “pug-like, wrinkly snickerdoodles” are still more tender and flavorful than the beautifully crackled, white sugar snickerdoodles. But, they are both solid renditions I would happily make for myself or others.
So, we all know I’ve gone to the dark side on toasting different milk powders, and I thought to myself what else can I toast? Turns out you can also toast sugar! If you heat sugar granules gently enough they will undergo thermal decomposition and caramelize without melting, because these reactions are mutually exclusive from each other. Pretty cool right!? It feels like such a foreign concept, because when have you ever put sugar in an oven or saucepan without the sole intention of melting it?
What are the best things about toasted sugar:
1. The process is almost completely hands-off;
2.The result is granulated sugar that tastes like brown sugar without the added liquidity and acidity of molasses; and
3. The sugar can be used 1:1 in place of regular white sugar.
IMP NOTE: While I did use toasted sugar during recipe testing, it did not make it into the final recipe. Mostly because it’s extra work for results that weren’t much different. Here is what I learned during testing. Toasted sugar:
1. Drastically reduces chill time (see chill time FAQ): Chill times allow for butter to solidify (reduce spread). It also lets the dough better absorb the liquid ingredients (allow for a more uniform flavor and softer texture). Toasted sugar is already partially broken down from the heat, so its rate of full incorporation is less than half the time of granulated sugar. Since, this recipe only needs 20 min of chill time, it seemed unnecessary in this context.
2. Provides a lovely caramelized flavor: toasted sugar A.K.A. caramelized sugar (not caramel) takes refined or unrefined sugar and enriches its flavor and deepens the overall flavor in a recipe, much like browned butter or toasted milk powder. Since I already had toasted milk powder and some molasses flavor from the unrefined sugar, this seemed like overkill. Additionally, I did notice the toasted milk powder’s flavor overwhelmed the more subtle toasted sugar, making the sugar superfluous.
To make toasted sugar preheat your oven to 300°F (149°C) and fill a glass or ceramic baking dish with as many cups of granulated sugar as you’d like to toast, making sure that the sugar level is never under 1in (2.5cm) deep. I like to work with between 4-8 cups (.9-1.8kg) at a time for bulk batching. Place the dish on your center rack and toast for 1 hour. After that, remove the dish and stir the sugar so that the granules along the edges are moved to the center and everything is well mixed. This stops both hot spots and releases any steam and subsequent clumping.
Here’s the key, from here on out you can continue baking for as many hours as you like. Just make sure you take the dish out and stir every thirty minutes. My preferred flavor happens around 5 hours. Though, the sugar will mimic the flavor profile of unrefined sugar after an hour, you can keep going until you are happy. When you reach your end game, leave the sugar out to cool before storing. It needs to be completely cool and dry or any remaining steam could be trapped in the container with the sugar and cause clumping.
*Just because I didn’t use toasted sugar in this recipe doesn’t mean you can’t make and use it in other interesting ways! (see toasted sugar FAQ above) Use it when you don’t want to chill cookie dough forever. Or, add it to your coffee, use it in macarons, or shortbread cookies. Anything with a delicate flavor (to make the toasted sugar sing) or where a tempering of strong flavor is needed (to mellow bitter flavors). Have fun experimenting friends!
If you use the recipe as written, my preferred chill time is between 20 minutes and 2 hours, but this cookie can absolutely be scooped and baked right away.
I did test different chill times so I could report back. The times were: no chill, 20 minutes; 2 hours, 6 hours; 12 hours; and 24 hours.
Here are my thoughts…depending on which sugar you use.
No-chill: The only cookie that was perfect right from mixed was the version with toasted granulated sugar. The refined and raw sugar both needed a little bit of hydration/rest time to create a velvety soft texture and the chill time to reduce spread a bit more.
20 minutes: This chill time worked like a charm for the refined and raw sugar versions. The snickerdoodle cookies came out soft and the dough spread noticeably less for me.
2 hours: This was the maximum amount of time that I noticed any real difference in flavor and texture. If the cookies weren’t coated in cinnamon and sugar I may have observed some differences in the longer resting periods, but that’s not the cookie we are making, so no difference.
6 hours, 12 hours, and 24 hours: Sorry friends, there is nothing of note for these categories. You can absolutely still chill your scooped cookies for up to 48 hours before freezing or baking. But, there won’t be any real benefit from that other than making cookies on your own timeline. 🙂
Chilled butter is straight out of the refrigerator. Softened butter, has been left at room temperature long enough that you can press into it and it indents slightly. Softened butter is not spreadable and should be between 62-68°F (17-20°C) if you check its temperature. Room temperature butter is spreadable. If you press down on room temperature butter, you finger will immediately sink down and begin melting it.
I like to toast the milk powder until it’s the same medium umber color that milk solids get when you brown butter. So, I suggest using that as a benchmark. Technically, however, anything between ochre and the medium umber is good-to-go. The darker the color the more nutty and caramelized flavor you will have. The least amount of time I would spend toasting is probably around 30 minutes.
Heck yes you can. As I said in the notes, making a bulk batch of this is a game-changer. In fact, it will last up to 6 months in a sealed container. Seriously, if you are going to spend an hour doing this, bulk it baby!
Yes, but I’d only suggest using one of them. There other ways of toasting powdered milk without needing specialty equipment are:
1. Adding powdered milk to a sauté pan where you are already browning butter – When the butter just melts, add the powdered milk and continue as normal. This is a great way to boost flavor and get things caramelizing fast. However, you can really only use what’s needed for a single recipe, so it’s not bulk or pantry friendly. Browned butter lasts for about a week in the refrigerator if you want to make it ahead of time.
2. Using a microwave – I’ve heard mixed results for this option and haven’t tried it personally for that reason. According to other blogs you can cook (1 cup) 100g of powdered milk in 30 second increments for 10 minutes and have a golden milk powder in 1/6 of the time as dry toasting it on the stove top. Make sure to break up clumps between rounds.
3. Baking it in the oven – Heat your oven to 300°F (149°C). Spread the powdered milk onto to a parchment paper covered baking tray and place it in the oven for between 6-9 minutes. You’ll need to stir the toasting powdered milk at least twice while it bakes. And, you guessed it, break up the clumps as you go.
You are welcome to use any of these options, however, the first one would be my preferred choice. Why you ask? Well, I am a HUGE control freak and knowing how quickly this ingredient burns makes me never want to take my eyes off of it. If I’m distilling the cooking time down from 1 hour to only 10 minutes, I want to be watching the milk powder cook the whole time.
Oh Yeah you can! Just know, brown butter loses about 25% of its liquid volume as you cook it. If a recipe calls for brown butter and you want to skip that step, use roughly 75% of the needed butter.
For reference, every 8 tablespoons (1 stick or 113.3g) of butter you would need about 1 tsp (2.5g) of toasted milk solids to get the same effect as browning butter. Do you see now, why this dough has so much more flavor?
To boost the brown butter flavor and not just recreate brown butter, I suggest using somewhere between 1-2 tablespoons (6-12.5g) of toasted milk powder per stick of butter (8 tablespoons or 113.3g).
OF NOTE: This is only a good substitute in cases where the recipe would traditionally start with creaming butter and sugar, but was updated to accommodate melted, browned butter. Some recipes may use melted butter or liquid brown butter on purpose to act as a crisping agent. In those cases, I’d say follow the instructions for the butter and add the toasted milk powder later by measuring with your heart.

