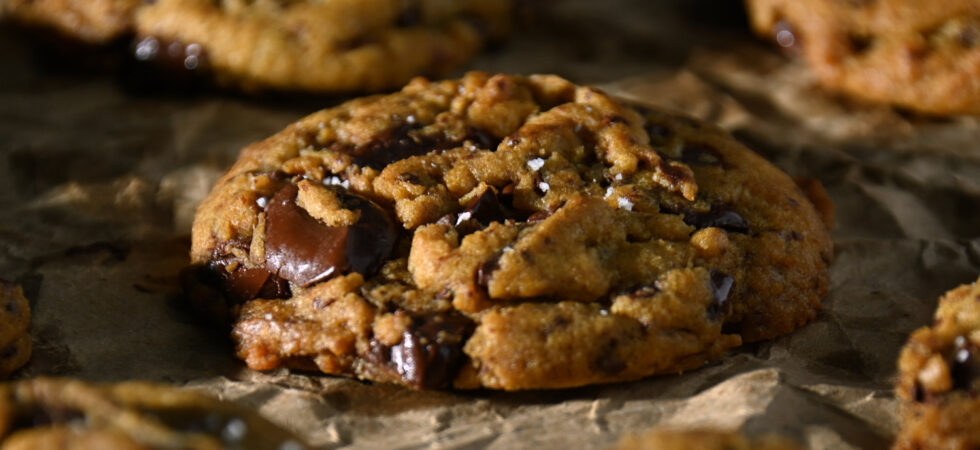
The Best Chocolate Chip Cookies Use Toasted Milk Powder
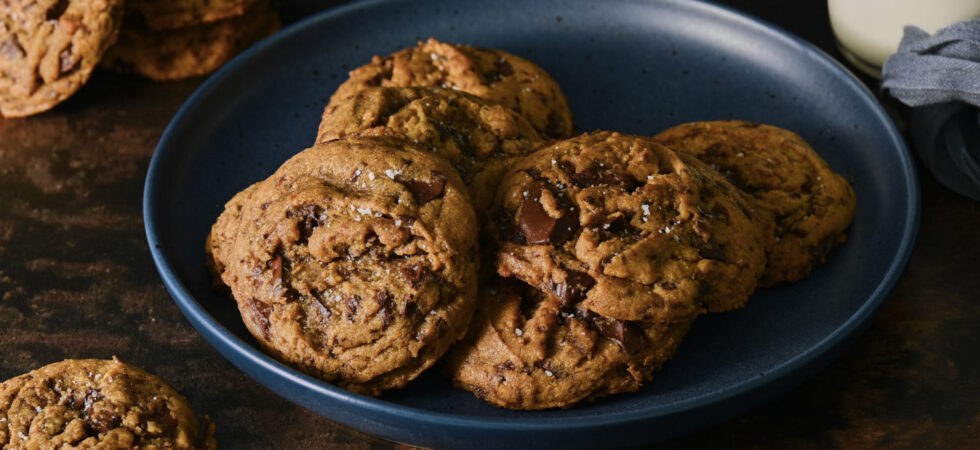
Toasted milk powder makes the base of these chocolate chip cookies so good you can skip the chocolate and make a chipless cookie that doesn’t feel unfinished. It’s like when BBQ is served it without sauce. That’s when you know it’s good.
And, I know what you’re thinking, “toasted milk powder sounds weird.” Seriously, hear me out. When you brown butter, you are toasting the milk solids for that nutty, caramelized flavor. Now, butter is only comprised of 1-2% milk solids, so a typical cookie recipe only has like 1/2 tablespoon (3-5 grams) of milk solids in it. This recipe has between 4-7 times that. I’m not kidding when I say these change the game.
I do use a few specific ingredient choices (brown butter, baking soda, and an extra egg yolk) to make my chocolate chip cookies gooey on the inside with a light crisp on the edges. But, flavor, dear readers, is where these babies shine. The combination of both toasted (caramelized) milk powder – think dulce de leche flavor – and untoasted buttermilk powder – for a gentle acidity – give these cookies an amazing depth of flavor without being overly sweet.
Get the Recipe: Chocolate Chip Cookies with Toasted Milk Powder
Ingredients
- ¼ cup powdered milk, toasted
- 2 cups all purpose flour
- 2 tablespoons powdered buttermilk
- 1 teaspoon baking soda
- 12 tablespoons unsalted butter, softened
- ¼ cup granulated sugar
- ¾ cup brown sugar, packed
- ½ tablespoon kosher salt
- 1 egg + 1 egg yolk
- 2 teaspoons vanilla extract
- 12 oz bittersweet or semi-sweet chocolate bars, chopped
Equipment
- sauté pan or skillet
- wood or silicone spatula
- kitchen scale (optional)
- mixing bowl
- stand mixer or hand mixer
- parchment paper or silicone baking mat
- #24 cookie scoop (optional)
Instructions
- First, measure out and set your butter on the counter to soften. Then, toast the milk powder in a pan on low, to medium low temperature for about 1 hour. Just like a roux, keep moving the powder around the pan so it doesn’t burn. Breakup any pieces that begin to clump together as best as you can. The powder will go from an ivory color all the way to a toasted deep golden, light brown color.
- If too much of the milk powder is sticking to the bottom of the pan and you are having trouble scraping it up, turn your heat down or remove the pan from the burner to scrape and then return it to the heating element to continue. When you achieve a warm light brown color, remove from the burner and set aside to cool.
- When the toasted powder is about room temperature, whisk together the flour, baking soda, toasted milk powder, and buttermilk powder. Set the flour mixture aside and measure out the sugars. At this point, you can also chop up your chocolate and set it aside.
- Begin the cookie dough, by beating the butter on medium speed until it lightens and becomes fluffy. This will take between 3-5 minutes. At that point, add both the brown and granulated sugars and continue beating for another 2-3 minutes. The mixture will go from very grainy to mostly uniform in color and texture (though it won’t be completely smooth).
- At this point, scrape the butter and sugar mixture down the sides of the bowl and turn the mixer to low. Add the egg + plus yolk and mix until it’s fully incorporated. Then, add in the salt and vanilla extract and continue beating for about 30 seconds, to make sure they are mixed in pretty well.
- Next, pour in the flour mixture in small increments, to keep it from puffing out of the mixing bowl. As soon as the flour mixes in, stop the machine. Do NOT overmix. The dough should be very soft. If you overmix the dough it will toughen. With a sturdy spatula, mix in the chocolate chunks until just combined.
- Grab a #24, 2in (5cm) cookie scoop (it should hold roughly 2½ tbsp or 45-50 g of dough). Scoop cookies onto a silicone mat lined baking sheet and cover them with your prefered cling wrap. Chill the dough for 6+ hours for best results. (See notes on chill times)
- After resting the dough, preheat your oven to 375°F (190°C). When it comes to temperature, arrange your cookies roughly 1½-2 in (3.8-5 cm) apart and place them in the oven. As soon as they are in, turn the temperature down to 350°F (177°C) and bake for 10-12 minutes. The edges of the cookies should just start to brown and the middle should be completely puffed and not look wet. Let cool for 5 minutes before moving to a cooling rack.
Notes
- To speed up chilling the toasted milk powder, pour it into a different container and/or place it in the refrigerator.
- Another way to save time and, honestly, have a fun pantry staple for all sorts of baked goods, is to make 1-2 cups (100-200g) of toasted milk powder at a time.
- Store the chocolate chip cookies for up to a week on the counter. You can also freeze the cookies baked (for 1 month) or frozen (up to 3 months).
- If baking from frozen, add 1-2 minutes to the oven time. To reheat previously baked chocolate chip cookies, throw them in a warm oven or microwave them on the reheat bread setting. If you don’t have that or a similar setting, use the lowest power in 10-15 second increments.
Nutrition

Frequently Asked Questions
You’re in luck! Because this recipe was really developed around how the dough tastes, so these are also excellent cookies without the chocolate chips or chunks. They have a lovely caramelized flavor and subtle tang that really shines without the chocolate, IMO.
It’s really important to me that all elements of a recipe are flavored and balanced individually. It makes the end result so much better and allows for greater flexibility with recipes.
I like to toast the milk powder until it’s the same medium umber color that milk solids get when you brown butter, so I suggest using that as a benchmark. Technically, however, anything between ochre and the medium umber is good-to-go. The darker the color the more nutty and caramelized flavor you will have. The least amount of time I would spend toasting is probably around 30 minutes.
Yes, but I’d only suggest using one of them. Three other ways of toasting powdered milk without needing specialty equipment are:
1.) Adding powdered milk to a sauté pan where you are already browning butter – When the butter just melts, add the powdered milk and continue as normal. This is a great way to boost flavor and get things caramelizing fast. However, you can really only use what’s needed for a single recipe, so it’s not bulk or pantry friendly. Browned butter lasts for about a week in the refrigerator if you want to make it ahead of time.
2.) Using a microwave – I’ve heard mixed results for this option and haven’t tried it personally for that reason. According to other blogs you can cook (1 cup) 100g of powdered milk in 30 second increments for 10 minutes and have a golden milk powder in 1/6 of the time as dry toasting it on the stove top. Make sure to break up clumps between rounds.
3.) Baking it in the oven – Heat your oven to 300°F (149°C). Spread the powdered milk onto to a parchment paper covered baking tray and place it in the oven for between 6-9 minutes. You’ll need to stir the toasting powdered milk at least twice while it bakes. And, you guessed it, break up the clumps as you go.
You are welcome to use any of these options, however, the first one would be my preferred choice. Why you ask? Well, I am a HUGE control freak and knowing how quickly this ingredient burns makes me never want to take my eyes off of it. If I’m distilling the cooking time down from 1 hour to only 10 minutes, I want to be watching the milk powder cook the whole time.
Heck yes you can. As I said in the notes, making a bulk batch of this is a game-changer. In fact, it will last up to 6 months in a sealed container. Seriously, if you are going to spend an hour doing this, bulk it baby!
The short answer is: yes.
The long answer is: toasting (caramelizing) buttermilk powder dampens the tangy flavor it starts with. It is also more difficult than toasting regular powdered milk. It sticks together more when it cooks and still takes an hour to make.
I did a number of versions of this chocolate chip cookie with different ratios of toasted and untoasted powdered buttermilk to regular toasted milk powder. And, all of the versions with the toasted buttermilk powder just didn’t shine in the same way.
Don’t get me wrong, you can absolutely make and keep toasted buttermilk powder in your pantry for a number of applications, but this just wasn’t one of them to me.
Yes. If you can’t find buttermilk powder (it should be right next to the regular powdered milk) in your supermarket or you just don’t want to use it, leave it out.
I am not a sweet-toothed girly so I prefer to give my desserts a bit of bitterness, earthiness, or acidity to balance the sugar. The buttermilk powder creates that balance for me. The toasted milk powder in these chocolate chip cookies adds flavor, nuttiness, and interest. While the buttermilk powder and bittersweet chocolate elevate them from sugar bomb to, “I literally can’t stop eating them, someone take them away!”
Oh Yeah you can! Just know, brown butter loses about 25% of its liquid volume as you cook it. If a recipe calls for brown butter and you want to skip that step, use roughly 75% of the needed butter.
For reference, every 8 tablespoons (1 stick or 113.3g) of butter you would need about 1 tsp (2.5g) of toasted milk solids to get the same effect as browning butter. Do you see now, why this dough has so much more flavor?
To boost the brown butter flavor and not just recreate brown butter, I suggest using somewhere between 1-2 tablespoons (6-12.5g) of toasted milk powder per stick of butter (8 tablespoons or 113.3g).
OF NOTE: This is only a good substitute in cases where the recipe would traditionally start with creaming butter and sugar, but was updated to accommodate melted, browned butter. Some recipes may use melted butter or liquid brown butter, on purpose, to act as a crisping agent. In those cases, I’d say follow the instructions for the butter and add the toasted milk powder later by measuring with your heart.
Chilled butter is straight out of the refrigerator. Softened butter, has been left at room temperature long enough that you can press into it and it indents slightly. Softened butter is not spreadable. Room temperature butter is. If you press down on room temperature butter, you finger will immediately sink down and begin melting it.
My preferred chill time was 24 hours, but I think this cookie shines, as intended, as soon as 6 hours.
I did, as a glutton for punishment and cookies, test different chill times so I could report back. The times were: 20 minutes; 2 hours, 6 hours; 8 hours; 12 hours; 18 hours; and 24 hours. Between those times, the chocolate chip cookies developed a much softer and less grainy texture.
This is because the flour had time to hydrate and the sugar dissolved into the dough more. Longer chill time also affected the flavor favorably at the 6 hour and 24 hour mark. In between those times, there wasn’t a discernible difference. Here are some quick and dirty notes:
– 20 minutes: The flavor tastes just like the dough as mixed. The texture is chalky and cakey.
– 2 hours: The flavor is much the same as at 20 minutes. The texture is softer but is still noticeably granular.
– 6 hours: The flavor is definitely deeper at this point. The texture is also softer, eliciting a nice gooey center when baked.
– 12 hours: Honestly, not a big difference between 6 and 12 hours. The center of the cookie is a little bit softer.
– 18 hours: Flavor is still about the same as at 6 hours. I thought this was peak texture until I had the 24 hours chilled cookies.
– 24 hours: Holy wow! The flavor is concentrated in the best way possible and is noticeably different from the 6 hour cookies (finally). And, the texture is velvety and gooey. The only granularity comes from the crispy edges.
Bittersweet chocolate is, as described, more bitter than semisweet chocolate. This is due the to the percentage of cacao in the chocolate. Bittersweet chocolates tend to have between 70-74% cacao. Semisweet chocolate, has a cacao content around 60%.
Yes, of course. If you love a good milk chocolate to sweeten the proverbial cookie deal. Go for it! I can definitely see myself using an even less sweet dark chocolate (between 75-80% cacao).
There is also a large chocolate to dough ratio in this recipe. If you are feeling like less is more when you are chopping, use less.
There may be affiliate links in this post. A Little Spoon, LLC is a participant in affiliate advertising programs designed to help content creators earn fees by linking to affiliated sites.
Hi, I made this recipe once and I loved it! But I was wondering, do you use light brown sugar or dark brown sugar ?
Hi Alina,
TLDR: I use whatever I have in my house. 🙂
Explanantion: The difference in molassess between the two ingredients is negligable in this recipe. If you want a bit more density and moisture retention and caramelized flavor, use dark brown sugar. If you want a slightly lighter cookie in density and flavor, use light brown sugar.
I will never use another chocolate chip cookie recipe again!!! I want to tattoo the recipe on my arm so I never loose it!! I specifically bought the milk powder and buttermilk powder just for this recipe and im so grateful that I did !! I’m 60 years old and I’ve eaten a lot of chocolate chip cookies over the years and always thought wow these are good , UNTIL this recipe THANK YOU, THANK YOU, THANK YOU for sharing this recipe I can’t wait to put my cookie boxes together and hearing the feedback on these cookies. The Best is an understatement these check all the boxes! Chewy center , gooey chocolate, crispy edges simply amazing !!
Wow! Thank you so much for your review. It made my whole year! 🙂
Hi. I haven’t made this recipe yet, but I was wondering if you have a preferred brand of powdered milk. Also, if you toast the powdered milk a cup or two at a time, how do you store it and how long will keep? Thank you
Thank you for your questions! 1. I do not have a preffered brand of powdered milk. I’ve used several different ones over the years with no noticeable difference. I do prefer whole milk powder over skim, because I like the touch of richness it provides, but even that distinction isn’t huge. 2/3. I highly recommend toasting a larger batch and keeping it ready-to-go in your pantry! Store it in any air tight container for up to the “best by date” on the original powdered milk’s packaging. I haven’t experienced any decline in texture or flavor in the toasted milk powder myself, nor have others in my community. Make sure to write the date on whatever you store it in, so you can keep track. It lasts so long, that it’s easy to forget when you made it. I hope you like the cookies! 🙂
Do you use King Arthur buttermilk powder or Saco cultured buttermilk blend? Thank you so much
Hi Mary!
I use Saco cultured buttermilk powder, because I like that it’s a little tangier and it reacts slightly better with the leaveners, but either will work. Use what you have! 🙂
The depth of flavor on these cookies is incomparable. This is my favorite chocolate chip cookie recipe of all time.
Wow! I’m honored. Thank you for leaving a such a wonderful comment! 🙂
These are amazing, love the addition of the toasted milk powder and the buttermilk powder! I added in toasted black walnuts and pecans, I enjoy the addition of something like this in a cookie to break up all the chocolate. I now also have a container of toasted milk powder in the pantry, just waiting for any recipe I want to add it to!
Thank you! Your mix-in choice is impeccable. I have several other recipes that use toasted milk powder and a resource post to help spark some creative uses. Happy Holidays!
if i’m not adding the buttermilk powder, what can i use to substitute it?
Great question! If you don’t want to use buttermilk powder, feel free to leave it out. No substitution necessary.
I don’t have a sweet tooth, so I prefer to give my desserts a bit of bitterness, earthiness, or acidity to balance the sugar. The cookies might spread a tad bit more without the additional acidity, but if you are really worried about that, add 1-2 tbsps. (7.8-15.6g) more AP flour. Enjoy!
Hi is it supposed to be half a tablespoon of salt ?
Hi Jemilah,
Yes, it’s really 1/2 tbsp (5g) of kosher salt. The most important part of that is the weight in grams. By weighing your salt, you make sure you have the correct flavor balance. For a little extra information, I specifically use Diamond Crystal Kosher Salt which has a looser, flakier structure than other koshers salts, like Morton. Diamond Crystal is actually 30% less salty than Morton. So, if you use the same 1/2 tbsp of Morton salt you are actually getting an extra 1/2 tsp of salt than if you used 1/2 tbsp of Diamond Crystal kosher salt. This is why I am pro-kitchen scale and I try to give metric measurements. Measuring by volume the way we do in the US can make it really easy to be inconsistent from person to person. It’s probably why so many recipes call for salting to taste.
I apologize that this information isn’t in the ingredient list or FAQs, but the algorithm penalizes bloggers who change recipes after they rank in the top 10. If I went in now and updated everything, there’s a very good chance I would fall down the rankings and less people would see this recipe. This was a great question. Thank you for asking it and allowing me to update my post without hurting my blog.
Hope this helps!
These were amazing! I was a bit scared to try toasting or roasting the milk powder, so I threw a few cups in a bag and cooked it sous vide at 200f for 16 hours, got a nice deep and even brown lump that broke up easy enough through a sieve. Can’t wait to try some other recipes with it!
I never considered a sous vide. That’s genius! I have several other recipes that use toasted milk powder: the s’mores ice cream has a no-churn toasted milk powder ice cream base; the snickerdoodles also have toasted milk powder in them; and for a super easy dessert, the avalanche bars also have it. If you want some more ideas and guidelines on how much toasted milk powder to use, I have a general guide too! Good Luck! Have Fun!
Hi!
Would it be possible to substitute the milk powders for a kind of non-dairy milk? And what would be the best substitutes for both the regular milk powder and the buttermilk powder the recipe calls for?
Thank you!
Hi Marie-Aimée.
I haven’t made these with non-dairy milk powder, but I don’t see why you couldn’t replace them! I would suggest using coconut milk powder or cashew milk powder, for the higher fat content (playing with flavors could be interesting here too). And, don’t worry. You can toast plant-based milk powders; it should only take 15-20 minutes. Check out my Ultimate Guide to Toasted Milk Powder for plant-based milk powder instructions.
Of note: the cookies might be a tad sweeter and may also spread a bit more, since the buttermilk powder adds some tartness and a little oomph to the baking soda. If you want to account for that loss, consider adding cream of tartar to the recipe. Just 1 tsp (3.2g) alongside a 1:1 replacement of the milk powders.
Let me know how it goes! I’d love to know how this variation turns out. 🙂
There are many sizes of eggs, could you perhaps give the weight in grams? Thank you.
Hi! You are going to want between 65-70g for the egg + egg yolk. I use “Large” Eggs if that’s helpful.
Lately I have been thinking about listing grams for everything (including higher viscosity liquids and whole items, like eggs) to make consistency even more attainable. Your request just reinforced that notion. Thank you for being a part of positive changes to this platform! 🙂
Seems interesting, but is there no liquid in the recipe? And what is the picture, is that how the toasted milk powder looks? Mine is a lot lighter in colour.
Hi! Thanks for submitting your questions. There is enough liquid in the butter, sugar, eggs, and vanilla for these cookies. No other or additional liquids needed. And, yes, that is the color I like my toasted (dairy) milk powder. The longer you toast the warmer and darker in color it will get. If you pop over to the toasted milk powder resource post, you can see a picture I took with varying shades of toasted milk powder. If you have any other questions, I’m happy to help!
Hi !
Can you brown the butter AND use toasted milk powder ?
Mel, I am so sorry I missed your question for so long.
Yes, you can brown the butter AND use toasted milk powder, but you will need to make some small adjustments to the recipe:
1. Butter can only brown when the water evaporates completely out of it. Since butter is 15% water, you’ll need to add 1.5tbsp or 22.5ml of liquid back into the mix around the time you add in the eggs and vanilla. I recommend using milk.
2. To keep the texture of the cookies as similar as possible, put your browned butter into the fridge for about 45 minutes, until it’s the same consistency as softened butter. Then cream the butter and sugar together, just like you would have normally.
Fair warning, there will be a little bit of a textural difference. Most likely a tad bit more spread and slightly denser cookie. But I think they could still be really good. 🙂
For your future baking reference… If you’d like to change a recipe from softened to browned butter add 1 tablespoon (14-15g) of liquid for every 1/2 cup (8 tablespoons/113.5g) of browned butter you use. Good Luck!
I’ve made these two times so far and they are so delicious!! My favorite chocolate chip cookie recipe ever! 10/10
These cookies are so good, my wife loves cookie dough and she said this dough tasted like Christmas, it was simply and easily followed. These will now be a staple in my baking repertoire.
Thank you! I’m so glad you like them!