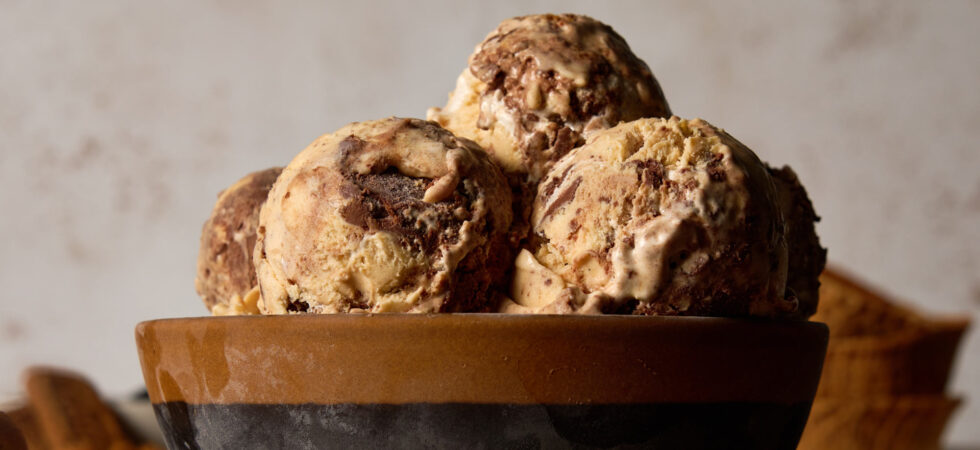
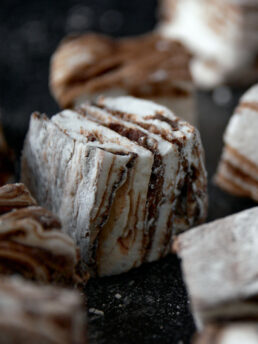
S’mores Ice Cream (No-Churn)
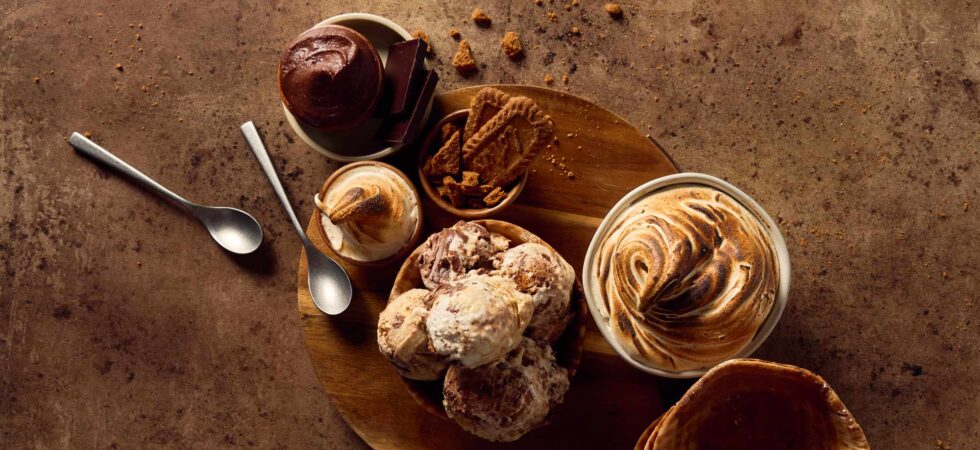
This no-churn s’mores ice cream was another daydream I could not shake from my head. It started with me wanting to make and roast marshmallow fluff, because of course you should roast it. Then, that dominoed into my newest obsession, toasted milk powder, when I realized that ice cream flavored with toasted milk powder tastes kind of like a graham cracker crust. And, where there is marshmallow and graham crackers, you know chocolate will be around to the party shortly.
I figured, “What can it hurt to see if all of these ingredients play well in the sandbox?” Let me tell you, it’s a home-run. There are a lot of steps in this recipe, but don’t let that scare you or keep you from the ball game. None of them are very difficult. And, the treat at the end is simply magical.
Get the Recipe: S’mores Ice Cream
Ingredients
Toasted Marshmallow Fluff
- 1 egg white
- ⅛ teaspoon cream of tartar
- ¼ cup light corn syrup
- ¼ cup granulated sugar
- 2 tablespoons water
- ⅛ teaspoon kosher salt
- ½ teaspoon vanilla extract
Chocolate ganache
- 4 oz heavy whipping cream (double cream)
- ¼ teaspoon espresso powder
- ½ tablespoon golden syrup, (or honey)
- 2 oz 72% dark chocolate, chopped from a bar
- 2 teaspoons 10g butter, softened
Toasted Milk Powder Ice Cream
- ⅔ cup sweetened and condensed milk, (½, 14oz can or 198g)
- 1 tablespoons toasted milk powder
- ½ teaspoon vanilla extract
- ⅛ teaspoon kosher salt
- 1 cup heavy whipping cream (double cream)
S'mores Ice Cream Assembly
- roasted marshmallow fluff
- chocolate ganache
- 10 Biscoff cookies, roughly chopped
- toasted milk powder ice cream base
Equipment
- 1 stainless steal sauté or sauce pan
- 1 flat wooden spatula
- 1 kitchen scale optional
- 1 food or candy thermometer able to reach 240℉ (115.5°C)
- 1 Small Sauce Pot
- 1 Stand mixer with whisk attachment
- 2 spatulas
- 1 cutting board
- 1 chef knife
- 1 Whisk
- 1 ,8.5 x 4.5 x 2.5 in (21.6 x 11.4 x 6.4 cm) loaf pan or some other 6cup / 1.4L container
Instructions
Recipe components are in chronological order…
Toasted Milk powder* (Skip if you already have this ingredient)
- *This recipe only requires 1 tablespoon of toasted milk powder. Unfortunately, making any amount is a labor of love. So, I suggest making at least 1 cup (100g) of toasted milk powder at a time and keeping it in your pantry for later use. I’ve provided other recipes that use toasted milk powder in the FAQ section to save you from needing to search! 🙂
- Now that we have established that, add powdered milk to a pan on low, to medium low temperature for about 1 hour. Just like a roux, keep moving the powder around the pan so it doesn’t burn. Breakup any pieces that begin to clump together as best as you can. The powder will go from an ivory color all the way to a toasted deep golden color.
- If too much of the milk powder is sticking to the bottom of the pan and you are having trouble scraping it up, turn your heat down or remove the pan from the burner to scrape and then return it to the heating element to continue. When you achieve a warm light brown color, remove from the burner and set aside to cool. This will later be added to the toasted milk powder ice cream.
Roasted Marshmallow Fluff
- First, add the egg white and cream of tarter to a stand mixer and begin mixing on a med-low setting. Then, add the sugar, corn syrup, and water to a small sauce pot and give it a quick stir to combine. Turn the burner to between medium-high and let the mixture heat up until most of the sugar is melted and the syrup begins to bubble. (Do NOT stir the mixture once the heat is on. Too much agitation by outside objects could make the syrup seize)
- Turn the heat higher a bit at a time to bring the syrup to 240°F (115.5°C) Once reached, immediately move the pan from the burner.
- Keep an eye on the egg white while the syrup heats. It should have increased in volume and become an opaque white. You should be able to visibly see individual bubbles in the whipped foam. Texturally, you are looking for what would be just before soft peaks. Switch on the stand mixer to the lowest setting and very slowly pour the HOT syrup into the mixer.
- When combined, you can begin turning up your mixer to a higher speed. Let your mixer run until the bubbles disappear into a glossy and thick, yet slightly soupy, viscosity. As the mixer incorporates air into the marshmallow fluff it will increase in volume even more.
- Around the time that the fluff stays mostly inside the whisk attachment when you lift the stand mixer head, and only slightly ribbons down, add the vanilla extract and the salt. Mix until just combined and then begin roasting the fluff with a butane torch. To do this, I simply lift the stand mixer’s head up, torch the fluff caught there, lower the whisk, turn on the mixer for 5-10 seconds at medium speed, and then repeat the process until you are happy with the fluff’s flavor (see FAQ on flavor) and it has whipped to stiff peaks. The marshmallow fluff will go from white to a lightly beige/gray color and will have flecks of char studding throughout. when done, set aside for assembly and cooling.
Ganache and Biscoff Mix-ins
- For the ganache, chop the chocolate into small pieces and place them in a medium sized bowl. Then, heat the milk, golden syrup, and espresso powder until they just begin to simmer (around 180°F or 82°C). Pour the heated liquid over the chocolate and let it sit for 30-60 seconds. Then, whisk until all of the chocolate has fully melted. Add in the softened butter and mix again, until the ganache becomes glossy and creamy. Set Aside.
- Chop up the Biscoff cookies into large chucks and set aside.
Toasted Milk Powder No-Churn Ice cream
- Time for the ice cream. Use a hand or stand mixer to combine the sweetened and condensed milk, toasted milk powder, vanilla, and salt. Then add in the heavy cream and whip everything into into soft peaks.
S'mores Ice Cream Assembly
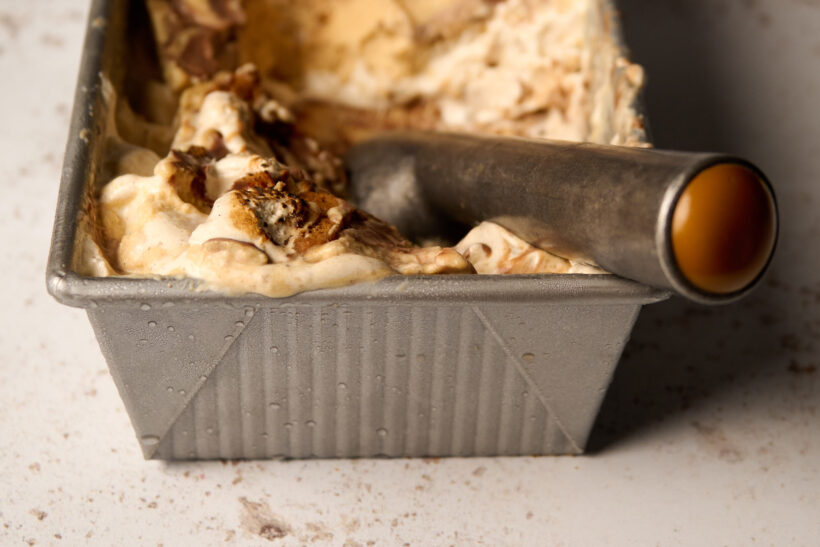
- Now you are ready to swirl the toasted milk powder ice cream base, roasted marshmallow fluff, crumbled Biscoff cookies, and dark chocolate ganache into a final container to freeze.
- To do this, add about half of the ice cream base and marshmallow fluff to an 8.5 x 4.5 x 2.5 in (21.6 x 11.4 x 6.4 cm) loaf pan. I know this sounds weird, but I’ve had the best mixing results by taking my index fingers and swirling them around whipped cream and fluff until I have a nice ribbon of fluff throughout the cream. Then spoon half of your ganache and Biscoff cookie pieces, on top of the cream and fluff and use a long utensil like a chopstick or offset spatula to gently swirl the ganache and base together. The point is to spread it around and create marbleization not mix it in. Less is more. Repeat with the base and fluff and then ganache and cookies once more, using the other half of each component. If you have any Biscoff cookie crumbs left, add them to the very top of the ice cream.
- Once layered and ready, place the no-churn s'mores ice cream into your freezer for at least 6 hours to harden. Scoop when frozen and enjoy.
Notes
- This recipe fills an 8.5 x 4.5 x 2.5 in (21.6 x 11.4 x 6.4 cm) loaf pan with a volume of 6 cups (1.4L). So, if you want to use a different vessel or insulated ice cream container, just make sure it can hold at least that much.
- Make sure whatever thermometer you are using for the marshmallow fluff is well cleaned and fully dry before putting it in the syrup. If you are using a candy thermometer, attach it before you turn on the burner.
- If you want to use purchased marshmallow fluff instead of making it, do it!
- For extra toasty flavor: When the marshmallow fluff is close to stiff peaks, torch the fluff for a few more rounds and put the mixer on the slowest setting for 5-10 seconds between rounds. The roasted bits will stay more intact in the fluff. YUM!
- If you don’t have access to golden syrup or some type of invert sugar syrup, you can use honey or agave.
- The ice cream texture is its creamiest/freshest within 2 weeks of making it. However, it can last as long as 1 month in the freezer before developing freezer burn and/or stale mouthfeel.
Nutrition
Frequently Asked Questions
No-churn ice cream is a simple and convenient substitute to a traditional custard-based ice cream. It combines whipping cream, sweetened condensed milk, and a variety or flavorings or mix-ins to customize it. The resulting mixture is whipped to incorporate air and then frozen until it reaches a creamy and scoopable consistency.
As its name suggests, no-churn s’mores ice cream can be made without an ice cream maker, which “churns” custard-based ice creams to both freeze and incorporate air into the mixture.
No-churn ice cream recipes rely on the high-fat content of the heavy (double) cream and the emulsifying properties of sweetened condensed milk to create a smooth and creamy textured ice cream.
The fat in the cream provides richness, while the sugar in the condensed milk acts as a stabilizer and lowers the freezing point of the mixture, reducing the formation of large ice crystals (creaminess).
While the absence of eggs and the churning process in no-churn ice cream does result in a slightly different texture and higher melting point (i.e. it thaws faster) compared to custard-based ice cream, the combination of high-fat content, sugar, and air incorporation allows no-churn ice cream to work as an acceptable replacement.
I like to toast the milk powder until it’s the same medium umber color that milk solids get when you brown butter, so I suggest using that as a benchmark. Technically, however, anything between ochre and the medium umber is good-to-go. The darker the color the nuttier and more caramelized flavor you will have. The least amount of time I would spend toasting is probably around 30 minutes.
Heck yes you can. As I said in the notes, making a bulk batch of this is a game-changer. In fact, it will last up to 6 months in a sealed container. Seriously, if you are going to spend an hour doing this, bulk it baby!
Yes, but I’d only suggest using one of them. There other ways of toasting powdered milk without needing specialty equipment are:
1. Adding powdered milk to a sauté pan where you are already browning butter – When the butter just melts, add the powdered milk and continue as normal. This is a great way to boost flavor and get things caramelizing fast. However, you can really only use what’s needed for a single recipe, so it’s not bulk or pantry friendly. Browned butter lasts for about a week in the refrigerator if you want to make it ahead of time.
2. Using a microwave – I’ve heard mixed results for this option and haven’t tried it personally for that reason. According to other blogs you can cook (1 cup) 100g of powdered milk in 30 second increments for 10 minutes and have a golden milk powder in 1/6 of the time as dry toasting it on the stove top. Make sure to break up clumps between rounds.
3. Baking it in the oven – Heat your oven to 300°F (149°C). Spread the powdered milk onto to a parchment paper covered baking tray and place it in the oven for between 6-9 minutes. You’ll need to stir the toasting powdered milk at least twice while it bakes. And, you guessed it, break up the clumps as you go.
You are welcome to use any of these options, however, the first one would be my preferred choice. Why you ask? Well, I am a HUGE control freak and knowing how quickly this ingredient burns makes me never want to take my eyes off of it. If I’m distilling the cooking time down from 1 hour to only 10 minutes, I want to be watching the milk powder cook the whole time.
If you want to read more about toasted milk powder, check out my resource post about it! The Ultimate Guide to Toasted Milk Powder
A hand mixer will work perfectly fine for this no-churn s’mores ice cream recipe. I would be remiss, however, if I did not mention two things to consider:
1. It will take longer as a hand mixer’s speed and power are less than a stand mixer.
2. For the marshmallow fluff YOU MUST BE FAR MORE CAREFUL with the butane torch if you are using a hand mixer. Make sure you never direct the torch towards your hand. Instead remove the mixer and toast the fluff in your bowl. Make sure the bowl you are using is metal and you have some kind of glove on if you need to hold the bowl while mixing. It will get hot because of metal’s conductivity. Please be safe when using open flame in your kitchen.
If you over mix eggs whites, the proteins will crowd and “weep”, mostly water as they destabilize. Here’s the egg white circle of life:
1. The foam created from whisking will go from large translucent bubbles to small opaque ones.
2. The volume will increase and the egg white foam will get visibly glossy as the bubbles get smaller and form soft peaks.
3. The volume will continue to increase as the egg white proteins become more structured and form stiff peaks.
4. The structure will break down and the bubbles will once again begin enlarging. The foam will turn grainy and matte and you will see foam floating around on top the liquid pushed out of the foam structure.
If you see signs of bubbles or graininess immediately stop whisking and assess. If you are making something high in sugar like a meringue or marshmallow, you can still probably use the egg whites, as the sugar will emulsify and re-stabilize the structure. However, if you see any splitting, stop and start over.
Good thing this recipe has cream of tartar. huh? Not sure what that means? The next Q&A has you covered. 😉
Adding an acid, like cream of tartar (potassium bitartrate), to egg whites helps stabilize the egg proteins and makes them more resistant to breakdown, drying out, and graininess. Bye-bye weeping, both the foam and me!
While the final flavor of the fluff comes down to personal preference, I recommend making sure the roasted flavor is stronger than what you would want if you ate it by itself for 2 reasons:
1. Chilling, or in this case, freezing food mutes both taste and aroma. i.e. The flavor of the fluff when fully incorporated into the no-churn, s’mores ice cream will not be as strong once it’s frozen.
2. Once the roasted fluff is mixed in with all of the other flavors, it will be less discernible for your tastebuds.
I recommend using chocolate between 60% (semi-sweet) and 85% (bitter-sweet) cacao. Their fat content makes it harder for them to break than darker chocolates. 72% has just enough bitterness to breakthrough the ice cream and marshmallow without taking away from the overall s’mores flavor. And, using milk chocolate, as is traditional for s’mores, would be far too sweet in this context.
The butter and syrup aren’t fully necessary to this being a good ganache. Go without them if you’d like.
1. The butter is specifically for texture and flavor reasons. There is enough fat in the whipping cream to stabilize the chocolate. The added fat from the butter is meant to help the ganache more fully coat your tongue, which in turn makes you perceive a more full flavor and creaminess from the chocolate.
2. The syrup acts as an emulsifier and even further stabilizes the ganache. It makes the process of heating, mixing, and cooling much more forgiving by inhibiting sugar crystal development. You can use another invert sugar if you don’t have access to golden syrup or just use honey.
Just like with whipped eggs whites, the proteins in the heavy (double) cream will lose their gloss after passing stiff peaks stage. As they destabilize, they will stick to milk fat creating globules of butter and weeping buttermilk in the process.
You definitely don’t want it to get to the butter stage. Stop when you have just a little more than soft peaks. The base should be shiny and stand-up when you pull your whisk out of it. However, it will but be too liquid to do that if you scrape the sides and gently fold the ice cream base without a whisk.
I have 3 other recipes that use toasted milk powder, and that list will continue growing. If you’d like to check them out, here you go…
Transform Your Snickerdoodles with Toasted Milk Powder
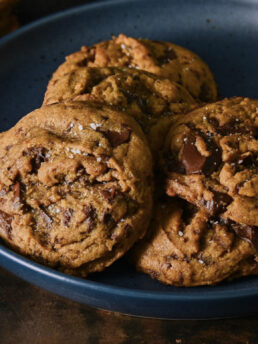
The Best Chocolate Chip Cookies Use Toasted Milk Powder
Avalanche Bars are better than Rice Krispie Treats! There, I said it!

There may be affiliate links in this post. A Little Spoon, LLC is a participant in affiliate advertising programs designed to help content creators earn fees by linking to affiliated sites.