All-Purpose Flatbread (with Yeast)

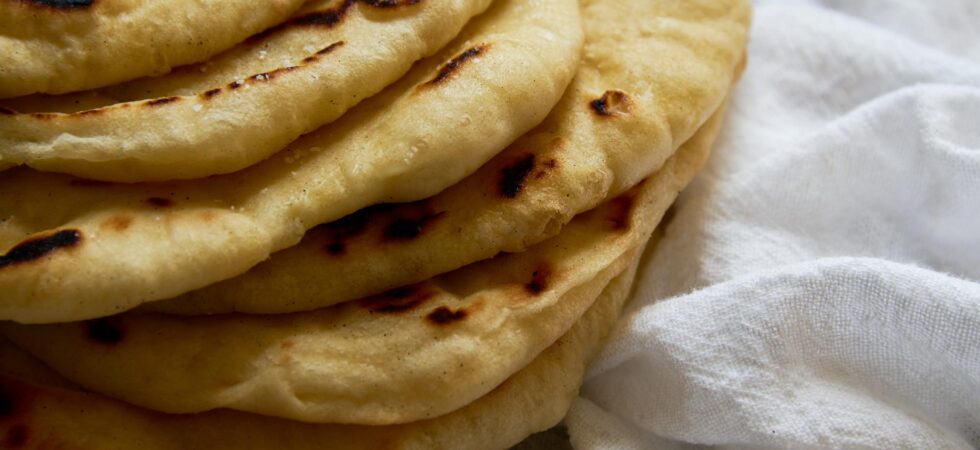
This all-purpose flatbread, with yeast, can be used in place of pita and naan and even act as the base of a flatbread pizza. When rolled out thin, it’s crispy in some places and soft in others while still pliable. When the dough is rolled a little thicker, a soft pillowy bread emerges. Thickness plus your cooking technique (oven or stove top) will define what your resulting bread will be.
- thin + oven = restaurant-style naan
- thick + oven = soft pita pockets
- thick + stove top = flatbread pizza bases
I will note, I have strayed a bit from a traditional naan or flatbread (with yeast) recipe with some of my ingredients (namely, egg, honey and labneh). And, of course, I don’t have a tandoor oven or pizza oven for naan. But I get great results with a pizza stone and high oven temperature, and so can you.
Get the Recipe: All-Purpose Flatbread with Yeast
Ingredients
All-Purpose Flatbread Dough
- 1 cup very warm water , (105-115°F or 40-46°C)
- 1 tablespoon honey
- 1 packet or 2½tsp active dry yeast
- 1 tablespoon olive oil
- 1 large egg
- 1½ teaspoon Diamond Crystal kosher salt
- ½ cup labneh or (10% milk fat) Greek Yogurt
- 4 cups all-purpose flour
Topping for Restuarant-Style Naan
- ¼ cup (4tbsp) butter or ghee
- 1 tablespoon Diamond Crystal Kosher Salt
Equipment
- 1 kitchen scale optional
- 1 large mixing bowl
- 1 stand mixer with whisk and dough hook attachment
- cling wrap/film
- 1 Rolling Pin
- 1 pizza steel/stone or heavy 12" fry pan
- 1 pizza peel or large heat proof spatula
- 1 pastry brush
Instructions
- In the bowl of a stand mixer, combine the warm water (105-115°F or 40-46°C) and honey until it dissolves. Then, add in the active dry yeast and let everything rest for 10-15 minutes. If your yeast is live, the mixture will bloom.
- While that sits, measure out the flour and set aside. Then, mix the oil, egg, salt, and labneh in another bowl.
- Once the yeast has bloomed, turn on the mixer (with the whisk or beater attachment on) and add in the egg mixture. When incorporated, add in flour a little at a time until it's about the viscosity of pancake batter or the machine starts to slow from mixing the dough.
- Switch out the beater attachment for a dough hook and continue mixing until the dough fully incorporates and cleanly pulls away from the sides of the bowl. The dough will also change from matte to slightly shiney (maybe 5-7 minutes). Don't overmix. The dough will not pass a windowpane test yet (see FAQs) and will still appear mottled when stretched. Cover the bowl and let the dough rest for 10-15 minutes.
- Next, hold onto the bowl with one hand and with the other hand take your fingers and quickly pull the bottom of the dough up and over towards the middle of the ball turning the bowl in a circle as you go for about 1 minute. (If needed, use wet or oiled fingers to help keep the dough from sticking to your fingers.) The faster you go the less the dough will stick.
- Rest and repeat (every 10-15 minutes) 2-3 more times. The dough will get stretchier, shinier and smoother but will probably still not pass the windowpane test (FAQs again) with flying colors (this is okay). You should be able to feel that the dough has relaxed and softened to the touch. Additionally, by the 3rd or 4th turn, you should be able to tap and manipulate the dough a few times without it sticking to your fingers. If not, either let it rest for one more turn or add in a small amount of flour to the dough to lessen the hydration a bit. (See notes)
- Dump out the dough on your counter and shape into a ball. Then, place in into a bowl that's been lightly coated in oil. Cover it with plastic wrap (cling film) or a damp towel. Set the bowl aside for 60-90 minutes for the dough to double in size.
- Once the dough has doubled, gently place it into the refrigerator for at least 6 hours and up to 12 hours for cold proofing. For naan or pita pockets (about an hour before you are ready to take the dough out of the refrigerator) place a pizza stone or steel onto your top oven rack and turn on your oven as high as it can go. This is typically between 500-550°F (260-288°C).
- Now, retrieve your cold-proofed dough and scrape it out of the bowl onto a well-floured countertop. Coat the dough just enough that you can place it onto a kitchen scale. Weigh the dough for a total weight and divide by the number of flatbreads you’d like. (12 equal pieces should be ≈ 75-80g per piece.) Shape the pieces of dough into small balls by pulling the bottom of the dough up and over towards the middle of the ball from all four corners. Then rotate it 45 degrees and fold from the bottom again. Turn the whole thing over making sure the folds stay tucked. Then, gently rotate and shape the dough finalizing your sphere.
- Set your dough balls on a silicone mat lined baking sheet under a cloth or more plastic wrap and rest between 15 and 45 minutes. If you are making naan, prep melted butter or ghee, salt, and other toppings (see notes) now.
For Restaurant-Style Naan
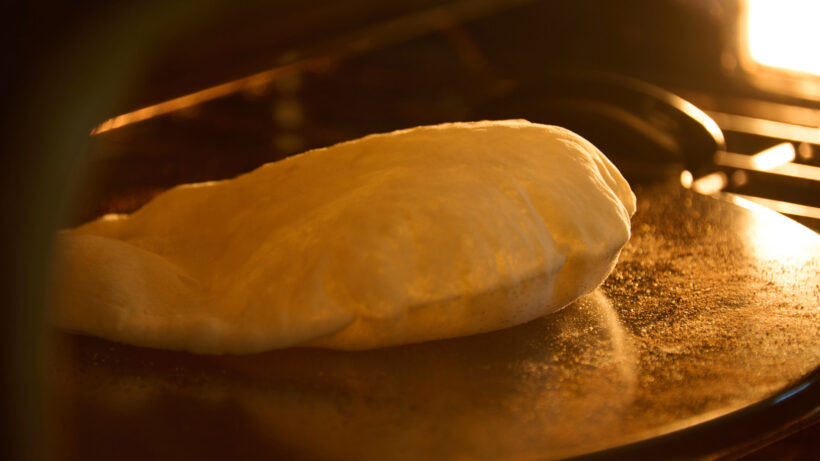
- One at a time, roll out the flatbread on a lightly floured surface until it's about a 10in x 7in (25cm x 18cm) oval. Place the rolled dough on pizza peel. Then, slide it onto the heated pizza stone in your oven. (see notes for tips) After about 45-60 seconds, you should see the flatbread begin to bubble and puff. Once it stops puffing, flip the naan and bake it for another 60-90 seconds. Then, take it out of the oven.
- Repeat until all the dough balls have been cooked and topped.
- Immediately after the flatbread comes out of the oven, use a pastry brush to spread melted butter or ghee on top of the flatbread and sprinkle salt and any other toppings onto the butter. If you wait until the butter sinks into the flatbread the toppings won’t stick.
For Pita Pockets
- One at a time, roll out the flatbread on a lightly floured surface until it's about a 7in x 5in (18cm x 12.5cm) oval. Then, slide the dough onto the heated pizza stone in your oven. After about 45-60 seconds, you should see the flatbread begin to bubble and puff up all of the way. Once it stops puffing, flip the flatbread. Bake for another 60 seconds and take it out of the oven. Stack them under a kitchen towel to stay warm and soften them. Repeat until all the dough balls have been cooked and topped. When cooled, cut off the tops of the pita pockets so you can stuff and enjoy them.
- Stack them under a kitchen towel to stay warm and soften them. Repeat until all the dough balls have been cooked and topped. When cooled, cut off the tops of the pita pockets so you can stuff and enjoy them.
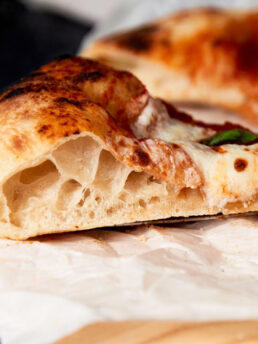
For Flatbread Pizzas
- One at a time, roll out the flatbread on a lightly floured surface until it's about a 7in x 5in (18cm x 12.5cm) oval. Next, bring a heavy, well-seasoned cast Iron or carbon steel pan up to medium high heat on your stove top. It will be ready when you flick water on the pan and it beads and skitters around. When ready, place your flatbread pizza base onto the pan. After about 45-60 seconds, you should see the flatbread begin to bubble and puff. In order to keep the flatbread thicker, flip the flatbread over before the bubbles begin connecting to puff the whole flatbread. Cook the topside until it starts to brown and then flip it back over, to make sure the bottom is well crisped.
Notes
- If you don’t want to use honey to bloom the yeast, use a 1:1 substitution of granulated sugar (1tbsp or 14g).
- If you want to, you can replace some or all of the water with milk at a 1:1 ratio. You will end up with an even softer, tangier result.
- Adding 1tsp (4.5g) of baking soda will create pillowy flatbreads with a texture closer to a pancake. This technique can also be used to make soft, fluffy flour tortillas.
- If you don’t want to do the hand folds, you can rest the dough and then re-attach it to your stand mixer instead. I recommend cutting the mixing time in half and not going faster than a 4 on your mixer.
- Having trouble with the flatbread dough sticking to your pizza peel or large spatula? Coat the dough with a little more flour after rolling it or try sprinkling cornmeal or semolina flour on your pizza peel.
- Give your oven 2-3 minutes between flatbreads to come back up to temperature for more even cooking.
- Typically, flatbreads wont puff all the way if you cook them on the stovetop. Don’t panic, they can still be used for a thicker style naan. I’d avoid trying for pita on a stovetop.
- A regular oven won’t create charred or browned spots on your flatbreads. If you want that, take the flatbread right from the oven to a hot pan until toasted to your taste. Or use a pizza oven for those extreme temperatures.
- Traditional toppings for naan, are garlic and cilantro. For garlic, you’ll want to add about 4 cloves (10-12g) of grated garlic to the melted butter. And for the cilantro, chop up about 1/4 cup (8.5g) and sprinkle it over the top.
- If you want your flatbreads to soften a bit after cooking, stack them under a kitchen towel to stay warm and steam up a bit.
Nutrition
Frequently Asked Questions
Most flatbreads are actually made with Greek yogurt. Therefore, it won’t be a problem if you cannot find labneh. Just make sure the yogurt has at least 10% milk fat.
Full-fat Greek yogurt has 10% milk fat, while labneh has between 10-15% milk fat. Their shared texture, relatively similar moisture content, and similar fat content results in very similar flatbreads. In my experience, flatbreads are just slightly tougher with Greek yogurt than they are with Labneh.
If you are looking for a good 10% milk fat Greek yogurt, Cabot brand makes a great one.
Labneh is plain yogurt that has been suspended in cheesecloth for up to 24 hours. Hanging yogurt strains out the whey and leaves behind labneh. It has a thick, spreadable consistency akin to soft cream cheese. Typically, labneh is used to spread on top of flatbreads.
Sure do!
1. Water heater temperatures are traditionally set to 120°F (49°C) to protect against burns. So, let your water heat to what feels hot to touch. Typically, that is very close to the 105-115°F (40-46°C) temperature range for blooming the yeast.
2. Additionally, warm the mixing bowl ahead of time by filling it with tap-hot water. Pour the water out just before adding the warmed water and honey. There shouldn’t be more than a 1-2 degree change in your mixture’s temperature, making the process much less finicky.
3. I prefer to bloom yeast separately, instead of in a poolish. This way I can make sure the yeast is still live (activated or fresh) before adding salt or flour. It’s much less of a loss to toss my failed bloom than an entire dough that isn’t proofing.
There may be 3 reasons your yeast doesn’t bloom:
1. Your yeast expired (literally). Check the expiration date on your active dry yeast packets or jar before using them. I, personally, like to label my jar with an “opened” date. I then replace it every 6 months, to make sure I don’t have any issues. If your yeast isn’t alive to begin with, it won’t start converting simple and complex carbohydrates (sugars) into carbon dioxide. No bubbles = no rise.
2. Your water was too cold. If your water temperature is lower than the specified range, it may not activate the yeast at all. Low temperatures might also cause very little or a much slower activation, which, subsequently, slows the fermentation process substantially.
3. Your water was too hot. If the water temperature is 120°F (49°C) or higher, it will kill the yeast. Then, there will be nothing to start the fermentation process. Without fermentation, your bread will have no leavening agent and will be flatter than a pancake. There’s baking soda and powder in pancakes! 😉
Cold proofing the dough inhibits fermentation and allows the dough to develop more flavor and structure as it rises. Cold proofing also makes it much easier to not over-proof your dough. The longer the cold-proof lasts, the more “bready” the flatbreads will taste. A full 12 hours isn’t necessary, but the dough is much better after a long stint in your refrigerator. Chilling the dough also makes it much easier to handle when rolling it out on your counter.
The trick to getting the flatbread off the peel and onto the pizza stone with its shape intact is twofold. First, make sure the rolled dough is not sticky at all. If you are really worried, sprinkle either cornmeal or semolina onto the peel before placing down the stretched dough. These coarse flours will not incorporate into the dough and allow the flatbread to roll freely on top of the peel.
Second, when you go to place the all-purpose flatbread in the oven, touch the end of the peel about 2/3rds of the way across the pizza steel. Then, give the peel a small jerk to slide the dough off at a roughly 15–20-degree angle. As the dough slides down pull out the peel leaving the flatbread behind.
Unfortunately, it’s difficult to use the peel to turn or flip the flatbread because there is very little clearance at the top of an oven. If you still want to turn the dough, you have to wait until the dough has set and begun to rise. This way you know it won’t collapse on itself as you move it. I would also recommend a metal peel for this over a wooden one because it will be thinner and easier to get under the dough. I typically use a peel to deposit the dough onto the stone and then a large metal grilling spatula to flip or move it.
If you bake or pan fry all of the all-purpose flatbreads, they can be chilled in the refrigerator for up to 5 days or frozen for up to 2 months.
To defrost, place them in the oven at 250°F (121°C), for 10-15 minutes. You can also, use your microwave on a baked goods setting. If you don’t have this or a pizza setting, lower the power to between 10-30% and cook at 15-second increments. To add extra moisture, place a small container of water in the microwave with the bread.
Yep! After you divide the dough into separate balls and shape them, place them on a silicone lined sheet pan and into a freezer. Once frozen, they will keep for up to 2 months.
A dough piece from this all-purpose flatbread recipe will take at least 4 hours to defrost in your refrigerator, so include that into your proofing calculations. If you’d like to speed things up a bit, you can place the defrosting dough pieces on your kitchen counter for 1-2.5 hours. They will defrost after roughly 1 hour and then proof for the rest. Once the dough has defrosted and puffed, you can roll it out and then bake or pan fry it according to the above instructions.

There may be affiliate links in this post. A Little Spoon, LLC is a participant in affiliate advertising programs designed to help content creators earn fees by linking to affiliated sites.