Toasted Milk Powder: Browned Butter Bourbon Ice Cream
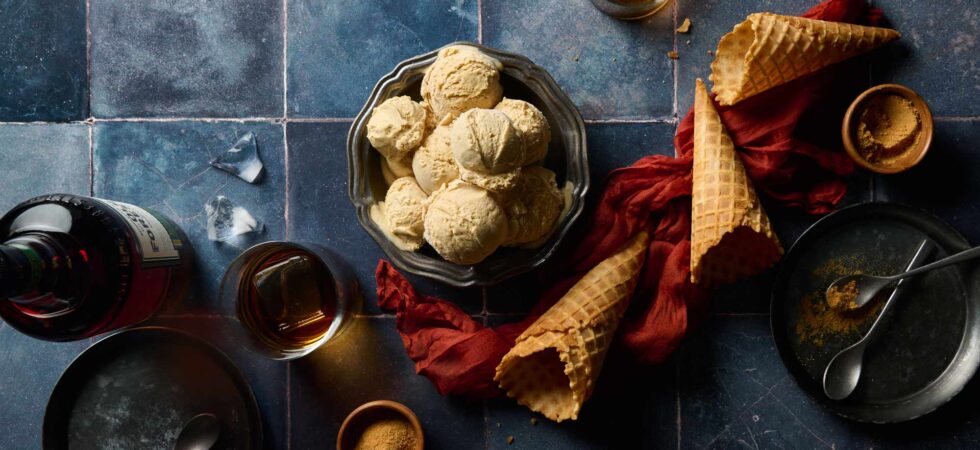
Friends, it’s time to introduce you to my version of Browned Butter Bourbon Ice Cream. The rise in popularity of brown(ed) butter (whichever descriptor you use) has inspired updates to all kinds of desserts to include this delicious flavor.
In my version, I use toasted milk powder to enhance the browned butter flavor beyond what you could achieve using actual butter. Let me explain: When you brown butter, the flavor comes from the toasted milk solids in the butter. However, even a full stick (1/4 cup or 113.5 g) of butter will only yield about 1/2 tablespoon (7 g) of toasted milk solids. By toasting powdered milk, I can remove butter from the equation and intensify the flavor as much as I want!
The toasted milk powder also adds extra protein and fat, resulting in a creamier ice cream. Win-Win! For an even richer ice cream — as if that wasn’t enough — I incorporated egg yolks for better stabilization (slower ice crystal development over time) and 100-proof bourbon for scoopability (lower freezing point). Yeah…you’re going to want to make this!
If you want to learn more about toasted milk powder, check out my guide to your new favorite pantry staple: The Ultimate Guide to Toasted Milk Powder.

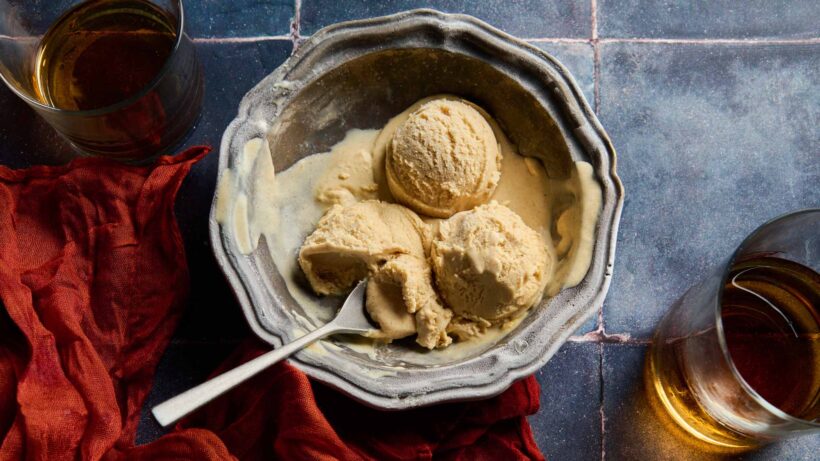
Get the Recipe: Browned Butter Bourbon Ice Cream
Ingredients
- 1 cup whole milk
- ¾ cup unrefined, granulated sugar
- ¼ cup toasted whole milk powder, (if you don't have this, see instructions)
- 1 teaspoon Diamond Crystal kosher salt
- ½ tablespoon Neilsen-Massey Madagascar bourbon vanilla bean paste
- 2 cups heavy whipping cream or double cream, divided in half
- 6 large egg yolks, (roughly 90-95g)
- 1½ tablespoons 100 proof (50% ABV) bourbon
Equipment
- 1 Small Sauce Pot
- 1 Whisk
- 1 spatula
- 1 medium bowl
- 1 Fine Mesh Strainer
- 1 ice cream maker
- 1 2-3 pt container
Instructions
Toasted Milk Powder:
- If you don't already have toasted milk powder in your pantry, don't worry. Just add 30-40 minutes to your timeline and make some using whole milk powder.
- To toast the whole milk powder, add the desired amount (or more, if you want to make a bulk batch) to a pan over low to medium-low heat for about 30 minutes. Like making a roux, keep moving the whole milk powder around the pan so it doesn’t burn. Break up any clumps that form as best as you can. The powder will change from an ivory color to a deep golden or light brown color.
- If too much milk powder sticks to the bottom of the pan and you have trouble scraping it up, turn the heat down or remove the pan from the burner to scrape it. Then, return it to the heat to continue. Once you achieve a warm light brown color, remove the pan from the burner and set it aside to cool.
Browned Butter Bourbon Ice Cream:
- For the ice cream, mix and heat half the cream (1c or 240ml 0r 245g), the milk, sugar, toasted milk powder, and salt in a saucepan until all of the sugar has dissolved. Whisk in the vanilla bean paste, turn off the heat, and let the mixture sit until its temperature comes down to 140°F (60°C).
- In a separate bowl, whisk the eggs yolks until they froth and lighten in color slightly. Then, slowly temper the cream mixture into the egg yolks by ladling a small stream of cream into the eggs while whisking constantly, until all of the cream mixture is combined.
- Scrape the fully combined mixture back into the saucepan and stir it constantly over medium-low heat with a heatproof spatula until mixture thickens and coats the spatula. Make sure to check the temperature while you heat the custard. Do not go over 180°F (82°C) while thickening. I tend to keep mine between 170-175°F (76-79°C) to be on the safe side.
- If you are really worried about overcooking your custard, you can always use a double boiler as a safety net. (See FAQs) You'll know the custard is done when you can run your finger across the coated spatula and the custard doesn't run back together.
- Add the remaining cup of cream to a large bowl and set a fine mesh strainer on top. Then, pour the thickened custard into the strainer and use a spoon to stir and scrape it through the mesh and into the bowl below.
- Next, add the bourbon to the custard mixture and stir everything together. Cover the container and chill the mixture completely in the refrigerator. It should take roughly 4-8 hours. (see notes for a chilling shortcut)
- When the ice cream base is ready to churn, pour the mixture into an ice cream maker and freeze according to the manufacturer's instructions. Once the browned butter bourbon ice cream is partially frozen into a soft serve consistency, scrape it out of the mixer and into a freezer safe container. Freeze for at least another 4 hours or overnight for best results. Scoop and enjoy!
Video
Notes
- DON’T FORGET to freeze your ice cream machine’s bowl if you have a bowl style ice cream maker.
- If you cannot find vanilla bean paste, you can substitute with a single vanilla bean pod or pure vanilla extract. It’s a 1:1 ratio for extract. (See FAQs for more)
- There is no real timeline for how quickly your custard will thicken. If it seems like it’s staying runny, DO NOT turn up the heat, just have patience and keep stirring. (more in the FAQs for doneness cues)
- A lot of ice cream recipes use ice baths after tempering. You don’t need it for this recipe, because the custard is poured into the second cup of cold cream, which stops any carry over cooking.
- But an ice bath will save on refrigeration time before churning. If you really want to, you can completely negate the need to chill before spinning the custard, as long as you get the ice cream base down to 43°F (6°C) before churning it. The trade-off is your flavors will be less complex without time to infuse.
- The ice cream texture is its creamiest/freshest within 2 weeks of making it. However, it can last as long as 1 month in the freezer before developing freezer burn and/or a stale mouthfeel.
- This recipe fills up a 9x5x2.5 (22.86×12.7×6.35cm) loaf pan about ¾ of the way. So, if you want to use a different vessel or insulated ice cream container, just make sure it can hold up to 8c or 1.9L of ice cream
Nutrition
Frequently Asked Questions
Alright you caught me. I know you noticed me using the word custard in the recipe. Technically this is a French ice cream. So, what’s the difference? Let me explain:
– American ice cream is made with milk, cream, sugar, and flavorings. It has a very high milkfat content to get around its lack of egg yolks as stabilizers, think 14-25% milkfat. American ice creams’ volume changes drastically during the churning process, sometimes exceeding a 50% increase in volume. That’s a LOT of air!
– Italian ice cream or gelato, like American ice cream, does not use eggs. It also uses more milk and less cream than all other ice creams. Gelato usually has a milkfat content of around 4-9%. Gelato gets its density and creaminess from how slowly it’s churned and from the warmer temperature it’s served at.
– French ice cream or Crème glacée also uses egg yolks, but there can be less yolks by weight than in frozen custard. French ice cream’s custard base is always cooked before churning. Any ice cream that uses less than 1.4% egg yolks and more than 10% milkfat must be labeled French ice cream in the U.S. The change in volume (overrun) typically won’t be more than 40% after churning.
– Frozen custard includes at least 1.4% egg yolks by weight and more than 10% milkfat. The volume should not increase by more than 30% when churning. Originally, frozen custard was made in small batches, to preserve freshness, and wasn’t heated before churning. But commercially it has to be pasteurized to kill any bacteria before churning.
Technically, no. However, you can use bourbon extract to flavor the ice cream and significantly reduce the alcohol by volume. I’ve never made this ice cream with bourbon extract, but based on what I found online, you can check out OliveNation for their Bourbon Whiskey Extract. Their website description says you only need a few drops for cakes and whipped creams.
The beauty of this browned butter bourbon ice cream recipe is that you add alcohol and/or pure extracts after cooking the custard. Add the bourbon extract one drop at a time to the finished custard, then mix and taste it. The eggs are fully cooked, so you won’t risk food poisoning. Make sure the bourbon flavor is slightly too strong before mixing. As the custard chills, the ice cream’s aroma molecules become trapped, reducing the ice cream’s sweetness and overall flavor.
If you’re nervous, err on the side of caution and use a light hand, then adjust the next time you make it, if necessary.
Yes. I did test this recipe several times with lower proof bourbons, but the final flavor of the ice creams was too sweet. And, unless I used more alcohol, the bourbon flavor wasn’t strong enough. Adding more alcohol, made the ice cream meltier and overall, it was not a great experience. Stick to the strong stuff!
NOPE. Let’s talk vanilla…
Extract: You can absolutely use Neilsen-Massey’s pure Madagascar Bourbon vanilla extract for the same flavor, if you don’t have access to vanilla bean paste. It’s a 1:1 ratio for substitution. Add the vanilla extract to the ice cream base after straining the cooked custard into the rest of the chilled cream.
Pods: You can also substitute the paste with a single Madagascar Bourbon vanilla bean pod. Slice down the center of the pod and scrape out the insides with the back of your knife. Add both the seeds and pod at the same point you’d add the paste. Using a vanilla bean pod adds about 30 extra minutes to the recipe. In order to infuse the custard enough, it must steep for a bit. Don’t forget to reheat the cream back up to 140°F (60°C) before tempering the eggs.
This vanilla specifically comes from the Bourbon Islands off the eastern coast of Africa. It does not actually refer to bourbon the liquor. However, in my opinion, it’s complexity and richness of flavor outshines all other varietals of vanilla.
Okay, so here’s my ringing endorsement of Neilsen-Massey products. (No, I am not sponsored. I WISH!) Their quality and variety are, quite frankly, amazing. I don’t use any other vanilla extract products in my home. This means I can only tell you about what they have for purchase. Real quick, here is a description of each extract and how I would use it: (An * means it also comes in paste form.)
Madagascar Bourbon vanilla*: This extract is rich, warm, and complex in flavor. I use it in anything where I want the vanilla to stand out on its own against deeply flavored ingredients.
Mexican vanilla*: This vanilla has a lighter flavor and spiced edge that works well in tangy, spicy, and tropical applications.
Tahitian vanilla: This extract has the lightest flavor of them all. Use it where strong-tasting ingredients won’t overwhelm it; think Chantilly cream, meringue, pavlova, etc.
Ugandan vanilla: This extract is fruity and bold with notes of chocolate, making it perfect for creamy chocolate and caramel applications.
Indonesian vanilla: This is another bold and fruity extract, but it has notes of caramel and smoke. I recommend this vanilla for baking spiced and masala chai-flavored recipes.
Pure vanilla*: Blended vanilla, aka pure vanilla extract, is crafted to be the best of all worlds. It comes from a blend of vanilla beans sourced from multiple countries for a balanced yet strong flavor you can use in any recipe.
If you use pure vanilla extract or a single-sourced vanilla extract, the ice cream will taste different. If you want to substitute for a different vanilla, I suggest sticking to Indonesian or pure vanilla bean extract (a blend) for this recipe.
Tempering is a technique used in cooking to ensure even heating and prevent heat shock. It involves gradually heating or cooling ingredients that are sensitive to heat. Think eggs, sour cream, chocolate, and spices.
If you are worried about cooking your eggs during tempering, you can do 2 things:
1. Make absolutely sure the cream mixture is 140°F (60°C) or less before tempering.
2. Ladle the cream into the eggs a bit at a time so you can better control how much liquid is added.
The protein Ovotransferrin, found in egg whites, cooks in temperatures as low as 140°F (60°C). If you pour too much heated liquid at once or too hot of a liquid in any amount, the proteins will cook, causing them to coagulate and shorten (aka scrambled eggs).
As long as you add the hot liquid in small amounts and stir constantly it will spread out the intense temperatures and gentle heat the eggs.
So, I know the go-to descriptions are coating the back of a spoon or spatula and fluidity after running your finger over the coated utensils. But there’s quite a bit of nuance even in those phrases.
Here’s a larger description from uncooked to over-cooked custard to help you out.
Stage 1: During the first 5-7 minutes at medium-low/low heat, the ice cream base remains very liquid. If you dip a spoon into the mixture and look at the back of it, you will see the liquid bead up and run off the spoon.
Stage 2: Over the next 15-20 minutes, the custard will thicken and start looking like fruit nectar or buttermilk. You will feel a slight resistance as you stir, but the mixture moves easily, with the liquid trailing slightly behind the spoon instead of splashing freely. Look for a gentle swirling motion, with visible ripples forming on the surface. The cream will coat the back of a spoon at this point. However, if you run your finger along its surface, the cream will still be too runny. The coating will be thin and very see-through.
Stage 3: You shouldn’t have more than 5-10 minutes left at this point. Use the spoon test every 2-3 minutes until the cream doesn’t run back and it looks hazy on the spoon. You should be able to turn the spoon gently side to side and not have the cream shift into the separation you made. (YOU’RE DONE!)
Stage 4: If you continue to stir and let the custard thicken into the consistency of caramel syrup, honey, or condensed milk, you have cooked your custard too long. This does not mean it is over cooked or scrambled. It simply means that you’ve evaporated too much water out of the mixture. This results in a lower than recommended the freezing and melting temperature.
Essentially it means two things. 1.) That your ice cream needs to be at a lower temperature to freeze. And 2.) Your ice cream will melt at a lower (cooler) temperature.
This tends to make ice cream feel creamier. However, it actually means the ice cream melts faster and takes longer to re-freeze. And a lengthy re-freeze promotes larger ice crystal formation. Larger ice crystals mean icy textured ice cream. Typically, it can take weeks for this texture develop as you remove your ice cream from the freezer over and over again. But, the lower these temperatures the quicker the texture change.
This recipe already lowers the ice cream’s freezing and melting points with the addition of alcohol and the toasted milk powder. Thickening the custard to a caramel consistency would be great for a plain vanilla ice cream, but not great for this particular flavor.
What do you know, another two-part response!
1. Constantly stir: Do not walk away from the cooking custard. You need to continuously stir and scrape the bottom of the pot during cooking. It only takes a few moments for the custard to sit too long in one place and clump up. The fat, sugar, and water surrounding the egg proteins help lower the chance of scrambling, but it remains a concern. A few clumps might form here and there. You can strain them out but try to keep the custard as smooth as possible. I highly recommend using a spatula instead of a whisk, because a whisk doesn’t reach all the corners of a pan or fully scrape the bottom.
2. Use a double boiler: Add about 1in (2.5cm) depth of water to a saucepan and place a heat safe bowl over the top of the pan. Turn the burner to medium/med-low so the water begins to simmer (NOT a rolling boil) and heat the bowl. Add all the tempered custard to the bowl and stir until the mixture has thickened and passed the spoon test. This step takes longer with a double boiler, but you have far less of a chance to scramble it. With a double boiler, the custard isn’t directly touching the pot, which is touching the heat source, so there is less intense heat transfer.
Yes, with one caveat.
You can completely negate the need to chill before spinning the custard, as long as you get the ice cream base down to 43°F (6°C) before churning it. To do this, nest the cooked browned butter bourbon ice cream custard bowl into a larger bowl filled with ice. Stir until the aforementioned temperature is reached. You may need to add more ice or completely change out the larger bowl with fresh ice. Then, finish the recipe as written.
The trade-off to omitting the long chill time, is your flavors will be less developed without that time to infuse, mellow, and become uniform.
Of Note: For anyone thinking about using rock salt, I don’t recommend it unless you have a machine that requires it. Yes, adding ice cream (rock) salt to the ice bowl will help cool the custard even faster. However, I promise you’ll get salt on your hands and possibly into the custard. That being said, it could be a fun science experiment if you want to split the custard equally and have your kids race or something.
Two factors influence the final color of this browned butter bourbon ice cream: egg yolk color and toasted milk powder color.
Egg Yolk Color: Egg yolk color is directly related to the diet of the chickens they come from. In the U.S., chickens often consume a commercial diet primarily consisting of corn, soybeans, and other grains. This diet contains much lower levels of carotenoids compared to the more natural diets of pasture-raised, free-range, and European chickens. Fewer carotenoids result in less vibrant yolk color.
Toasted Milk Powder Color: Milk powder starts off as white or just off-white. The longer you toast it, the deeper its color becomes, which results in a more saturated final ice cream color. I like to toast my milk powder until it reaches a warm, light brown color.
Of Note: Your ice cream will lighten in color as it churns. During the churning process, two things happen that change the way light scatters through its structure, making it visually lighter in color. First, the churning whips air into the ice cream mixture, creating tiny air bubbles. These air bubbles increase the volume of the ice cream (known as the overrun) and allow light to pass through the mixture more than before churning. Additionally, as the mixture freezes, ice crystals form and refract light through themselves and the newly incorporated air bubbles, further lightening the ice cream’s color.
Don’t have an ice cream maker? That’s okay!
Put you fully chilled custard in the freezer and after about an hour remove it and scrape down the ice cream that has begun to freeze around the edges. Return it to the freezer and check in every 30 minutes using a hand-held mixer to really break up any frozen sections. It should be ready to eat in about 2-3 hours. It won’t be as creamy as a machine, but it’ll still be delicious.
First, I’ve linked some recipes below in the “other recipes to try” section. There are others on my site as well, but that’s a good place to start.
Second, I’ve written resource articles on Toasted Milk Powder and its base ingredient Powdered Milk, to give you even more context. They will help you learn how the powders are made, how they can be used, and even vegan options.

There may be affiliate links in this post. A Little Spoon, LLC is a participant in affiliate advertising programs designed to help content creators earn fees by linking to affiliated sites.
Currently my favorite recipe. The base of the recipe has allowed me to create several different ones like dark chocolate ice cream, chocolate coffee , French vanilla with Oreos ice cream and much more. Thank you!
Chocolate coffee sounds incredible! So happy you like the recipe and have been able to make it yours in so many delicious ways! ☺️